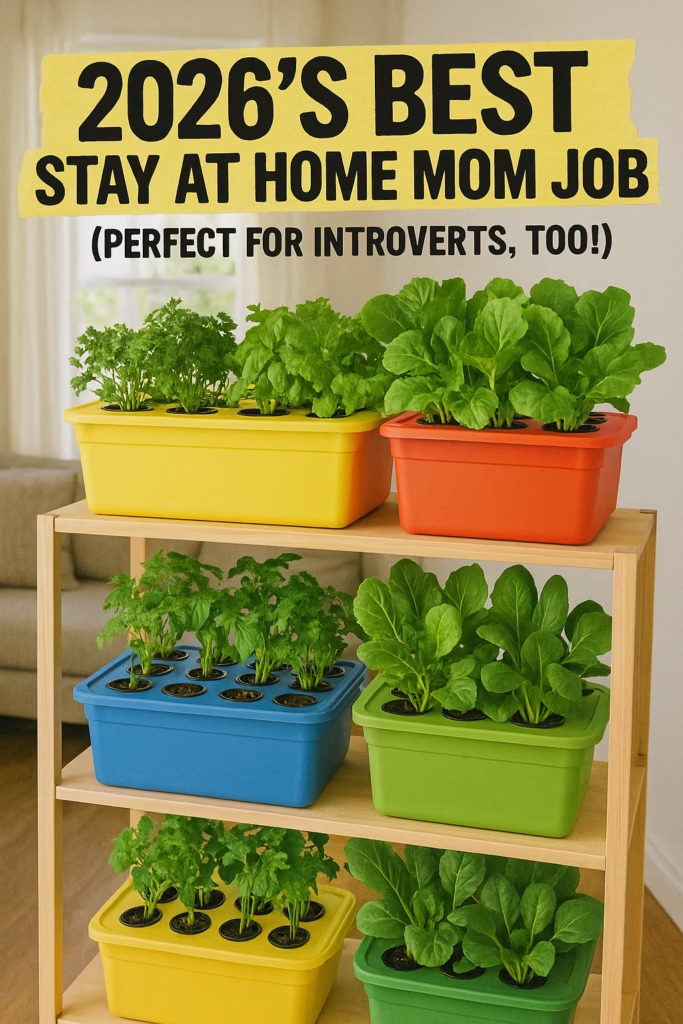
DIY Hydroponic Systems at Home: The Simple Beginner’s Guide
A DIY hydroponic system is a homemade setup that grows plants in water with nutrients instead of soil.
Unlike commercial kits, DIY systems use simple containers, basic materials, and straightforward designs. The goal is function, not aesthetics. Most DIY hydroponic systems rely on gravity, passive water movement, or minimal equipment rather than complex plumbing.
In practice, this usually means:
A container to hold water and nutrients
A way to support plants above the water
Light (sunlight or grow lights)
A nutrient solution designed for hydroponics
For beginners, the simplest systems are often the most reliable. You’re not trying to automate everything. You’re creating a stable environment where plants can grow consistently indoors.
How hydroponic systems work at home
Hydroponic systems work by delivering water, nutrients, oxygen, and light directly to plant roots.
In soil, roots search for nutrients. In hydroponics, nutrients are already dissolved in the water. This reduces guesswork and makes growth more predictable indoors.
At home, most hydroponic grow systems follow the same basic process:
Plants sit in net cups or holders
Roots extend into a nutrient solution
Oxygen reaches roots through air exposure or water movement
Light drives photosynthesis
For indoor hydroponic gardens, stability matters more than speed. You don’t need rapid circulation or high-pressure pumps. Many small home systems work well with still water and occasional maintenance.
Practical note: If a system requires constant monitoring to survive, it’s usually not beginner-friendly.
DIY hydroponic systems vs store-bought kits
DIY systems prioritize flexibility and simplicity, while store-bought kits prioritize convenience and design.
Here’s a clear comparison:
Feature
DIY Hydroponic System
Store-Bought Countertop Kit
Cost
Low to moderate
High upfront
Customization
Very high
Limited
Repairability
Easy
Often proprietary
Plant types
Flexible
Often restricted
Learning curve
Moderate
Low initially
Store-bought kits can be useful for seed starting or herbs, but they often lock you into specific pods or replacement parts. DIY systems give you more control and scale more easily.
If you want a simple system designed specifically for food production rather than décor, a DIY approach is usually more sustainable long-term.
Types of DIY hydroponic systems
DIY hydroponic systems range from very simple passive setups to complex recirculating designs.
1. Passive water-based systems (simplest)
These systems use no pumps. Plants sit above a nutrient reservoir, and roots grow down into the water.
Best for:
Leafy greens
Beginners
Small spaces
This is often the easiest entry point into hydroponics for beginners.
2. Kratky-style systems (low-tech)
A variation of passive systems where water levels drop gradually as plants grow.
Pros:
No electricity required
Very low maintenance
Cons:
Less forgiving if water levels aren’t monitored
3. Wick systems
Nutrients travel upward through a wick material.
These work but tend to be slower and less consistent for food crops.
4. Recirculating systems (advanced)
Includes NFT or pumped systems.
Simple DIY
Complex Recirculating
Few failure points
Multiple failure points
Quiet
Often noisy
Beginner-friendly
Experience required
For most home growers, simple systems outperform complex ones in reliability.
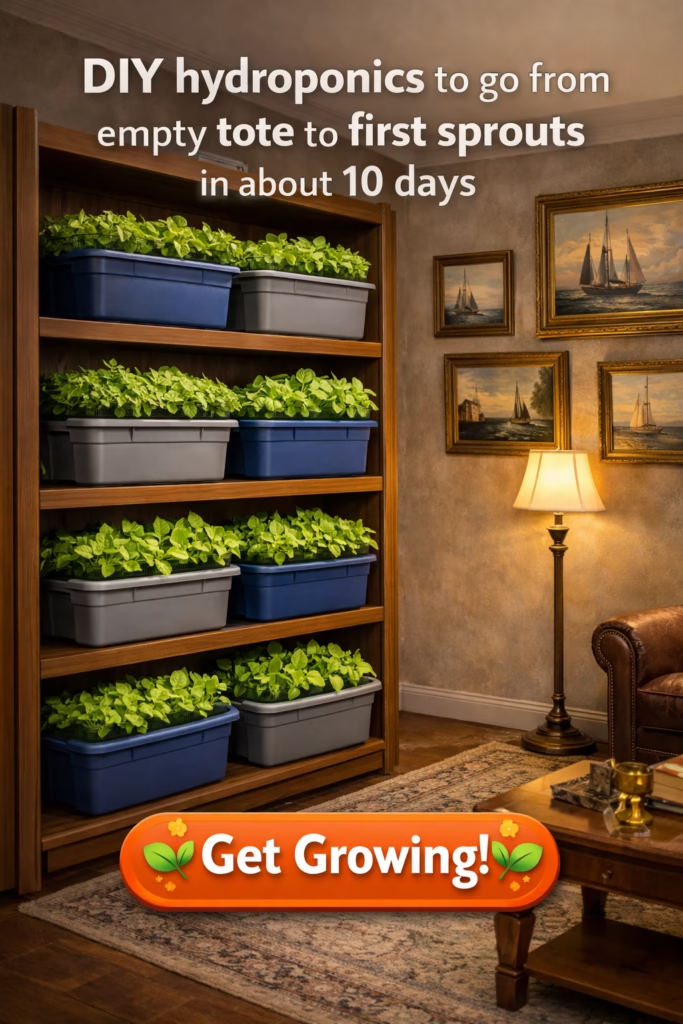
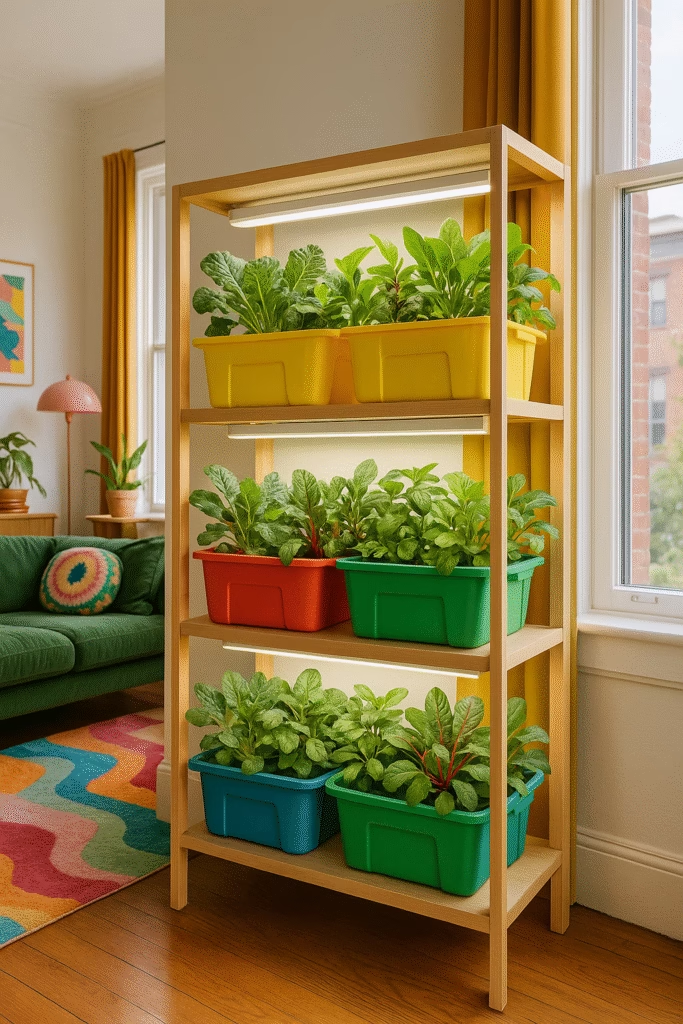
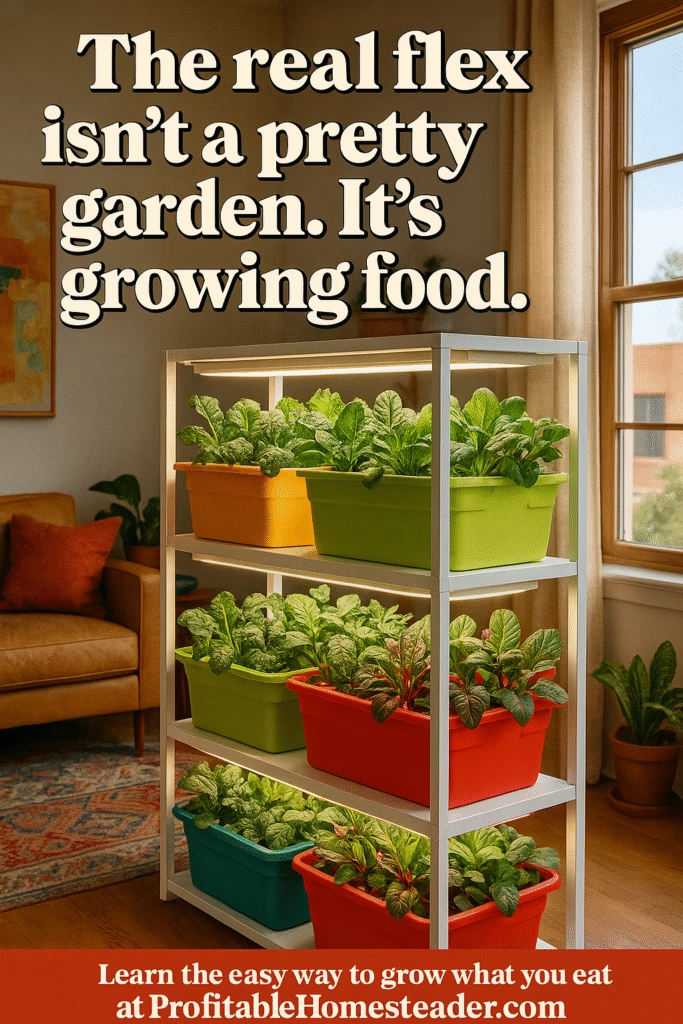
Best DIY hydroponic system for small spaces
The best DIY hydroponic system for small spaces is a low-profile, horizontal system under 5 square feet.
Small space hydroponics works best when:
Plants grow outward, not upward
Systems are easy to access
Maintenance is minimal
Vertical towers look efficient but often create uneven lighting and maintenance issues. Horizontal systems are easier to manage indoors and fit well under shelves or along walls.
If you want the simplest small-space system, see this beginner-friendly indoor mini farm system. [Internal link: /greens/]
Hydroponics for beginners: common mistakes
Most beginner problems come from overcomplicating the system.
Common mistakes include:
Adding pumps too early
Using too many nutrients
Growing fruiting plants first
Ignoring light quality
Hydroponic indoor gardens reward consistency. Leafy greens grow well even when conditions aren’t perfect. Tomatoes and peppers demand precision.
Practical rule: Start with plants that forgive mistakes.
Hydroponic seed starting
Hydroponic seed starting is easiest when seeds are started outside the main system.
A simple method:
Start seeds in a hydroponic-friendly medium
Keep moisture consistent
Transplant once roots emerge
A hydroponic seed starter doesn’t need nutrients initially. Seeds contain enough energy to sprout on their own.
Once roots form, seedlings can move into your hydroponic grow system without shock.
Cost of DIY hydroponics at home
DIY hydroponics can cost anywhere from $40 to $200 depending on scale.
Typical costs:
Containers and plant holders
Nutrients
Lights (if no natural light)
Unlike store-bought kits, DIY systems don’t force recurring purchases. Most ongoing costs are limited to nutrients and electricity for lights.
Is DIY hydroponics worth it?
DIY hydroponics is worth it if you value reliability, food quality, and control.
It’s especially useful for:
Apartment dwellers
People without outdoor space
Anyone wanting year-round greens
For people interested in selling what they grow, see this guide on growing greens for income. [Internal link: /grow/]
FAQs about DIY hydroponic systems
Is hydroponics hard for beginners?
No. Simple DIY hydroponic systems are often easier than soil gardening indoors because they remove guesswork around watering.
Can you do hydroponics without pumps?
Yes. Many beginner systems are passive and use no pumps at all.
How much space do you need?
Most small space hydroponics setups fit under 5 square feet.
What grows best in an indoor hydroponic garden?
Leafy greens, herbs, and fast-growing crops perform best indoors.
Do plants grown hydroponically taste different?
They often taste fresher because nutrients and water are consistent.
Is hydroponics expensive to maintain?
Ongoing costs are low once the system is built.
Do you need special seeds?
No. Standard seeds work fine for hydroponics.
How to Start a Backyard Homestead (Even on a Small Lot)
The word “homestead” used to mean 160 acres and a covered wagon. Today it means something different — and more accessible — for most people who are drawn to it. It means intentional self-reliance. Growing some of your own food. Reducing dependence on a supply chain that seems less reliable every year. Living a little closer to where things actually come from.
You can do all of that on a quarter-acre lot. On a tenth of an acre. Even on a patio with containers and a shelf indoors. The scale is up to you. What matters is the system — starting with the pieces that give you the most return for your effort and building from there.
This is the guide I wish I’d had at the beginning: what to set up first, what to grow, how to structure your time and space, and how to think about backyard homesteading as a progression rather than an all-or-nothing commitment.
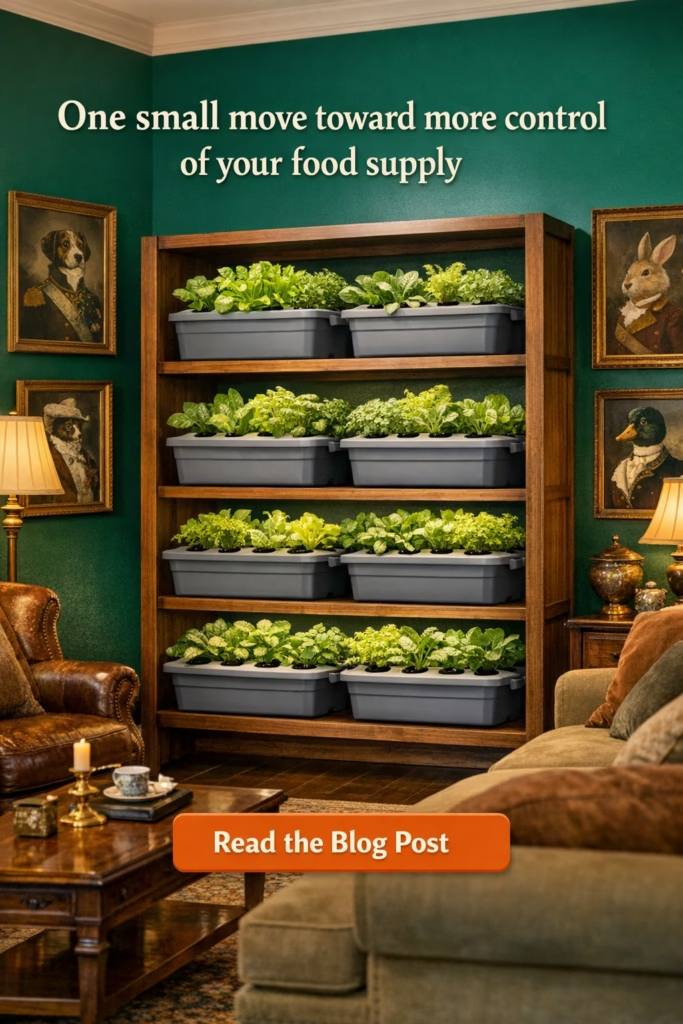
Backyard homesteading is the practice of using your available space — whatever that is — to produce food, reduce waste, and increase self-reliance. It’s not about being completely off-grid or feeding yourself entirely from your property. It’s about shifting the needle from full dependence on the grocery store toward something more balanced and intentional.
What that looks like in practice varies enormously. For some people it’s a productive vegetable garden and an herb shelf indoors. For others it’s chickens, fruit trees, a large vegetable garden, a root cellar, and a chest freezer full of preserved summer produce. Both are homesteading. Neither is wrong.
The key principle: start with what gives you the most return for the least complexity, build skills and systems gradually, and expand only when what you have is running well.
Start With Food: The Highest-Return First Step
New homesteaders often want to do everything at once — chickens, bees, fruit trees, a large garden, composting, rainwater collection. The result is usually overwhelm, half-finished projects, and abandonment within a year.
The better approach: start with food growing, specifically the crops that give you the fastest feedback and highest grocery savings for the effort involved. That means leafy greens, herbs, and summer vegetables — not grain crops, not large livestock, not complex preservation projects.
Here’s why this order matters: growing food teaches you the fundamentals of working with plants, seasons, and your specific microclimate. That knowledge transfers to everything else you add later. Chickens are easier to manage when you already have composting infrastructure. Fruit trees integrate naturally into a space you’ve already mapped and understood. Start with the garden — everything else builds on it.
Assess Your Space Honestly
Before you build or plant anything, spend a few weeks observing your space. Where does full sun hit, and for how long? Where does water pool after rain? Which areas are shaded by the house or neighboring trees at different times of day?
This observation period is one of the most valuable investments you can make. Gardens planted in the wrong spot fail regardless of how much work you put into them. Knowing your space well before committing to a layout saves enormous time and frustration.
What to Look For
Full sun zones (6–8+ hours of direct sun) — your primary vegetable growing areas
Partial sun zones (4–6 hours) — good for cool-season greens, herbs, some fruits
Shade zones — compost bins, storage, maybe chickens or rabbits eventually
Water access — where are your outdoor taps? Long hose runs are friction you’ll resent by August.
Wind exposure — exposed areas need windbreaks for tall crops; sheltered spots are warmer and extend your season
Existing trees and perennials — these define your space permanently; work with them rather than planning around their removal
First Projects: What to Set Up in Year One
A productive first year on a backyard homestead focuses on three things: soil, growing infrastructure, and a reliable harvest. Here’s what I’d prioritize in order.
1. Compost System
Set this up first, even before you plant anything. Compost is the foundation of productive soil, and it takes time — the pile you start now feeds the garden you’ll expand next year. A simple two-bin system (one actively building, one finishing) handles a household’s kitchen and yard waste and produces rich compost with minimal effort.
If you don’t have space for an outdoor compost system, a small vermicomposting bin (worm composting) works indoors or in a garage — no smell, very little space, and exceptional compost output from kitchen scraps.
2. Raised Beds or In-Ground Beds
Two 4×8 ft raised beds is an excellent starting point — enough to grow a meaningful quantity of food without being overwhelming to manage. Raised beds warm up earlier in spring, drain better than most native soil, and can be intensively planted without wasted walkway space.
Fill with a mix of quality topsoil, compost, and perlite or coarse sand for drainage. Build with untreated cedar (naturally rot-resistant), pine (cheap, shorter-lived), or composite lumber. First-year cost for two beds, filled: $100–$250 depending on materials.
3. Perennial Plantings
Plant perennials in year one so they’re productive by year two and three. Asparagus takes two years to produce but then gives you 20+ years of spring harvests with zero replanting. Strawberries establish their first year and fruit prolifically the second. Perennial herbs — thyme, oregano, sage, chives — spread and fill space with zero maintenance once established.
Dedicate a permanent bed or border to perennials so you’re not disturbing them with annual crop rotation.
4. Vertical Structure
Add a trellis structure along the back of your raised beds or against a fence. Cucumbers, pole beans, and tomatoes grown vertically produce more food in less space than any other garden configuration. A simple T-post and netting trellis costs $20–$40 and doubles the productive capacity of the bed behind it. Full details in the vertical gardening guide.
5. Seed Starting Setup
Starting your own transplants from seed saves significant money over buying starts each spring, and gives you access to far more variety. A basic seed starting setup — a wire shelf, a grow light, seed trays, and a heat mat — runs $60–$100 and pays for itself in the first season. Start tomatoes, peppers, eggplant, and cucumbers indoors 6–8 weeks before your last frost date.
Don’t Overlook Indoor Growing
Most backyard homestead guides focus entirely on outdoor growing — which leaves a critical gap. Outdoor gardens produce roughly half the year in most North American climates. For year-round food production, you need an indoor system running in parallel.
A simple indoor hydroponic setup — a shelf, LED grow lights, and a passive Kratky system — produces fresh lettuce, herbs, kale, and spinach through every month of the year, regardless of what’s happening outside. It runs on about 30 minutes of attention per week and costs $4–$10 per month to operate.
For most families, the indoor growing piece delivers more consistent, year-round value than any single outdoor addition in the first year. It’s the part of a backyard homestead setup that closes the winter gap — and it’s where the DIY hydroponics system fits perfectly alongside an outdoor garden.
Some homesteaders find they grow more food indoors from two shelving units than they do from their outdoor beds — simply because the indoor system runs 12 months a year while the outdoor garden runs 4–6. Factor that into your planning from the start.
Year Two and Beyond: Expanding Intelligently
Once your first year’s food growing system is established and running well, you have the foundation to add more complexity. Here’s how I think about the expansion sequence:
Year Two: Preservation and Fruit
Add fruit trees, berry bushes, or grape vines — perennial plants that take a year or two to establish but then produce for decades. Plant them in year two so they’re productive by year three or four. Invest in a chest freezer and basic canning equipment to start preserving the summer surplus. A well-stocked freezer of home-grown tomatoes, beans, and herbs significantly extends the value of your garden into winter months.
Year Three: Small Livestock (If Desired)
Backyard chickens are the most common livestock addition for small homesteads. Four to six hens provide a family with most of their egg needs, eat garden pests and kitchen scraps, and produce manure for compost. Check local zoning before committing — many suburban areas allow hens but not roosters, and some require minimum lot sizes.
Other small-scale livestock options: rabbits (very space-efficient, excellent meat and manure), ducks (eggs, pest control, more forgiving than chickens on garden plants), and quail (tiny footprint, rapid egg production, quiet enough for dense neighborhoods).
Ongoing: Soil Building
The most productive backyard homesteads have exceptional soil — and building it is a multi-year process. Every year, add compost to your beds. Grow cover crops in the off-season. Mulch heavily to suppress weeds and retain moisture. The soil you have in year five will be dramatically better than what you started with, and your yields will reflect it.
Common Backyard Homestead Mistakes
Doing too much at once. The most common reason people quit homesteading isn’t failure — it’s overwhelm. Three half-finished projects produce less food and less satisfaction than one finished one. Pick one or two things, do them well, then add more.
Starting with difficult crops or livestock. Bees, goats, and corn are not beginner projects. Lettuce, herbs, tomatoes, and chickens are. Match your first projects to your current skill level, not your aspirational one.
Ignoring the indoor growing window. A homestead that only grows outdoors is a seasonal homestead. Add an indoor growing system and you turn it into a year-round food source — which is where the real value and satisfaction comes from.
Underestimating water needs. Vegetable gardens need consistent moisture — typically 1–2 inches per week. Install drip irrigation or a soaker hose system early. Hand watering a large garden through a hot summer is exhausting and leads to inconsistent results.
Not tracking what you grow and eat. Keep a simple garden journal — what you planted, what produced well, what the family actually ate. This data is invaluable for refining your planting plan each year toward the crops that actually move the needle on your grocery bill.
Being Realistic About Time
Backyard homesteading adds to your life, not replaces it. A well-designed system shouldn’t require hours of daily attention — it should integrate into your existing routine.
System
Time Per Week (Established)
Raised bed garden (2–4 beds)
2–4 hours (more in peak planting/harvest season)
Indoor hydroponic system (1–2 shelves)
30 minutes
Compost system
10–15 minutes
4–6 backyard chickens
20–30 minutes daily (mostly feeding and egg collection)
Fruit trees (established)
30–60 minutes per month, more at harvest
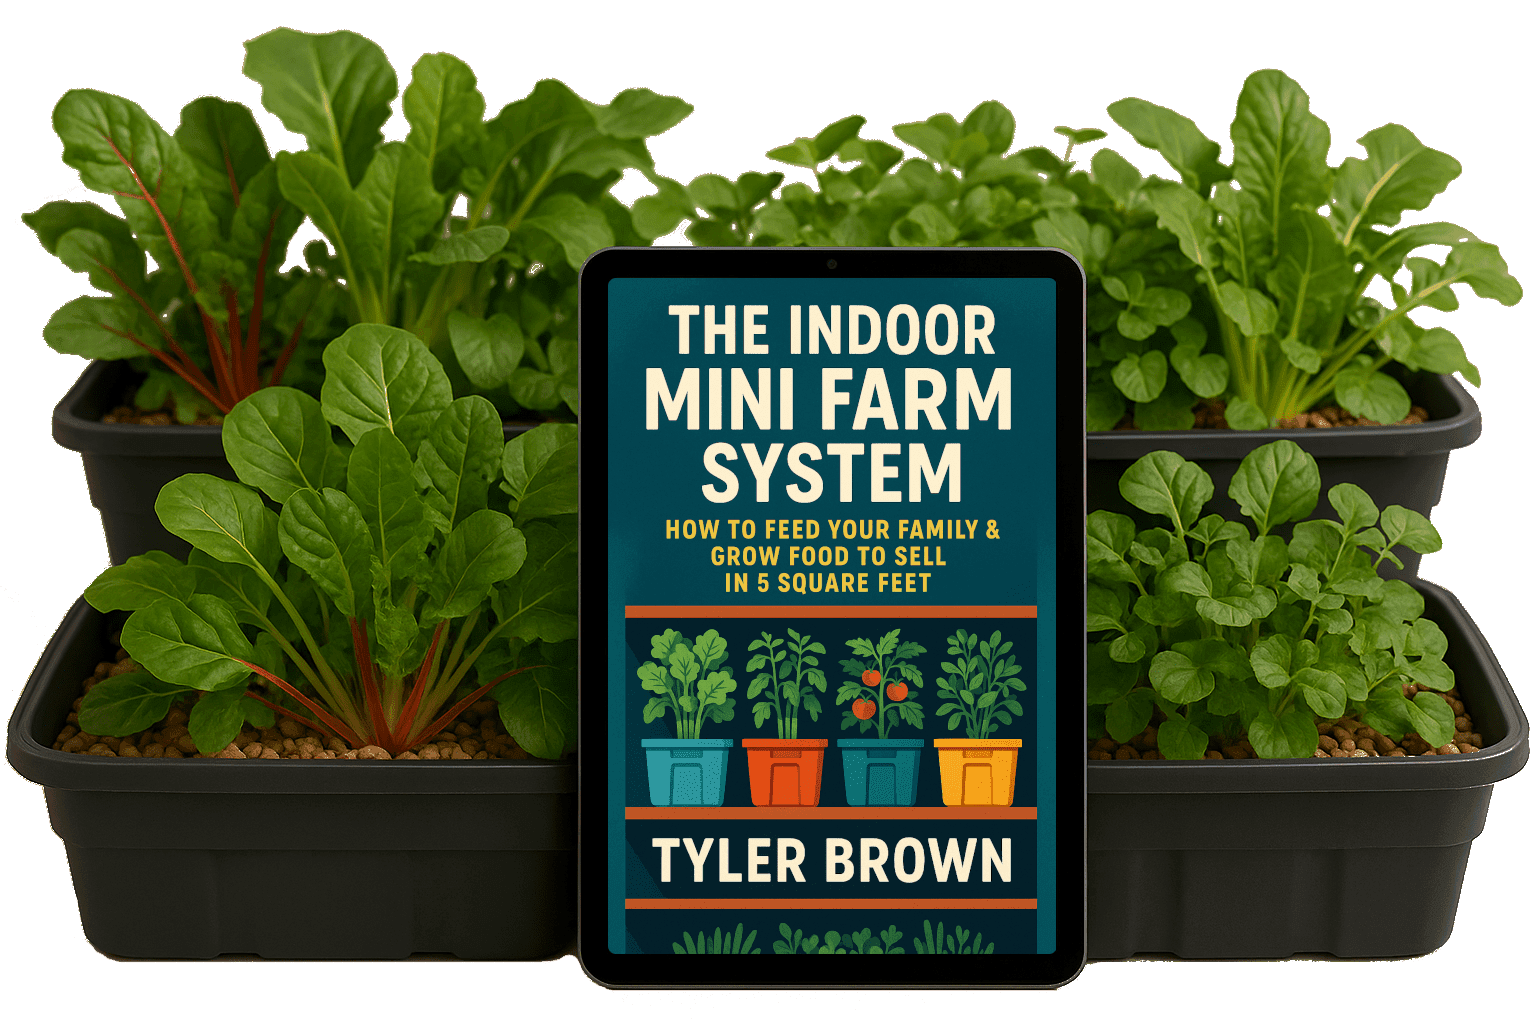
The indoor growing system is genuinely the lowest time-to-value ratio on that list — 30 minutes a week for continuous year-round produce. It’s often the first piece that makes the biggest dent in a family’s grocery bill, which is why it’s the foundation of the Indoor Mini Farm System — a complete guide to setting up and running a productive indoor growing operation that works alongside whatever you’re doing outdoors.
Frequently Asked Questions
How much land do you need to start homesteading?
None, technically — a productive indoor growing setup on a shelf requires no land at all. For a backyard homestead that combines indoor growing with an outdoor garden, a standard suburban lot (1/8 to 1/4 acre) is genuinely sufficient to produce a significant portion of a family’s fresh vegetables and herbs. Focus on high-value crops per square foot rather than trying to produce calorie crops like grain, which require much more space.
What should I grow first on a backyard homestead?
Start with the crops your family eats most frequently that are most expensive to buy organic: salad greens, fresh herbs, cherry tomatoes, and cucumbers. These deliver the highest grocery savings for the space and effort invested. Add a simple indoor hydroponic setup for year-round greens and herbs, and an outdoor raised bed for summer vegetables. Master those before adding anything more complex.
Is backyard homesteading worth it financially?
For most families who stick with it: yes, significantly. The break-even point on setup costs is typically 1–2 seasons for a vegetable garden, and often within the first month for an indoor hydroponic system growing fresh herbs and salad greens. Beyond grocery savings, many backyard homesteaders generate additional income from selling surplus produce, eggs, or seedlings to neighbors.
Can you have a homestead in a suburb or city?
Yes — urban and suburban homesteading is a well-established movement precisely because most of what makes homesteading valuable doesn’t require rural land. Container gardens, raised beds, vertical growing systems, indoor hydroponic setups, backyard chickens (where zoning permits), and small-scale food preservation all work in urban and suburban settings. Check local zoning laws before adding livestock, but food growing is almost universally permitted.
The best time to start a backyard homestead is now — with whatever space and time you have. Pick one project, do it well, and build from there. If you’re starting with indoor growing, the Indoor Mini Farm System is the complete guide to getting a productive system running fast — and it pairs naturally with everything you’ll add outdoors over time.
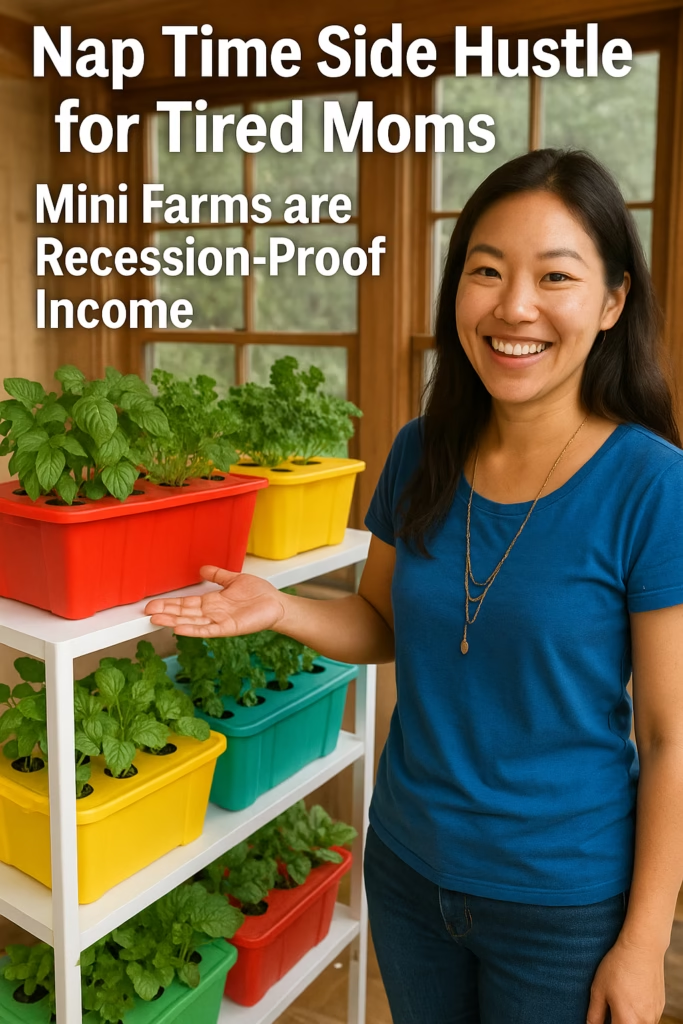
How to Make Money Homesteading in 2026 (Real Income Streams That Work)
Most people start homesteading to reduce what they spend. At some point — usually after the first surplus harvest — they start wondering whether they could also make money from it. The answer, for many homesteaders, is yes. Sometimes surprisingly well.
The key is choosing income streams that match your scale, your skills, and how much time you actually have. Not every homestead income idea works for every setup. But there are a handful of models that work consistently for small-scale growers — and one in particular that works exceptionally well even without land, a market booth, or a large customer base.
This guide covers the most practical ways to make money homesteading in 2026 — what they require, what they realistically earn, and how to think about which ones fit your situation.
Before diving into specific income streams, a few principles separate homesteaders who build reliable income from those who stay perpetually busy without much to show for it.
Sell high-value, perishable products. The most profitable homestead products are things that are expensive to buy, don’t last long, and are hard to ship. Fresh herbs, living plants, eggs, and artisan foods all fit this profile. Dried beans and bulk grains don’t — they’re competing with industrial-scale producers.
Minimize your labor per dollar earned. Harvesting individual lettuce leaves and selling them by the pound is labor-intensive for modest return. Selling an entire living plant that the customer harvests themselves is faster, commands a higher price, and builds repeat business. Always ask: is there a way to sell the same product with less processing?
Build recurring customers, not one-time sales. A neighbor who buys a living lettuce tote from you every six weeks is worth far more than a stranger who buys once at a farmers market. Build relationships with a small number of consistent customers before chasing volume.
Start with one income stream, do it well. The homesteaders who burn out fastest are the ones who try to sell eggs, herbs, seedlings, jam, and honey simultaneously in year one. Master one product first. Expand from a position of proven success.
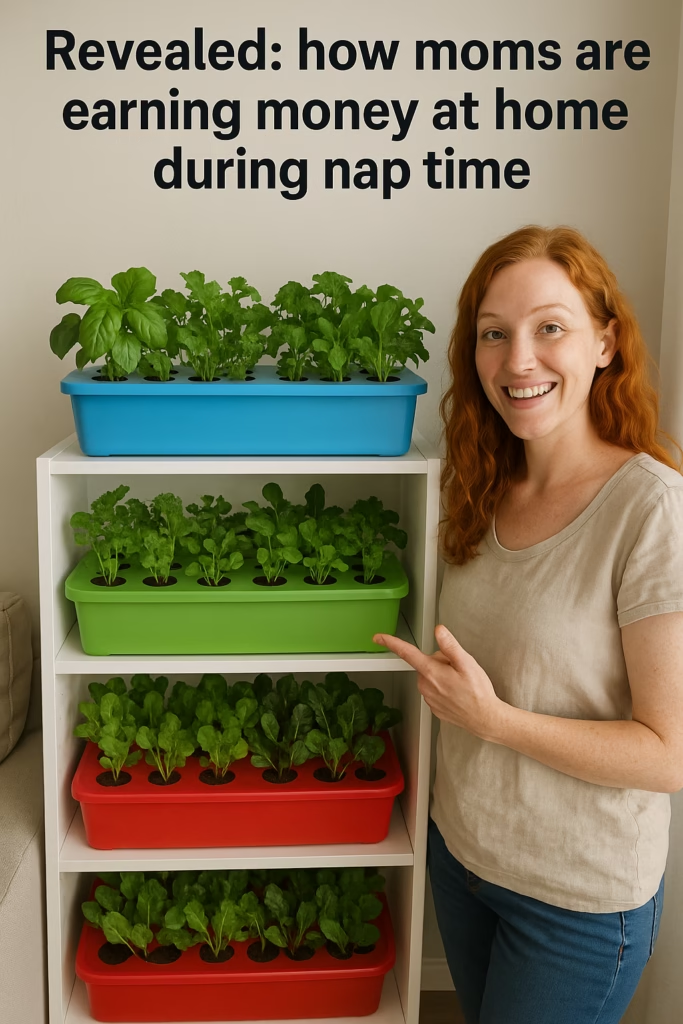
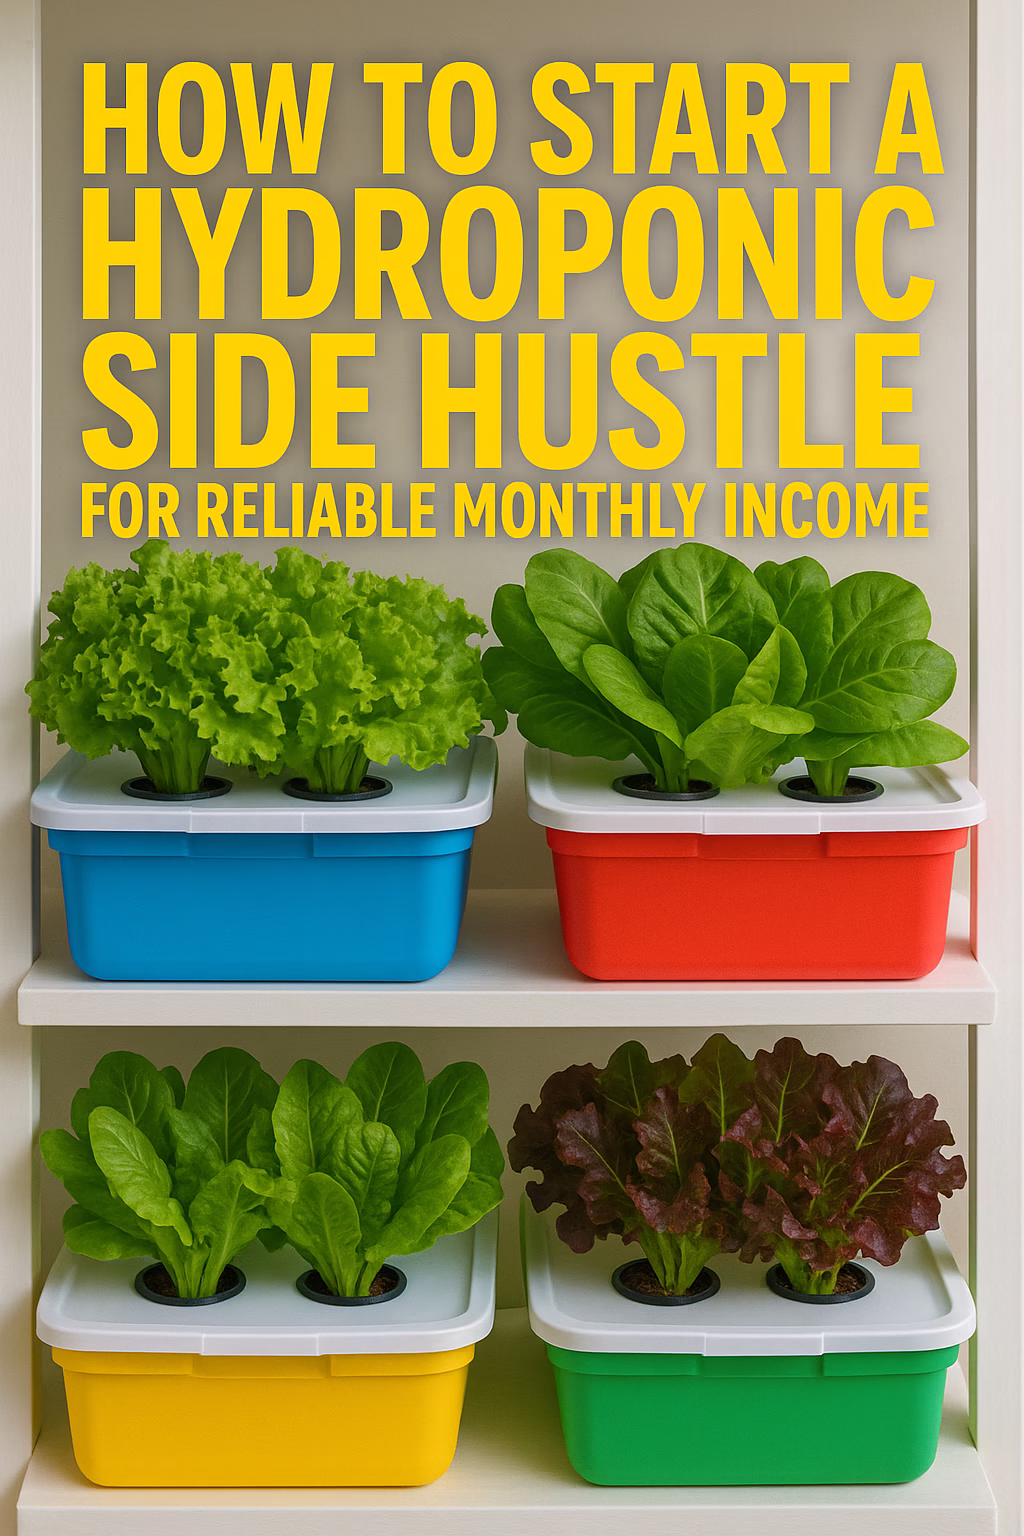
Indoor Growing: The Highest-Return Starting Point
If you’re looking for the highest return on investment, the lowest startup cost, and the most consistent year-round income from a homestead operation, indoor hydroponic growing of living plants checks every box.
Here’s the model: you grow full-size leafy greens — lettuce, kale, spinach, basil — in simple hydroponic totes using the Kratky passive method. Instead of harvesting and selling cut greens (labor-intensive, short shelf life), you sell the entire living tote to neighbors. They take it home, keep it on a windowsill, and harvest from it for weeks. You replant immediately and start the next cycle.
A ready-to-harvest living lettuce tote sells for $30–$50. Your cost to produce it — seeds, nutrients, electricity — is $2–$4. The time to set it up and maintain it is about 10–15 minutes per tote per week. Run three totes a week and you’re looking at $360–$600/month from a shelf in a spare room, working about an hour per week.
This works because you’re not competing with the grocery store. You’re selling something the grocery store doesn’t carry: a living, ready-to-harvest food supply that lasts weeks rather than days. Customers love it. Repeat business comes naturally.
The complete system — from setup through to building a neighborhood customer base — is exactly what the Indoor Mini Farm System covers. It’s the income model this site is built around, and it’s the one I’d recommend anyone start with before expanding to other streams.
Farmers Markets
Farmers markets are the most visible homestead income channel — and one of the more demanding ones. Booth fees run $20–$100 per market depending on location. You need to be there every week (or most weeks) to build a customer base. Setup, transport, and teardown add 4–6 hours to every market day beyond actual selling time.
That said, farmers markets are excellent for specific products: fresh herbs, specialty greens, value-added items like jams and pickles, eggs, and cut flowers. High-margin, eye-catching products that sell themselves at a booth. A well-stocked herb table at a Saturday market can generate $150–$400 in a few hours from the right location.
For a complete guide to selling at farmers markets — including what sells best, how to price, and how to get accepted into your local market — that post covers the full process.
The honest assessment: farmers markets are best as a supplement to a more consistent income stream (like neighborhood selling), not as a primary channel for a small homestead. The time commitment is high relative to the return unless you’re moving significant volume.
Eggs and Poultry
Backyard eggs sell easily and command premium prices — $6–$12 per dozen for genuine pasture-raised eggs in most markets, compared to $3–$5 for the best eggs at the grocery store. Six to eight hens produce enough eggs to supply your family and sell 2–3 dozen per week to neighbors.
The math at face value looks appealing: 3 dozen per week at $8/dozen is nearly $100/month. But the costs are real — quality feed runs $30–$50/month for a small flock, plus housing costs amortized over time, bedding, and vet expenses if needed. Net profit from a backyard flock is more modest than the gross numbers suggest: typically $30–$60/month for a small flock after feed costs.
Eggs work best as a supplementary income stream with a built-in benefit: the hens produce manure for your compost, eat garden pests, and provide your family with far better eggs than anything available at retail. The income is a bonus rather than the primary reason to keep chickens.
Fresh Herbs
Fresh herbs are the most underrated homestead income opportunity. They’re expensive at the grocery store ($3–$5 per small bunch), they have an extremely short shelf life (which is why customers keep buying), and they grow prolifically — especially indoors under grow lights year-round.
Basil, cilantro, mint, chives, dill, and parsley all sell well. Specialty herbs — Thai basil, lemon balm, sorrel, shiso — command premium prices at farmers markets and to restaurant buyers because they’re rarely available locally.
The indoor growing advantage is significant here: while outdoor herb production is seasonal, an indoor hydroponic shelf produces continuous basil, cilantro, and mint every month of the year. That consistency is exactly what builds reliable recurring customers — the neighbor who buys a fresh basil plant from you every three weeks because the grocery store’s version wilts before they use it.
For a detailed breakdown of the best herbs to grow for income and how to sell them, see the herb selling guide.
Value-Added Products
Value-added products transform raw homestead produce into something with higher margins and longer shelf life. A pound of cucumbers sells for $1–$2; a jar of artisan pickles sells for $8–$12. A pound of strawberries sells for $4–$6; strawberry jam from the same berries sells for $8–$14 per jar.
Common homestead value-added products that sell well:
Jams, jellies, and preserves — Berry jams, tomato jam, herb jellies. High perceived value, long shelf life, good margins.
Pickles and ferments — Dill pickles, sauerkraut, kimchi, fermented hot sauce. Huge demand at farmers markets.
Dried herbs and herb blends — Herbes de Provence, pizza seasoning, tea blends. High margin, very long shelf life.
Hot sauce — A single productive pepper season can produce dozens of bottles. Premium hot sauces sell for $8–$15 each.
Infused oils and vinegars — Garlic oil, herb-infused olive oil, raspberry vinegar. Popular gift items.
Baked goods — If you have fruit production, pies, tarts, and jams made from your own fruit command strong premiums.
Note: cottage food laws govern what you can legally sell from a home kitchen and vary significantly by state. Most states allow jams, baked goods, and dried herbs under cottage food exemptions without a commercial kitchen license. Check your state’s specific laws before selling processed food products.
Teaching and Content
Once you’ve built a working homestead system, the knowledge you’ve accumulated has value to people who are where you were a year or two ago. Teaching takes several forms:
In-person workshops — Hosting 6–10 people for a half-day homesteading workshop ($50–$100/person) generates meaningful income from a single morning. Topics: seed starting, hydroponic basics, preserving, fermentation, keeping chickens.
Online courses — A well-produced course on any homesteading topic can generate passive income long after it’s created. Platforms like Teachable and Kajabi make course hosting straightforward.
YouTube or blog content — Slower to monetize but builds a compounding audience. Ad revenue, affiliate commissions, and product sales (like an Indoor Mini Farm guide) all become available once you have traffic.
Consulting and coaching — One-on-one help setting up homestead systems. $75–$150/hour for experienced growers helping beginners avoid expensive mistakes.
Selling Seedlings and Starts
In spring, demand for vegetable and herb transplants dramatically outstrips supply at most garden centers. If you have a seed starting setup, you’re already producing transplants for your own garden — scaling up to sell the excess is a natural extension.
Tomato and pepper starts sell for $3–$6 each at garden centers; heirloom and specialty varieties sell for $5–$8. A 72-cell seed starting tray costs pennies per cell to fill and produces $200–$400 in saleable transplants. Herb six-packs (6 plants per tray section) sell for $4–$6 and are extremely popular in spring.
Spring plant sales — either at your home, at a farmers market, or through neighborhood social media groups — can generate $500–$2,000 in a single spring weekend from a modest seed starting setup.
CSA and Subscription Models
A CSA (Community Supported Agriculture) arrangement — where customers pay upfront at the start of the season in exchange for a weekly share of whatever you grow — provides reliable income and working capital before the season starts. Traditional CSAs are common for outdoor vegetable operations.
For indoor growing operations, a subscription model works even better: customers pay monthly for a regular delivery of living plants, fresh herbs, or salad totes. The recurring revenue is predictable, the relationship deepens over time, and you know exactly how much to grow each week. A subscription of 10 customers at $40/month is $400/month of reliable income with almost no marketing effort after the initial setup.
For a detailed look at structuring a small CSA or subscription model, the CSA business plan guide walks through the full setup.
Income Stream Comparison
Income Stream
Startup Cost
Monthly Earning Potential
Hours/Week
Year-Round?
Indoor living plant sales
$50–$200
$200–$800
3–5 hrs
Yes
Fresh herbs (indoor)
$50–$150
$100–$400
2–3 hrs
Yes
Farmers market (produce)
$200–$500
$300–$1,200
8–12 hrs
Seasonal
Backyard eggs
$500–$1,500
$40–$100 (net)
1–2 hrs/day
Yes
Spring seedling sales
$100–$300
$500–$2,000 (one season)
Variable
Seasonal
Value-added products
$200–$800
$200–$600
4–8 hrs
Seasonal
Workshops/teaching
Minimal
$200–$800/event
Variable
Yes
CSA subscription
$200–$500
$400–$1,500
8–15 hrs
Seasonal/Year-round
The indoor living plant model stands out for its combination of low startup cost, year-round operation, and high return per hour. It’s the natural first income stream for anyone starting a homestead operation — and the one most compatible with a full-time job or other commitments.
Frequently Asked Questions
Can you actually make money homesteading?
Yes — many small-scale homesteaders generate meaningful supplemental income, and some build full-time livelihoods from it. The key is choosing income streams with favorable economics (high-value products, low labor per sale, recurring customers) rather than trying to compete with commercial producers on volume. Indoor growing operations, specialty herbs, value-added products, and teaching consistently produce solid returns at small scale.
What is the most profitable thing to grow on a small homestead?
Fresh herbs and living lettuce plants grown hydroponically indoors consistently deliver the highest profit per square foot and per hour of labor. The combination of low production cost, high selling price, year-round availability, and recurring customer demand makes indoor growing the most reliably profitable homestead income stream at small scale.
How much can a small homestead make per year?
A small homestead with one or two well-chosen income streams can reasonably generate $5,000–$20,000 per year in supplemental income. Indoor living plant operations running year-round with a small customer base generate $2,400–$9,600 annually from minimal infrastructure. Adding farmers market sales, seedling sales, or value-added products expands that range significantly.
Do I need a license to sell produce from home?
Requirements vary by state and product type. Most states allow direct sale of unprocessed produce (fresh vegetables, herbs, living plants) from a home without a license. Processed foods (jams, pickles, baked goods) fall under cottage food laws that vary significantly — most states permit sales up to a certain dollar threshold without a commercial kitchen license. Always check your specific state’s laws before selling any processed food product.
The best homestead income stream is the one you’ll actually build and maintain. Start with the model that fits your current space, time, and goals — and build from there. If that’s indoor growing, the Indoor Mini Farm System is the complete guide to getting it producing income from a shelf in your home.
15 Homestead Income Ideas That Actually Work (2026)
The internet is full of homestead income ideas that look great in theory and quietly fail in practice. Selling honey sounds romantic until you’ve priced out the equipment and found out what local honey actually sells for. Raising meat rabbits pencils out on paper until you calculate the feed costs and your actual hourly rate.
This guide skips the wishful thinking and focuses on homestead income ideas that consistently work at small scale — where the math actually holds up, the demand is real, and the model fits into a life that already has other things in it.
This is the single most overlooked homestead income idea — and consistently one of the best performing. You grow full-size lettuce, kale, basil, or spinach in simple hydroponic totes using the Kratky passive method. Instead of harvesting and selling cut greens, you sell the entire living tote ready to harvest. Neighbors keep it on a windowsill, harvest from it for weeks, and come back for another.
A tote that costs $3–$4 to produce sells for $30–$50. Three totes a week is $360–$600 per month from a shelf in a spare room, about an hour of work per week. Year-round, no seasonality, no market booth, no commercial kitchen. The complete model is laid out in the Indoor Mini Farm System.
2. Fresh Herbs — Year-Round
Fresh herbs grown indoors hydroponically produce continuously regardless of season. Basil, cilantro, mint, chives, and dill all sell easily — direct to neighbors, at farmers markets, or to local restaurants. A single indoor shelf of herbs produces $50–$150 worth of product per week at retail pricing. The time investment is minimal; the recurring demand is reliable because herbs are perishable and people buy them constantly.
The herb selling guide covers which herbs sell best, how to price them, and the easiest channels to reach buyers.
3. Spring Seedling Sales
Every spring, demand for vegetable transplants vastly exceeds what local garden centers can supply — especially for heirloom and specialty varieties. If you already have a seed starting setup for your own garden, scaling up to sell the surplus is nearly pure profit. Tomato starts sell for $3–$6 each; peppers for $3–$5; herb six-packs for $4–$6.
A well-organized spring plant sale — advertised through neighborhood Facebook groups, Nextdoor, or a simple yard sign — can generate $800–$2,000 in a single weekend from a garage full of transplants. Low overhead, high margins, strong demand window every single year.
4. Backyard Eggs
Six to eight hens on pasture produce 4–5 dozen eggs per week — enough for your family plus consistent sales to neighbors at $7–$10 per dozen. Net of feed costs, a small flock typically generates $50–$80 per month in profit. It’s not a primary income stream on its own, but it’s a reliable supplemental one with the added benefits of manure for compost and pest control in the garden.
5. Specialty Cut Flowers
Cut flowers are among the highest-margin crops available to small growers. A 4×8 raised bed of specialty flowers — dahlias, zinnias, lisianthus, ranunculus — produces $500–$1,500 worth of cut flowers per season. They sell quickly at farmers markets, to florists, and through flower subscription deliveries. Flower farming requires attention to variety selection and timing but has exceptional per-square-foot returns.
Tier 2: Solid Income With More Setup
6. Farmers Market Produce
A well-stocked farmers market booth selling fresh vegetables, herbs, and value-added products can generate $300–$800 per market day in a good location. The trade-off is significant time commitment — setup, selling, and teardown adds 6–8 hours to every market day, plus booth fees and travel. Best suited as a supplement to a neighborhood selling model rather than a standalone income stream for a small homestead.
7. Value-Added Food Products
Transforming raw produce into preserved products dramatically increases margin. Jams, pickles, hot sauce, dried herbs, and infused oils all command 4–8x the price of raw ingredients. A jar of strawberry jam from your own berries sells for $8–$12; the berries themselves sell for $4–$6 per pint. Check your state’s cottage food laws — most states allow home sale of non-potentially-hazardous products like jams and dried goods without a commercial kitchen license.
8. Garlic
Specialty garlic — hardneck varieties like Rocambole, Purple Stripe, and Porcelain — sells for $12–$20 per pound at farmers markets compared to $3–$5 for grocery store garlic. A 4×8 raised bed planted with hardneck garlic in October produces 50–80 heads the following July. Braided garlic and seed garlic (sold to other growers) command even higher prices. It’s one of the few crops where a small home garden can genuinely compete on quality and variety.
9. Homestead Workshops
Hosting small workshops at your homestead — seed starting, hydroponic basics, preserving, fermentation, beekeeping, chicken keeping — converts your experience into direct income. A 3-hour workshop for 8–10 participants at $60–$80 per person generates $480–$800 from a single morning. The marketing is simple: your existing neighbors and social network. The cost to run one is minimal if you’re already doing the activity yourself.
10. Vegetable CSA or Subscription Box
A small neighborhood CSA — 10–20 households receiving a weekly box of produce — generates reliable upfront income and builds strong customer relationships. Traditional CSAs collect payment at the start of the season, giving you working capital before you spend it on seeds and supplies. Indoor growing operations can run year-round subscriptions with living plants and fresh herbs, avoiding the seasonal limitation of outdoor-only CSAs.
Tier 3: Seasonal or Niche Opportunities
11. Strawberries
U-pick strawberries are enormously popular and command $4–$6 per pound — 2–3x what you’d pay for picked berries. A well-maintained strawberry patch requires initial planting work but is largely self-sustaining after the first year through runner propagation. Even a small patch (200–300 sq ft) can attract enough U-pick customers to generate $500–$1,500 in a season with zero harvesting labor on your part.
12. Hatching Eggs and Chicks
If you keep heritage breed chickens or ducks, hatching eggs sell for $3–$8 each and started chicks for $5–$15 each — far above commodity hatchery prices. Rare or heritage breeds with dedicated followings command even more. Requires a rooster (check local zoning) and an incubator, but the margins are excellent for a small flock.
13. Soap, Candles, and Herbal Products
If you have herb production, extending into herbal body products — soap, salves, lip balm, herbal teas — adds significant value to the same raw material. Herbal soap sells for $7–$12 per bar; herbal salves for $10–$18 per tin. These products have long shelf lives, ship easily, and sell well at markets and online. The learning curve is real but manageable.
14. Composting Services
In urban and suburban areas, many households generate kitchen scraps with nowhere to compost them. Collecting kitchen scraps from neighbors (charging $10–$20/month per household) and returning finished compost builds your soil fertility while generating income. It’s a simple, overlooked model that works well in dense neighborhoods.
15. Online Content and Courses
Documenting your homestead journey — on YouTube, a blog, or through an online course platform — builds an audience that eventually becomes a sales channel for your physical products, affiliate commissions, and digital courses. The timeline is long (12–24 months to meaningful traffic) but the income compounds. Many homestead content creators earn more from their content than from direct product sales.
Ideas That Usually Don’t Work Out
Honey. Beekeeping equipment costs $500–$1,000 to start, hive losses are common even for experienced keepers, and local honey prices rarely cover costs at small scale. Beekeeping is a wonderful practice but a poor primary income source for most small homesteads.
Selling bulk vegetables at commodity prices. Competing with wholesale produce pricing is a losing game for small growers. You cannot out-scale a commercial operation. The answer is always to sell at premium prices through direct relationships — not to compete on volume.
Meat rabbits or meat chickens as a primary income. Processing time, feed costs, and the legal complexity of selling meat in most states make this difficult to profit from at small scale. Good supplemental protein for your own family; challenging as a commercial income source without significant scale.
Exotic animals. Alpacas, emus, and heritage pig breeds often attract attention as homestead income ideas. The reality: specialized care requirements, high feed costs, and niche markets make them difficult to profit from without significant experience and infrastructure.
How to Stack Income Streams
The most financially successful small homesteads typically run two or three complementary income streams rather than trying to maximize one or spread across too many. A natural stack that works well together:
Indoor living plants + herbs — Year-round base income, minimal time, direct-to-neighbor sales
Spring seedling sale — One-time seasonal boost from existing seed starting infrastructure
Summer farmers market — Seasonal supplement using outdoor garden surplus and value-added products
That stack is achievable for most homesteaders within the first two years, requires modest infrastructure, and generates meaningful supplemental income without requiring full-time commitment. Add eggs and workshops as your confidence and customer base grow.
For the full roadmap to a profitable homestead — including a detailed look at the indoor growing income model — the complete guide to making money homesteading covers every stream with honest income projections and startup cost estimates.
Frequently Asked Questions
What homestead products sell the best?
Fresh herbs, living plants, specialty garlic, pasture-raised eggs, heirloom vegetable transplants, artisan preserves, and cut flowers consistently sell well at small scale. The common thread: they’re perishable or specialty items that grocery stores don’t supply well, they command premium prices, and they build repeat customers.
Can a small homestead be profitable?
Yes, with the right income streams. A small homestead with well-chosen products can generate $5,000–$20,000 per year in supplemental income. The key is choosing products with favorable economics — high margin, direct relationships, recurring demand — rather than competing with commercial producers on volume.
How do I start making money from my homestead?
Start with one product that you can produce reliably and sell to people you already know. Living plants or fresh herbs sold to neighbors requires no market booth, no commercial license (for fresh produce), and no large upfront investment. Build a small customer base, refine the model, then add a second income stream once the first is running smoothly.
The best homestead income idea is the one you’ll actually execute. Start simple, start close to home, and build from there. If you’re ready to start with indoor growing, the Indoor Mini Farm System is the complete guide to the model that works best for most people starting out.
Selling Produce From Home Legally: What You Need to Know
One of the most common questions from home growers who start producing more food than they can eat is: can I actually sell this? The answer is almost always yes — but the specifics depend on what you’re selling, how you’re selling it, and where you live.
The good news: selling fresh, unprocessed produce and living plants directly to neighbors or at a farmers market is legal in virtually every state with minimal or no licensing. The rules get more complicated when you move into processed food products. Understanding where the lines are means you can start selling confidently without worrying about running into regulatory problems.
This guide covers the legal framework for selling produce from home — what’s permitted, what requires a license, and how to set up a simple, legal home-based selling operation.
Selling Fresh Produce: Generally No License Needed
In most states, selling fresh, unprocessed produce — vegetables, fruits, herbs, and living plants — directly to consumers requires no license, no inspection, and no special permit. This is the most permissive category of home food sales and the best starting point for any home grower.
“Direct to consumer” means selling to the person who will eat it — your neighbor, a farmers market customer, someone who responds to your Nextdoor post. It does not include selling wholesale to grocery stores or restaurants, which typically triggers additional requirements.
States that have specific exemptions for small-scale direct produce sales (most of them) typically set a revenue threshold below which even farmers market licensing isn’t required — often $1,000–$5,000 per year. Above that threshold, a basic agricultural producer’s license or farmers market permit may be needed, which is typically a simple registration process rather than an inspection-based license.
The practical takeaway: If you’re selling fresh lettuce, herbs, or living plants to neighbors for supplemental income, you’re almost certainly operating well within the legal zone for unprocessed produce sales. Start there and look into licensing requirements only if you plan to scale significantly or move into processed products.
Selling Living Plants
Living plants — a lettuce tote ready to harvest, a potted basil plant, a tray of herb starts — occupy an interesting legal space. They’re not technically food products until harvested, which means they generally fall under plant nursery or agricultural sales regulations rather than food safety rules.
In most states, selling small quantities of living plants directly to consumers requires no license at all. Selling vegetable and herb starts at a farmers market or roadside stand is treated the same as selling fresh produce — direct agricultural sales with minimal regulatory burden.
This is one of the reasons the living plant model works so well as a home-based income stream. It sidesteps the food processing regulations entirely — you’re selling an agricultural product, not a prepared food. The neighbor harvests their own food from it. You replant and do it again. No food handler’s license, no cottage food compliance, no commercial kitchen required.
If you’re scaling up to a genuine plant nursery operation — large volume, wide variety, significant revenue — some states require a nursery dealer license. But for home growers selling herb starts and lettuce totes to neighbors and at local markets, this threshold is rarely an issue.
Cottage Food Laws: Selling Processed Products
Once you move from fresh produce into processed food products — jams, pickles, baked goods, dried herbs, sauces — you enter cottage food law territory. Cottage food laws are state regulations that allow the sale of certain homemade food products without requiring a commercial kitchen license, under specific conditions.
What Cottage Food Laws Generally Allow
Most state cottage food laws permit sale of “non-potentially hazardous” foods — products that don’t require refrigeration to remain safe. This typically includes:
Jams, jellies, and preserves (high-sugar, high-acid products)
Products that require refrigeration or have food safety risk factors generally require a licensed commercial kitchen or food processing facility:
Refrigerated pickles and fermented products (some states have exceptions)
Meat and poultry products
Dairy products (cheese, yogurt)
Canned low-acid vegetables (green beans, beets without added acid)
Products with meat or cheese filling
Revenue Limits and Labeling Requirements
Most state cottage food laws set an annual revenue limit — commonly $25,000–$75,000, though it varies widely. Products must typically be labeled with your name, address, product name, ingredients, and a statement that the product was made in a home kitchen not inspected by the state. Requirements vary by state, so always check your specific state’s cottage food law before selling processed products.
A useful resource: Forrager.com maintains an up-to-date state-by-state cottage food law database that’s worth checking before you start.
Farmers Market Rules
Farmers markets have their own rules on top of state regulations — set by the market manager and the market organization. Requirements vary significantly between markets:
Some markets require proof of production (they may want to visit your farm or garden)
Some require proof of insurance ($1–$2 million general liability is common)
Some require a state cottage food registration or producer’s certificate for processed goods
Most require that you grew or made what you’re selling — no reselling wholesale product
The application process for a farmers market booth varies from a simple online form to a waiting list and jury process for competitive urban markets. Start by attending your local market, talking to the manager, and asking what their vendor requirements are. Many smaller community markets have minimal requirements and welcome new vendors.
For a full guide to getting started at farmers markets, the farmers market selling guide covers the application process, what products sell best, and how to price effectively.
Direct-to-Neighbor Selling
Selling directly to neighbors — through word of mouth, Nextdoor, neighborhood Facebook groups, or a simple sign in your yard — is the most permissive and lowest-friction selling model available. It requires no booth, no market application, no set schedule, and typically no license for fresh produce and living plants.
This is the model that works best for indoor growing operations selling living plant totes and fresh herbs. Your customers are people who already live near you, trust you because you’re a neighbor, and can easily come back for repeat purchases. The transaction is simple: they text you, you have a tote ready, they pick it up at your door or you drop it at theirs.
Payment is typically handled through Venmo, PayPal, Cash App, or cash. No point-of-sale system needed. No booth fees. No early Saturday mornings loading a van.
The selling system that makes direct-to-neighbor selling work consistently — including how to find your first customers, how to build recurring relationships, and how to price your products — is exactly what the Indoor Mini Farm System covers in detail.
Roadside Stands and Farm Stands
An unmanned farm stand at the end of your driveway — an honor system box with produce, a price list, and a payment jar — is one of the most traditional forms of direct produce selling and one of the least regulated. In most areas, selling produce from your own property requires no permit.
What works well at a roadside stand: lettuce, herbs, tomatoes, cucumbers, flowers, eggs, jams (where cottage food law permits), and anything visually appealing and clearly priced. Honor system stands work better than most people expect, especially in suburban neighborhoods where trust is higher.
Check your local zoning if you’re in a homeowners association or a neighborhood with deed restrictions — some prohibit commercial activity including roadside stands. Most municipalities have no restrictions on small-scale produce stands on private property.
Selling Online
For fresh produce and living plants, online selling typically means local platforms — Nextdoor, Facebook Marketplace, local buy/sell groups — rather than shipping products nationally. Fresh produce doesn’t ship well, and living plants even less so. The value of online platforms for home growers is reach within your local community, not geographic expansion.
Exception: shelf-stable processed products (dried herbs, jams, candies) can be sold and shipped nationally through platforms like Etsy or your own website. This opens a much larger market but also triggers more complex compliance questions — labeling, shipping regulations, and platform-specific food safety requirements.
Taxes: What You Need to Know
Selling produce from your homestead generates taxable income. Even if you’re selling to neighbors informally, income above the IRS reporting threshold ($400 in net self-employment income) should be reported on Schedule C or Schedule F (farm income) with your federal tax return.
The good news: your production costs — seeds, nutrients, electricity, equipment depreciation — are deductible business expenses that reduce your taxable income. A well-documented homestead operation often has very low net taxable income after legitimate deductions.
State sales tax on produce varies — many states exempt fresh produce from sales tax entirely. Check your state’s rules before collecting or remitting sales tax.
For a homestead operation generating under $10,000/year, a simple spreadsheet tracking income and expenses is usually sufficient recordkeeping. Consult a tax professional as your income grows.
Setting Up Your Home Selling Operation
For a simple fresh produce and living plant selling operation, here’s the practical setup:
Check your state’s produce direct sales rules — A quick search for “[your state] direct farm sales law” or “[your state] cottage food law” will surface the relevant regulations. Most states have a Department of Agriculture page summarizing them.
Set up a simple payment method — Venmo, PayPal, or Cash App. Free, instant, and what most neighbors prefer.
Create a simple product list — What you’re growing, pricing, and how to order. A Google Doc, a notes page on your phone, or a simple Instagram account works fine at small scale.
Tell your neighbors — Post on Nextdoor, text a few neighbors, put a sign in your yard. Word of mouth does most of the work once you have one or two happy customers.
Track your income and expenses — A simple spreadsheet from day one makes tax time straightforward and helps you understand what’s actually profitable.
That’s genuinely all you need to start. The legal complexity increases as you scale and diversify into processed products — but for fresh produce and living plants sold to neighbors, the bar to entry is very low.
Frequently Asked Questions
Do I need a license to sell vegetables from my garden?
In most states, no license is required to sell fresh, unprocessed vegetables and herbs directly to consumers at small scale. Direct farm sales of fresh produce are the most permissive category of home food sales. Requirements vary by state and scale — check your state’s Department of Agriculture website for your specific situation, especially if you plan to sell at a farmers market or generate significant revenue.
Can I legally sell food made in my home kitchen?
Most states allow sale of certain “non-potentially hazardous” homemade food products under cottage food laws — including jams, baked goods, dried herbs, and candy — without a commercial kitchen license. Requirements and permitted products vary significantly by state. Check your state’s specific cottage food law before selling any processed food product.
How much can I earn selling produce from home before I need to report taxes?
The IRS requires reporting of net self-employment income of $400 or more per year. This applies regardless of whether you receive a 1099 or not. Keep records of your income and expenses from the start — production costs are deductible and significantly reduce your taxable income. Consult a tax professional if you’re generating meaningful income.
Can I sell plants from my home?
Yes — selling vegetable transplants, herb plants, and living produce totes directly to consumers is generally permitted with no license at small scale in most states. At larger scale, some states require a nursery dealer registration, but home growers selling starts and living plants to neighbors typically fall well below this threshold.
The legal path to selling from home is simpler than most people expect — especially for fresh produce and living plants. Start there, build your customer base, and expand into processed products once you understand your state’s specific rules. If you’re ready to build the growing side of the operation, the Indoor Mini Farm System is the complete guide to producing living plants consistently enough to sell.
How to Sell at Farmers Markets: A Beginner’s Complete Guide
A farmers market booth sounds appealing — set up a table, sell what you’ve grown, go home. The reality is more nuanced, and knowing what to expect going in makes the difference between a frustrating first season and a profitable one.
Farmers markets can be an excellent outlet for homestead produce, herbs, and value-added products. They can also be time-intensive for modest returns if you’re selling the wrong products or picked the wrong market. This guide covers everything you need to know to sell at a farmers market — from getting accepted to making your first market day actually work.
Honest answer: it depends on what you’re selling and which market you’re at. A well-located market with strong foot traffic, selling high-margin products like specialty herbs, artisan preserves, or fresh cut flowers, can generate $300–$800 in a single morning. The same products at a poorly attended community market might generate $60–$80.
The time cost is real: setup, market time, and teardown typically add 6–8 hours to a market day. Booth fees run $20–$100 per market, sometimes more. You need to be there consistently to build a customer base — occasional appearances don’t build the repeat business that makes markets worthwhile.
Farmers markets work best as a complement to a direct-to-neighbor selling model rather than a standalone income channel for a small homestead. Your neighbor customers come back weekly without requiring your presence at a booth. Market customers become neighbor customers over time if you cultivate the relationship. The combination is more powerful than either alone.
How to Get Accepted Into a Farmers Market
Types of Markets
Not all farmers markets are equally selective. Understanding the type of market helps you target your applications appropriately:
Producer-only markets — The most selective. You must grow or make everything you sell. Some require an on-site inspection of your production facility. These markets attract the most serious buyers and often have waitlists.
Community markets — More accessible. Often accept applications on a rolling basis, have lower booth fees, and have less foot traffic. A good starting point for first-time vendors.
Pop-up and seasonal markets — Lowest barrier to entry. Good for testing products and pricing before committing to a weekly market schedule.
Specialty markets — Holiday markets, urban markets, maker markets. Different product mix and customer base than traditional produce markets.
The Application Process
Attend the market as a customer first. Walk the market, understand what’s already being sold, identify gaps, talk to the market manager. This research makes your application stronger and helps you understand whether this market fits your products.
Request the vendor application. Most markets have applications on their website or through the market manager. Applications typically ask what you’ll be selling, where you produce it, your estimated pricing, and whether you’re a producer or reseller.
Gather required documentation. Common requirements: proof of insurance ($1–$2 million general liability), a cottage food registration or producer’s certificate if selling processed goods, and sometimes a business license.
Apply early. Many markets set their vendor roster months before the season opens. Apply in January or February for a spring/summer market, even if the season starts in May.
Follow up. A polite follow-up email after submitting your application is appropriate and sometimes makes the difference when a market is choosing between similar vendors.
What Sells Best at Farmers Markets
Not every product sells equally well at a farmers market. Here’s what consistently moves at most markets — and what to avoid.
Strong Sellers
Product
Why It Sells
Typical Price Range
Fresh herbs (potted)
Visually appealing, fragrant, impulse purchase
$4–$8 per pot
Herb bundles (cut)
Immediate use, familiar product
$3–$5 per bundle
Cherry tomatoes
Snacking at the booth converts browsers to buyers
$4–$6 per pint
Specialty salad mix
Premium over grocery store, visual appeal
$5–$8 per bag
Heirloom tomatoes
Variety and flavor unavailable in stores
$4–$7 per lb
Fresh cut flowers
Impulse purchase, high perceived value
$10–$20 per bunch
Specialty garlic
Unique varieties, strong flavor, braided displays sell well
$8–$15 per head or bundle
Artisan jams and preserves
Gift item, unique flavors, long shelf life
$8–$14 per jar
Baked goods (cottage food)
Immediate gratification, snacking impulse
$3–$6 per item
Eggs (pasture-raised)
Reliable weekly purchase, repeat customers
$7–$12 per dozen
Living lettuce totes
Novel, high perceived value, conversation starter
$25–$45 per tote
Weaker Sellers at Markets
Bulk vegetables at commodity prices (zucchini, beans, cucumbers by the pound) compete directly with every other produce booth and grocery stores — customers price-shop rather than building loyalty. Anything that requires explanation before a customer understands the value is also harder to sell in a busy market environment.
How to Price Your Products
The most common pricing mistake small homestead vendors make is underpricing. Farmers market customers are specifically choosing to pay a premium for locally grown, fresh, direct-from-producer products. They’re not coming to a farmers market expecting grocery store prices. Match or exceed specialty grocery store pricing for comparable products — you’re offering something better.
Pricing Framework
Calculate your cost of production — seeds, soil, nutrients, packaging, your time at a realistic hourly rate
Multiply by 3–5x for retail — a product that costs $2 to produce should sell for $6–$10
Check comparable products at the market and nearby specialty stores — price at or slightly above if your quality warrants it
Never price below your cost — selling at a loss to compete with cheaper booths is a path to burnout, not a business model
Living lettuce totes are a great example of value-based pricing: the cost to produce a tote is $3–$4. The product provides weeks of fresh food. A price of $30–$45 reflects the value to the customer, not the cost of production. Customers who understand what they’re getting are happy to pay it — and they come back.
Booth Setup That Attracts Customers
Your booth display does most of the selling before you say a word. A visually compelling display draws browsers in; a cluttered or sparse one sends them past.
Height and layers. Flat tables with products laid out look like a garage sale. Use tiered displays, crates, baskets, and risers to create visual interest and height. Products at different levels are more engaging than a flat surface.
Abundance. A full, plentiful display signals freshness and success. Keep products topped up through the market — a half-empty table at noon reads as picked-over.
Clear signage. Product name and price on every item. Customers rarely ask the price of something they want — they just move on. Make pricing obvious.
Samples. If your market allows it and your products lend themselves to tasting, samples convert browsers to buyers more effectively than any other technique. A sample of your cherry tomatoes or herb-infused olive oil closes sales without a word.
Branding consistency. A simple, consistent visual identity — matching labels, a banner with your farm name, a consistent color scheme — makes you look established and builds recognition over time.
Accept multiple payment methods. Card payments are now expected at most markets. A Square reader (free) connected to your phone handles card payments easily. Cash is still common — keep a float of small bills for change.
Your First Market Day
The first market day is a learning experience regardless of how well you prepare. Here’s how to approach it:
Arrive early. Most markets require vendors to be set up 30–45 minutes before opening. Plan for longer than you think — your first setup takes twice as long as subsequent ones.
Bring more than you think you need. Running out of your best products early is a missed opportunity and frustrating for repeat customers.
Talk to neighboring vendors. The vendor community at most markets is welcoming. Experienced vendors are often generous with advice about what sells, how the market runs, and what to expect.
Collect contact information. Ask customers if they’d like to be notified when you have seasonal specials or new products. A simple sign-up sheet or a QR code to a Nextdoor profile or mailing list builds your customer base beyond the market.
Take notes. Which products sold fastest? What did people ask for that you didn’t have? What price objections came up? Your first market day is market research — treat it that way.
Building a Base of Regular Customers
The vendors who make consistent money at farmers markets are the ones with a loyal base of weekly regulars — customers who come specifically to find them, not just whoever happens to have tomatoes that day. Building that base takes time and consistency:
Show up every week, same booth, same time. Regulars need to know where to find you.
Remember faces and names. “The usual?” is a powerful relationship builder.
Let customers know what’s coming next week — “We’ll have the first heirloom tomatoes next Saturday” — gives them a reason to return.
Extend the relationship beyond the market. If a regular customer lives in your neighborhood, offer home delivery or a standing order. The transition from market customer to neighbor customer is the most valuable one you can make.
The Indoor Growing Advantage at Farmers Markets
One of the challenges for outdoor-only produce vendors is seasonality — you have tomatoes in July and not much in March. An indoor hydroponic growing operation produces fresh herbs, lettuce, and specialty greens every week of the year, giving you consistent market inventory when other vendors have nothing.
Living lettuce totes are particularly effective at farmers markets — they’re visually striking, unusual enough to be a conversation starter, and priced well above cut produce. Customers who’ve never seen a ready-to-harvest living tote often stop to ask about it, which is the beginning of a sale and often a recurring customer relationship.
The Indoor Mini Farm System covers both the production side — how to grow living totes consistently enough to supply a market booth — and the selling side, including how to explain the product to customers and build repeat business from it.
Frequently Asked Questions
How much does it cost to sell at a farmers market?
Booth fees typically run $20–$100 per market day depending on location and market size. Startup costs include a folding table ($50–$100), a canopy ($80–$150), display materials ($50–$100), and a card reader (free with Square). Budget $300–$500 for initial market setup, plus ongoing booth fees. Your first few markets should cover these costs if you’re selling appropriate products at appropriate prices.
What license do I need to sell at a farmers market?
Requirements vary by state and market. Most markets require proof of general liability insurance for all vendors. Selling fresh produce typically requires no special license in most states. Selling processed food products requires compliance with your state’s cottage food law and sometimes a cottage food registration. Check with your specific market manager and your state’s Department of Agriculture for current requirements.
How much can you make selling at a farmers market?
Highly variable. Small community markets may generate $60–$150 per day. Well-attended urban markets with strong foot traffic and the right products can generate $300–$800 per market day. The best-performing small vendors are consistent weekly participants selling high-margin products (herbs, specialty produce, value-added goods, cut flowers) with a loyal customer base built over multiple seasons.
What is the most profitable thing to sell at a farmers market?
Cut flowers, specialty herbs, artisan preserves, and specialty garlic consistently rank among the highest-margin products at farmers markets. Cut flowers in particular deliver exceptional revenue per square foot of booth space. For food producers, the combination of fresh herbs (high weekly demand, perishable, premium pricing) and a value-added product like herb-infused oils or dried herb blends creates a strong complementary offering.
A farmers market booth is a great way to build your customer base and establish your brand — especially when combined with a direct-to-neighbor selling model that works year-round. If you’re building the production side of the operation, the Indoor Mini Farm System is the guide to growing living plants and herbs consistently enough to supply a market booth every week.
Growing Greens for Profit: The Home Grower’s Income Guide
Of all the crops a home grower can produce for income, leafy greens — lettuce, kale, spinach, arugula, watercress — offer one of the most favorable combinations of fast growth, high value, year-round demand, and minimal production cost.
The challenge with selling greens isn’t demand — it’s the model. Harvesting individual leaves and selling them by the pound is labor-intensive for modest return. But there’s a better way that most growers never consider: selling the living plant rather than the harvested crop.
This guide covers the most practical model for growing greens for profit at home — what to grow, how to grow it efficiently, how to sell it, and what you can realistically earn from a small indoor operation.
Fresh leafy greens check every box for a viable small-scale profit crop:
High grocery value. Organic lettuce runs $4–$7 per head. Specialty greens like watercress and arugula run $4–$8 per bunch. These are expensive relative to their weight — which means the margin for a grower is significant.
Short production cycle. Lettuce is ready to harvest in 30–45 days from transplant. That’s 8–12 crop cycles per year from the same growing space, compounding your annual production.
Year-round demand. Unlike summer squash or corn, salad greens are purchased every week by most families, regardless of season. The demand doesn’t stop in November.
Excellent indoor growing candidates. Greens grow just as well — often better — under LED grow lights as they do in a summer garden. That means year-round production from an indoor setup regardless of climate or season.
Low production cost. Seeds, nutrients, water, and electricity for a Kratky hydroponic setup cost $2–$4 per tote of 6 plants. The margin between production cost and retail value is exceptional.
The Living Plant Model: Why It Works Better Than Selling Cut Greens
The conventional model for selling greens is to harvest them, bag them, and sell them by weight. A bag of mixed salad greens sells for $5–$8. You spend significant time harvesting, washing, drying, and bagging. Your margin per hour of labor is modest.
The living plant model is different — and significantly more profitable per hour of work.
Instead of harvesting your greens, you sell the entire growing tote — plant, growing medium, and remaining nutrient solution — to your customer. They take it home, put it on a sunny windowsill or under a simple grow light, and harvest from it themselves for weeks. When the tote is spent, they come back for another.
Here’s why this model works so much better economically:
Higher price point. A living lettuce tote sells for $30–$50. The same plants harvested and bagged would sell for $8–$15. The living plant delivers ongoing value the customer can see — they’re willing to pay for it.
Less labor. You do zero harvesting, washing, or packaging. You grow the plants, hand the customer a tote, and immediately plant a new one. The customer does the harvesting work.
Longer “shelf life.” A bag of cut greens lasts 5–7 days. A living tote lasts 4–8 weeks on a customer’s windowsill. That longevity justifies the premium price and reduces the urgency pressure on your growing schedule.
Natural recurring sales. When the tote is done, the customer needs a new one. This creates an organic repeat purchase cycle without any marketing effort.
This is the exact model the Indoor Mini Farm System is built around — growing living plants efficiently and building a neighborhood customer base that generates consistent recurring income.
Best Greens to Grow for Profit
Green
Days to Harvest
Sell Price Per Tote
Notes
Butterhead lettuce
35–45
$30–$45
Classic, broad appeal. Most popular seller.
Romaine
35–45
$30–$45
Familiar variety. Very productive per tote.
Mixed leaf lettuce
30–40
$30–$50
Visual variety appeals to customers.
Kale
50–60 (then ongoing)
$35–$50
Superfood appeal. Cut-and-come-again longevity.
Spinach
40–50
$30–$45
Very popular. Prefers cooler temperatures.
Arugula
30–40
$35–$55
Premium positioning. Less common, commands higher price.
Watercress
20–30
$35–$55
Fastest growing. Rarely available fresh locally.
Swiss chard (rainbow)
50–60
$35–$50
Visual appeal. Cut-and-come-again longevity.
Start with butterhead or romaine lettuce — they’re fast, reliable, and have the broadest customer appeal. Once you have a steady flow of lettuce customers, add kale or arugula as premium options for health-conscious buyers.
No pump required. No pump means no electricity cost beyond the grow light, no equipment maintenance, no noise.
Self-contained totes. Each tote is a complete, portable unit. When you sell a tote, you hand the customer the entire self-contained system — the plant, the growing medium, and the remaining nutrient solution. The customer doesn’t need to do anything except put it in a light.
Minimal maintenance. Check pH and water level every 3–4 days. That’s genuinely all the active maintenance required during a grow cycle.
Scales simply. Add more totes as demand grows. No additional infrastructure beyond shelf space and grow lights.
The full setup — shelving unit, LED grow lights, totes, net pots, nutrients, and pH kit — runs $150–$250 for a system that produces 2–3 totes per week. That’s the complete capital investment for a production system generating $240–$450 per month at market prices.
The time to produce and sell 4 totes per week — planting, monitoring, and delivery — is approximately 2–3 hours. That’s an effective hourly rate of $170–$225 per hour of work. These are genuinely exceptional economics for a home-based operation.
The limiting factor isn’t usually production capacity — it’s customer demand. Building from 2 totes/week to 8 requires finding and maintaining 8–10 recurring customers. That process takes a few months of consistent effort but compounds: happy customers refer neighbors, and each referral adds to a growing passive income stream.
How to Find Buyers
Start With Your Immediate Network
Your first customers are almost certainly people you already know. Tell your neighbors what you’re doing. Bring a tote to a neighbor’s door and offer it at a discount for their first try. Word of mouth from one enthusiastic customer is worth more than any marketing you’ll do.
Nextdoor and Neighborhood Facebook Groups
A simple post — “I’m a local grower producing organic living lettuce totes ready to harvest from your windowsill — $35, I deliver within [X] miles” — reaches hundreds of nearby households instantly. A photo of a lush, ready-to-harvest tote does the selling. This is the most effective single marketing channel for a neighborhood selling operation.
Local Facebook Marketplace
List your totes as a local pickup or delivery item. Consistent presence in local food groups builds name recognition over time. Respond promptly to inquiries — speed of response is one of the biggest factors in whether a marketplace inquiry converts to a sale.
Farmers Markets
A living lettuce tote display at a farmers market is genuinely unusual — most vendors sell cut produce. The novelty draws attention and creates conversations that lead to sales. More importantly, every market customer who buys a tote is a potential weekly neighbor customer. Follow up with a card that includes your contact info and encourage them to reach out directly for future orders.
Local Restaurants and Cafes
Restaurants that focus on fresh, local ingredients are worth approaching — especially for specialty greens like arugula, watercress, and herb varieties they struggle to source fresh. A consistent weekly supply is more valuable to a restaurant buyer than occasional availability. Pricing for restaurant sales is typically below direct consumer pricing but the volume and reliability offset the lower margin.
Scaling Up
Once your initial customer base is established and you’re consistently selling your current production, scaling is a matter of adding shelf capacity and grow lights — the same infrastructure, more of it.
A second shelving unit doubles production with no additional customer acquisition cost if your existing customers have referred others. The marginal cost of additional capacity is low; the marginal revenue from existing customers at higher production is high.
At larger scale — 20+ totes per week — you’ll want to think about production scheduling more systematically: staggering plantings so you have 3–4 totes ready every week rather than 20 all at once, optimizing your nutrient mixing routine, and possibly adding a subscription model so customers pre-commit to regular deliveries.
The full system for building from first customer to a consistent weekly production and selling operation is exactly what the Indoor Mini Farm System walks through — from growing setup through customer acquisition and the subscription model that makes it genuinely passive income.
Frequently Asked Questions
Is growing greens for profit realistic from a home?
Yes — it’s one of the most realistic small-scale agricultural income models available. The economics are straightforward: low production cost, high retail value, short production cycle, and year-round demand. The living plant model specifically is well-suited to home growing because it eliminates the labor-intensive harvesting and packaging steps that make cut produce sales less efficient at small scale.
How much can you make growing lettuce at home?
A home operation selling 4 living lettuce totes per week at $35–$45 each generates $560–$720 per month in revenue with production costs under $50/month. At 2–3 hours of work per week, that represents an effective hourly rate of $150–$225. Scaling to 8 totes per week at the same pricing generates $1,100–$1,400 per month from a spare bedroom shelf system.
What greens are most profitable to grow?
Butterhead and romaine lettuce sell most consistently due to broad customer appeal and fast production cycles. Arugula and watercress command premium prices ($35–$55 per tote) due to their specialty positioning and limited local availability. Kale totes have strong appeal to health-conscious buyers and last longer than lettuce, justifying their price point. Starting with lettuce and adding specialty greens as your customer base grows is the optimal progression.
Do I need a license to sell home-grown greens?
In most states, selling fresh produce and living plants directly to consumers requires no license at small scale. See the guide to selling produce from home legally for a full breakdown of what’s required in your state and situation.
Growing greens for profit is one of the most accessible home-based income streams available — fast to start, inexpensive to set up, and genuinely excellent economics per hour of work. The Indoor Mini Farm System is the complete guide to building the production and selling system that makes it work consistently.
Selling Herbs From Your Garden: The Complete Home Grower’s Guide
Herbs are the sleeper crop of home-based income growing. A bunch of fresh basil at the grocery store costs $3–$5 and wilts in four days. A cilantro plant costs the same and lasts a week if you’re lucky. The grocery store model for fresh herbs is genuinely bad — expensive, wasteful, and rarely what you actually want when you reach for it.
That structural problem in how herbs are sold is your opportunity. You can grow fresh herbs continuously at home — indoors, year-round — and sell them to neighbors who are tired of paying high prices for something that goes bad before they use it. The demand is reliable, the margins are excellent, and the growing is simple.
This guide covers exactly which herbs sell best, how to grow them productively at home, how to price and sell them, and how to build a reliable herb income stream alongside other growing activities.
Fresh herbs have a combination of characteristics that make them unusually well-suited to home growing for income:
High value per ounce. Fresh herbs are among the most expensive produce items by weight in any grocery store. Basil runs $25–$40 per pound retail. That’s a meaningful margin for a home grower producing it for cents per ounce.
Perishable — the best kind of product to sell. Herbs wilt and lose flavor quickly. Customers who want fresh herbs need them regularly, which creates reliable recurring sales that don’t need to be resold each time.
Continuous harvest. Unlike tomatoes or cucumbers that produce in a defined window, herbs like basil, mint, and chives produce continuously when harvested regularly. One plant can provide months of product.
Indoor-friendly. Herbs grow exceptionally well under LED grow lights, making them a year-round crop for indoor growers regardless of season or climate.
Broad appeal. Every household uses herbs. The market isn’t niche — it’s everyone who cooks.
Best Herbs to Sell (and What They Earn)
Herb
Retail Price (grocery)
Living Plant Sale Price
Cut Bunch Price
Notes
Basil
$3–$5/bunch
$8–$15/plant
$3–$5/bunch
Best seller. Grows explosively under lights. Year-round indoors.
Cilantro
$2–$4/bunch
$6–$10/plant
$2–$4/bunch
High demand. Bolts in heat — ideal for indoor growing.
Fast, reliable, cut-and-come-again. Very low maintenance.
Parsley
$2–$4/bunch
$6–$10/plant
$2–$4/bunch
Both flat-leaf and curly sell well. Good fill-in crop.
Dill
$2–$4/bunch
$6–$10/plant
$2–$4/bunch
Seasonal in many areas; indoor growing makes it year-round.
Thai basil
$4–$6/bunch
$10–$16/plant
$4–$6/bunch
Specialty positioning. Popular with Asian food lovers and restaurants.
Lemon balm
$4–$7/bunch
$8–$14/plant
$4–$6/bunch
Less common, premium price. Herbal tea and cocktail market.
Shiso (perilla)
$5–$8/bunch
$10–$18/plant
$5–$8/bunch
Specialty herb, excellent restaurant market. Hard to find locally.
Start with basil, cilantro, and mint — the three herbs that have the widest customer appeal, grow fastest, and sell most consistently. Add specialty herbs like Thai basil and shiso once you have an established customer base that includes restaurant buyers.
Growing Herbs for Sale: Indoor vs. Outdoor
Indoor Hydroponic Growing (Recommended)
Growing herbs hydroponically indoors under LED grow lights is the most reliable approach for year-round production. The Kratky passive method works extremely well for most herbs — no pump, minimal maintenance, consistent production.
Key advantages of indoor herb growing for selling:
Faster growth under optimal conditions than outdoor soil growing
Ability to produce herbs like cilantro and dill year-round that bolt quickly outdoors in warm weather
Herbs that grow especially well hydroponically: basil (grows explosively — needs frequent harvesting to stay productive), cilantro, mint, chives, dill, and watercress. The complete crop guide covers the best herbs for hydroponic growing in more detail.
Outdoor Growing (Seasonal Supplement)
Outdoor herb growing is excellent as a seasonal supplement to an indoor operation. Perennial herbs — thyme, oregano, sage, chives, mint — establish themselves outdoors and require almost zero maintenance once planted. They provide consistent product through the outdoor growing season and can be propagated to expand your indoor collection through the winter.
Basil grown outdoors in full sun during summer is faster and more productive than indoor growing, though it’s vulnerable to the first frost. Use outdoor production to supplement your indoor system during peak summer months.
Selling Living Plants vs. Cut Bunches
You have two basic options for how to sell herbs: as cut bunches or as living plants. Both have a place in a well-rounded herb selling operation.
Living Herb Plants
A living basil plant in a pot sells for $8–$15 — significantly more than a cut bunch at $3–$5. The customer gets weeks of fresh basil rather than a bunch that wilts in days. They’re happy to pay more because the value is obvious and ongoing.
For an indoor hydroponic operation, selling living herbs in small net pots or transplanted into soil containers is the most natural model. Customers take the plant home, harvest from it, and come back for another when it’s spent. The repeat purchase cycle is built into the product.
Cut Bunches
Cut herb bundles are the right product for farmers markets, where customers want something to take home and use today. Bundles of 3–5 stems wrapped with a rubber band or twist tie, priced at $3–$5 each, sell quickly at market booths. Mix variety bundles (basil + chives + parsley) are popular because they replicate the fresh herb variety most recipes call for.
The best strategy: sell living plants direct-to-neighbor for recurring income, and sell cut bunches at farmers markets to reach new customers who then become living plant customers over time.
How to Price Your Herbs
Price living plants at 2–3x the retail grocery price for a single bunch — you’re selling something that lasts much longer and delivers much more value. A $4 grocery bunch of basil wilts in 4 days. An $12 living basil plant harvests for 4–6 weeks. The value proposition is clear and the price is justified.
For cut bunches, price at grocery store specialty shop levels — not discount grocery levels. You’re providing something local, fresh, and often organic; price accordingly.
Living herb plant (single): $8–$15
Living herb trio (3 complementary herbs in one pot or tray): $20–$30
Cut bunch (single herb): $3–$5
Mixed herb bundle (3 herb varieties): $6–$10
Specialty herb (Thai basil, shiso, lemon balm): 25–50% premium over standard pricing
Where to Sell Your Herbs
Neighbors (Best Starting Point)
Direct neighbor sales through Nextdoor and neighborhood Facebook groups build the most valuable customer relationships. A neighbor who buys a basil plant from you every month is low-effort recurring income. Start there, build your base, and add other channels once the neighbor operation is running smoothly.
Farmers Markets
Herb displays are among the most visually compelling at any farmers market — fragrant, colorful, and immediately appealing. A well-arranged herb booth draws customers who wouldn’t have stopped for produce. Cut bunches and living pots both sell well. The farmers market guide covers booth setup and selling strategy in detail.
Restaurants and Cafes
Restaurants are excellent buyers for specialty herbs they struggle to source locally — Thai basil, fresh dill, shiso, lemon balm, and microherb garnishes. Approach restaurants with a sample of what you grow and a simple weekly availability and pricing sheet. Restaurant buyers pay wholesale prices (typically 40–60% of retail) but order consistently and in quantity, making them efficient to supply.
Local Grocery Stores and Co-ops
Smaller independent grocery stores and food co-ops often source from local growers where the large chains won’t. Approach the produce manager with samples. Expect to supply on consignment initially (you’re paid for what sells) or at wholesale pricing. This channel requires consistent, reliable supply and is better suited to an established operation than a startup.
Value-Added Herb Products
Extending fresh herbs into preserved products dramatically increases margin and shelf life. Where cottage food laws permit:
Dried herb blends — Herbes de Provence, Italian seasoning, chimichurri blend, za’atar. $8–$14 per small jar. Very long shelf life. Excellent gift market.
Herb-infused oils — Garlic-herb olive oil, basil oil, rosemary oil. $10–$16 per bottle. Popular at farmers markets and as gifts. Check your state’s cottage food law — infused oils sometimes have specific requirements.
Herb-infused vinegars — Tarragon vinegar, basil vinegar, herb blends. Lower regulatory complexity than oils. $8–$12 per bottle.
Herb salts — Blend dried herbs with flaky sea salt. Incredibly easy to make. $8–$14 per jar. One of the highest-margin value-added products available from a herb garden.
Fresh herb tea blends — Mint, lemon balm, chamomile, and other herbal tea herbs dried and blended. $6–$12 per tin. Strong market among tea drinkers.
Value-added herb products work best as a complement to fresh herb sales — they extend your seasonal outdoor production into a year-round product line and give you something to sell at holiday markets when fresh produce isn’t available.
For the complete model of building a home-based growing income from scratch — starting with herbs and lettuce and building into a consistent monthly income — the Indoor Mini Farm System covers everything from setup through to a stable customer base.
Frequently Asked Questions
What herbs are most profitable to grow and sell?
Basil consistently tops the profitability list for home herb growers — it grows fast, harvests continuously, sells at a premium as a living plant, and has universal demand. Specialty herbs like Thai basil, shiso, and lemon balm command higher per-unit prices due to their limited local availability. For cut bunches at farmers markets, cilantro and mixed herb bundles are reliable high-volume sellers.
Can you make money selling herbs from a home garden?
Yes — it’s one of the more accessible home-based produce income streams precisely because herbs are expensive to buy, perishable, and used by virtually everyone. A small indoor herb operation selling living plants to neighbors and cut bunches at a farmers market can generate $200–$600 per month from a single shelving unit with minimal time investment.
Do I need a license to sell herbs from my garden?
For fresh herbs and living plants sold directly to consumers, most states require no license at small scale. Processed herb products — dried blends, infused oils, herb salts — fall under cottage food laws that vary by state. See the guide to selling produce from home legally for the full breakdown.
What is the fastest herb to grow for profit?
Basil and cilantro are both ready for first harvest in 28–35 days from transplant under good growing conditions. Chives are even faster — 20–25 days for established plants to regrow after cutting. For a home hydroponic operation, basil is generally the fastest path to sellable product with the highest per-unit return.
Herbs are one of the highest-margin crops a home grower can sell — high value, continuous harvest, year-round demand. Start with basil, cilantro, and mint, build a small neighbor customer base, and expand from there. If you’re building the indoor growing system that makes it year-round, the Indoor Mini Farm System is the complete guide.
Homestead Business Plan: A Practical Framework for Small-Scale Income
A homestead business plan sounds formal. It doesn’t have to be. What it needs to do is answer four questions: What will you sell? Who will buy it? What does it cost to produce? And what will you realistically earn?
This guide walks you through building a practical homestead business plan — not a 40-page document for a bank loan, but the kind of working plan that helps you make smart decisions about what to grow, what to sell, and how to build toward actual profit rather than busy activity that doesn’t move the needle.
The most important decision in a homestead business plan is what you’re selling. Not what you enjoy growing — what customers will pay for reliably. These overlap more than you might think, but the starting point is the customer, not your preferences.
The homestead products with the most consistent demand at small scale:
Living lettuce and herb plants (indoor hydroponic, year-round)
Choose one primary product to start. It should be something you can produce reliably, that has clear local demand, and that you can sell at a price that makes economic sense. For most beginners, living plants or fresh herbs from an indoor hydroponic system is the lowest-friction starting point — fast to set up, fast to first sale, and year-round.
The homestead income ideas guide covers each product category with honest economics, which is worth reading before finalizing your product choice.
Step 2: Know Your Market
Your market is the people who will actually buy from you. For a small homestead, that’s almost always local — neighbors, farmers market customers, local restaurants. National or regional e-commerce is possible for shelf-stable products but adds complexity that’s worth avoiding at the start.
Market Research Questions
Who is your ideal customer? Health-conscious families? Busy professionals who cook? Restaurant chefs? The answer shapes everything from what you grow to how you communicate about it.
How many potential customers are within reach? A neighborhood of 200 households where you can reach 10–15 regular customers is a viable market. A rural road with 12 houses may not be.
What are they currently buying? Check local farmers market vendor variety, specialty grocery store pricing, and neighborhood social media to understand what’s available and what people are looking for.
Is there a gap you can fill? A local market well-supplied with cut produce but no living plants. A neighborhood with no local herb source. A restaurant cluster with no reliable fresh herb supplier. Gaps create easier market entry.
Simple Market Test Before Committing
Before investing in production infrastructure, test demand. Post on Nextdoor: “I’m considering growing locally and selling direct — would anyone be interested?” Responses tell you more than any formal market research. If 10 neighbors express interest, you have a market. If none do, you need to reconsider your product or channel.
Step 3: Map Your Cost Structure
Costs break into two categories: fixed costs (one-time setup expenses) and variable costs (ongoing per-unit production costs).
Understanding your cost structure tells you your break-even point and minimum viable price. In this example, you need to sell each tote for more than $2.80 to profit — which at a $35 selling price gives you a margin of $32.20 per unit. That’s an exceptional margin; most homestead products won’t look quite this good, but most should still pencil out clearly.
Step 4: Set Your Pricing
Price based on value to the customer and comparable market prices — not on your cost of production. Your cost structure tells you the minimum; market research tells you the ceiling; your pricing should be somewhere in between, on the higher end.
Rules for homestead pricing:
Never price below your full cost of production including your time
Match or exceed specialty/local grocery pricing, not commodity pricing
Price living plants at 2–3x the retail price of the equivalent harvested product — the ongoing value justifies the premium
Offer a subscription discount (10–15%) to incentivize recurring orders without dramatically reducing margin
Start higher than you think — it’s easy to discount, hard to raise prices
Step 5: Build Your Income Projections
Realistic income projections require three numbers: your average sale price, your weekly unit volume, and your operating weeks per year. For a year-round indoor operation, that’s 52 weeks. For a seasonal outdoor operation, it might be 20–28 weeks.
Scenario
Units/Week
Price
Weekly Revenue
Annual Revenue
Annual Costs
Annual Profit
Conservative start
2 totes
$35
$70
$3,640
$500
$3,140
Established (6 months)
5 totes
$38
$190
$9,880
$900
$8,980
Scaled (12+ months)
10 totes
$40
$400
$20,800
$1,500
$19,300
These projections assume year-round indoor production. Outdoor-only operations should calculate based on their actual growing season length. The indoor growing advantage — no seasonal downtime — is significant in annual income calculations.
Step 6: Calculate Startup Capital Needed
Add your fixed costs plus 2–3 months of variable costs and operating expenses before you expect revenue. This is your startup capital requirement. For most small homestead operations, this is $300–$1,000 — within range for most people without external financing.
If your startup capital requirement exceeds what you have available, start smaller. A $150 single-shelf setup generating $70/week is a real business that funds its own expansion. You don’t need to be fully scaled from day one.
Step 7: Plan Your Operations
An operations plan answers: what does a typical week look like? When do you plant? When do you sell? How do you handle delivery? What happens if you go on vacation?
For a small indoor growing operation, the weekly operations plan is simple:
Monday: Check pH on all totes, assess which are ready to sell this week
Tuesday/Wednesday: Customer communication, schedule pickups or deliveries
Thursday: Plant replacement totes for any sold this week
Weekend: Deliver or arrange pickup for ready totes
Total time: 45–90 minutes per week. That’s sustainable alongside any other commitments — which is why this model works for most people.
Step 8: Legal and Regulatory Considerations
Before your first sale, understand the legal requirements for your specific product and state. For fresh produce and living plants sold directly to consumers:
License requirements: Typically none for direct produce sales at small scale in most states
Business structure: Selling as a sole proprietor under your own name is the simplest starting point. An LLC provides liability protection as your business grows — consult a local attorney if you’re scaling significantly.
Taxes: Report income on Schedule C or Schedule F. Keep records of income and deductible expenses (seeds, nutrients, equipment) from day one.
Zoning: Most residential zones permit home-based agricultural sales; check local ordinances if you’re in an HOA or have deed restrictions.
Legal: Sole proprietor, direct produce sales (no license required in [state]), income reported on Schedule F
That’s a working business plan. It’s not a formal document — it’s a decision-making tool. Review it monthly in the first year and update as you learn what’s actually working.
For the complete production system this plan is built around, the Indoor Mini Farm System covers everything from setup through to a stable, recurring customer base.
Frequently Asked Questions
Do I need a business plan to start a homestead business?
Not a formal one. But answering the core questions — what you’ll sell, who will buy it, what it costs, and what you’ll charge — before you invest in equipment saves significant time and money. Even a one-page plan clarifies your thinking and helps you make better decisions as you go.
How do I start a small homestead business with no money?
Start with the lowest-cost viable product. A single Kratky jar for herbs costs $10–$15 to set up and can generate your first sales within 30 days — which then funds the next tote. A spring seedling sale requires only seed trays and seeds, which cost under $20, and can generate hundreds of dollars in a single weekend. Scale from whatever you can fund yourself before investing in more infrastructure.
Is a homestead a business for tax purposes?
If you’re generating income from homestead activities, yes — you have a business for tax purposes. Report income on Schedule C (business) or Schedule F (farm). Your production expenses are deductible, which significantly reduces your taxable income. Consult a tax professional as your income grows, but keeping a simple income and expense spreadsheet from the start makes tax time straightforward.
A homestead business plan doesn’t need to be complicated — it needs to be honest. Know your costs, know your market, price accordingly, and start small enough to learn without significant financial risk. If you’re ready to build the production system the plan runs on, the Indoor Mini Farm System is the complete guide.
CSA Business Plan: How to Start a Small Homestead Subscription
A CSA — Community Supported Agriculture — is one of the most elegant small farm business models ever devised. Customers pay you at the beginning of the season before you’ve planted anything. You get working capital when you need it most. They get a season of fresh, local food and a direct connection to where it comes from.
For a small homestead or backyard grower, the traditional CSA model needs some adaptation — you’re not a farm with a certified commercial kitchen or a dedicated delivery vehicle. But the core principle translates perfectly, and in some ways the small-scale version works better than the large one.
This guide covers how to set up a simple, profitable CSA or subscription model from a small homestead — what to grow, how to structure shares, what to charge, and how to find your first members.
In a traditional CSA, customers (“members” or “shareholders”) pay upfront at the start of the season — typically $400–$800 for a full season — in exchange for a weekly box of produce throughout the growing season. The customer shares in the farm’s harvest: good weeks bring abundance, difficult growing weeks might bring less.
The genius of the model for growers is cash flow: you collect payment in March or April, when you need money for seeds and supplies, and deliver product from June through October. You’re not chasing invoices or worrying about weekly sales. The money is already there.
For members, the appeal is access to genuinely fresh local food and a direct relationship with who grows it. Many CSA members will tell you the CSA box changed how they cook — forced to use whatever the farm produced, they discovered vegetables they’d never tried and became more adventurous in the kitchen.
Adapting the CSA Model for a Small Homestead
A traditional full-season CSA requires significant production volume — you’re feeding 20–100 families every week for 20+ weeks. That’s a commercial farming operation, not something most backyard homesteaders can deliver.
But the CSA model scales down beautifully. A micro-CSA — 5–15 members, a focused product selection, neighborhood-scale distribution — is achievable from a backyard garden plus an indoor growing system. The adaptation looks like this:
Fewer members: 5–15 is manageable for one person; 20+ requires significant time commitment
Focused product: Rather than 10–15 different vegetables per week, offer 3–5 consistent items you produce reliably
Smaller shares: $25–$50 per week rather than the $20–$40 from large CSAs (small-scale premium pricing)
Shorter season or year-round: Outdoor CSAs are seasonal; adding indoor growing extends to year-round delivery
Neighborhood distribution: No truck or delivery route needed when all your members live within a mile
Subscription Model vs. Traditional CSA: Which Is Better for You?
For most small homesteaders, a subscription model works better than a traditional CSA. Here’s the difference:
Traditional CSA
Subscription Model
Payment timing
Full season upfront
Monthly or per-delivery
Member commitment
Full season
Monthly, cancel anytime
Grower risk
Low (cash collected upfront)
Higher (ongoing collection)
Member acquisition
Harder (large upfront ask)
Easier (lower commitment)
Flexibility
Low
High
Year-round viability
Seasonal for most growers
Year-round with indoor growing
A monthly subscription — “I’ll deliver one living lettuce tote and a fresh herb plant to your door once a month for $55” — is easier to sell than a $600 season commitment, runs year-round with an indoor system, and builds the same recurring relationship. For a small homestead, this is usually the better model.
What to Grow for a CSA
The key to a small homestead CSA is reliability. You’re promising your members a consistent delivery. That means growing crops you can produce predictably every week, not crops that might or might not produce depending on weather or pests.
Most reliable for a small CSA:
Indoor hydroponic greens — Lettuce, kale, spinach, arugula. Completely weather-independent, 30–45 day production cycle, consistent quality every week of the year.
Fresh herbs — Basil, cilantro, mint, chives. High perceived value, continuous harvest from established plants, year-round indoors.
Cherry tomatoes — Reliable producers through a long summer season. Freeze the surplus for winter share additions.
Cucumbers — Prolific summer producers. Consistent enough for weekly shares during the outdoor season.
Specialty garlic — One large annual harvest that stores for months — include in fall and winter shares.
Avoid in a CSA until you’re experienced: Crops with highly variable yields (melons, peppers in marginal climates), crops prone to pest damage that could wipe out a week’s supply, and anything you haven’t grown successfully for at least one full season.
How to Structure Your Shares
A simple share structure works better than a complex one. Here are three models that work for small homesteads:
The Salad Subscription
Monthly delivery of one living lettuce tote + two herb plants. $45–$60/month. Year-round with indoor growing. Low production complexity — you’re delivering the same product consistently, making planning simple. This is the most scalable model for an indoor grower.
The Seasonal Produce Box
Weekly or bi-weekly box during the outdoor growing season (typically 16–24 weeks). Contents vary with what’s ready to harvest: greens, herbs, tomatoes, cucumbers, beans. $25–$45 per box. Classic CSA format. Requires more production variety but gives members more variety per delivery.
The Hybrid Year-Round
Year-round subscription with indoor greens and herbs as the consistent base, supplemented by outdoor produce during the growing season. Members receive indoor-grown items year-round plus the bonus of seasonal outdoor produce in summer and fall. $35–$55/month. The most comprehensive model — requires both indoor and outdoor growing infrastructure.
How to Price Your CSA Shares
Start with your production costs and work outward:
Calculate what each weekly or monthly delivery costs to produce (seeds, nutrients, electricity, growing medium)
Add your time at a fair hourly rate (minimum $20/hour for growing and delivery)
Add packaging and delivery costs
Apply a 3–5x markup on production costs, aiming for retail value of the produce included
Compare to what the same products would cost retail — your CSA price should be competitive with specialty grocery pricing, not discount pricing
A monthly salad subscription delivering one living lettuce tote ($35–$45 retail value) and two herb plants ($8–$12 retail value each) has a total retail equivalent of $51–$69. Pricing the subscription at $50–$60/month is fair, offers slight savings versus retail, and leaves you with good margins. Members who understand the value will find this reasonable — you’re delivering convenience, freshness, and a relationship, not just produce.
Finding Your First Members
Your first CSA members are almost certainly people you already know. Here’s the sequence that works:
Start with a test delivery. Give a sample box to 2–3 neighbors. Let the product sell itself. Follow up a week later and ask if they’d like to sign up for a monthly subscription.
Post on Nextdoor. “Starting a neighborhood CSA — local organic greens and herbs delivered monthly. Limited spots available.” The scarcity framing (limited spots) is accurate — you can only serve a finite number of members — and creates appropriate urgency.
Ask for referrals. Your first satisfied member is your best marketing. “Do you have any friends who might be interested in the same delivery?” often yields your next 2–3 members from a single conversation.
Local Facebook groups. Neighborhood food and buying groups, local parenting groups, and health-focused community groups are all good places to announce a neighborhood CSA.
Build a waiting list. Once you have more interested people than production capacity, create a waiting list. This creates social proof and gives you a pipeline for growth.
Running Your CSA Week to Week
The operational simplicity of a small CSA is one of its main advantages. For a 10-member monthly subscription:
Production: Plant totes on a rolling schedule so 10 are ready to sell at the same time each month. This takes planning upfront but becomes routine after the first cycle.
Communication: Send a simple message to members the week of delivery — what’s in their share, when to expect it. This takes 15 minutes.
Delivery or pickup: Neighborhood delivery takes 1–2 hours for 10 members. Pickup at your home takes zero additional time. Many small CSAs offer both options.
Billing: Monthly auto-pay via Venmo, PayPal, or Stripe makes collection effortless. Set it up once and it runs automatically.
The Indoor Growing Advantage for CSAs
The biggest limitation of a traditional CSA is seasonality — you’re delivering produce for 20 weeks, not 52. Members cancel in October and you start over in April with a new membership round.
An indoor hydroponic growing system changes this entirely. Lettuce, herbs, kale, and spinach grown indoors under grow lights produce just as well in December as in June. Your CSA runs 12 months a year. Members stay subscribed through winter. Your income doesn’t stop in October.
For a small homestead CSA, combining outdoor summer production with indoor year-round greens production is the model that delivers the best member experience and the most consistent grower income. The Indoor Mini Farm System is the complete guide to the indoor production side of that equation — from setup through to running a consistent weekly supply for CSA members.
Frequently Asked Questions
How many members do I need for a CSA to be profitable?
For a small homestead operation, 5–10 members is a viable and manageable starting point. At $45–$60/month per member, 10 members generates $450–$600/month in recurring revenue. That’s meaningful supplemental income from a manageable production volume. Scale to 15–20 members as your growing infrastructure expands.
How do I start a small CSA from home?
Define your product, set your price, find your first 3–5 members through your personal network, deliver consistently, and ask for referrals. Start with a subscription model (monthly payment) rather than a full upfront seasonal commitment — it’s easier to sell and builds the same recurring relationship. Grow your member base as your production capacity allows.
What’s the difference between a CSA and a subscription box?
A traditional CSA collects full payment upfront at the beginning of the season and delivers weekly for a fixed number of weeks. A subscription model collects monthly and is easier to cancel — lower commitment for members, slightly less cash flow security for the grower. For small homestead operations, the subscription model is usually easier to sell and more flexible to manage.
What should I include in a CSA share?
Prioritize crops you can produce reliably every week over variety for its own sake. A weekly share of living lettuce tote + two herb plants + whatever outdoor produce is ready is simpler and more consistent than trying to include 8–10 different items. Members value freshness and reliability over variety — focus on delivering both.
A small homestead CSA or subscription model is one of the most satisfying income streams available — you’re building real relationships with people who value what you grow. Start with a handful of neighbors, deliver consistently, and let the model grow through word of mouth. If you’re building the indoor production system that makes year-round delivery possible, the Indoor Mini Farm System is the complete guide.
Turn $5 of Seeds Into $200 a Month With a Kitchen Table Mini Farm
Revealed: How to grow real food in a tiny space, without pumps, grow lights, or complicated gear. Just set up a tote, follow a simple system, and let it quietly produce for you.
If grocery prices and “what now?” headlines have you on edge, you’re not crazy.
Most people feel stuck between:
Paying whatever the store decides to charge
Trying a huge garden they don’t have time or space for
Or pretending everything’s fine while the bill keeps climbing
You don’t need land. You don’t need a grow tent. You don’t need a science lab in your living room.
You need a dead-simple system that turns cheap plastic totes and a few dollars of seeds into a steady stream of fresh greens… right on your kitchen table.
It’s how I turn about $5 of seeds into $200+ a month in food value and side income.
Get Indoor Mini Farm Tips
Every few weeks you’ll get simple indoor growing tips (apartment-friendly), reader success stories, and easy tips to level up.
You can unsubscribe at anytime.
The moment I stopped letting the grocery store push me around
There was a week where every price in the produce aisle seemed to jump.
Same tired bag of greens. Higher price. Shorter date. Worse quality.
I remember standing there thinking,
“Why am I paying more and trusting this less?”
The “solutions” everyone talks about didn’t fit:
At the time, I didn’t own land for a big garden
I didn’t want to spend thousands on fancy hydroponic rigs
I wasn’t interested in a noisy, high-maintenance setup I’d end up resenting
So I started asking a different question:
“What’s the simplest way to grow a lot of greens indoors, in a small space, with almost no moving parts?” One effective method is to utilize indoor gardening techniques for beginners, such as using containers or vertical gardening systems. These approaches maximize space and allow for easy access to sunlight or grow lights. Additionally, choosing fast-growing greens like lettuce or herbs can yield a bountiful harvest with minimal effort. For those interested in expanding their indoor gardening efforts, learning how to start a hydroponic business can be a lucrative step. Hydroponics allows for even more efficient space utilization and faster growth rates, as plants can thrive in nutrient-rich water without soil. With the right setup and some basic knowledge, you can turn your small indoor garden into a profitable venture.
After a lot of ugly experiments, failures, and “well, that didn’t work,” I landed on something that shouldn’t have worked this well:
A low, cheap shoebox tote. Water. A few smart tweaks. Seeds.
When it clicked, it clicked hard.
The tote filled with thick, bright greens. The roots stayed clean. The water didn’t stink. The whole thing lived quietly on my table.
Forget the influencer setups with 20 shelves and 15 power strips.
Here’s what we’re doing instead:
You grab a low, wide storage tote
You turn it into a pump-free hydroponic bed
You add water + basic nutrients
You plant a tight mix of greens that love this exact setup
The roots drink what they need while the system just sits there and does its job
There’s:
No pump to burn out
No air stones to scrub
No timers to fight with
No bubbling keeping you up at night
From across the room, it looks like a normal bin on your table or windowsill. Up close, it’s a dense, living “field” of food.
You can:
Cut salads several times a week for your own kitchen
Sell “living salad totes” to neighbors and friends
Or do both, depending on what you need that month
All from a system that costs less than a typical grocery run to get started.
Why most indoor garden attempts fail (and this doesn’t)
Most people who try growing food indoors end up quitting for the same three reasons:
It’s too complicated They buy the full kit: pumps, hoses, apps, proprietary pods. Fun for a week. Then one piece cracks, clogs, or disconnects and the whole thing dies.
It’s too fragile The setup needs perfect light, perfect timing, perfect water levels. Life gets busy. Something slips. Plants melt.
It’s too expensive The gear costs more than the food it can grow. Even when it “works,” it never feels like a win.
The Indoor Mini Farm System was built to kill those problems:
It uses cheap, common supplies you can find at any big-box store
It works without pumps, timers, or electronics
It forgives missed check-ins and small mistakes
It produces enough food to actually matter
I’m not asking you to become a full-time grower. I’m handing you a setup that fits into a normal, busy life.
DIY hydroponics to go from empty tote to first sprouts in about 10 days
Here’s the big picture of how the system runs, without drowning you in details.
Step 1: Set up your tote the smart way You’ll:
Pick the size and shape that gives you the best yield for the space you have
Prep it so light stays out of the water (this matters more than most people think)
Put it in a spot in your home that works with your actual life
Step 2: Mix the water and nutrients You’ll:
Use a simple, proven mix
Skip the chemistry-class nonsense
Avoid the most common “gross water” mistakes before they ever start
Step 3: Plant the right seeds, at the right density You’ll:
Use specific greens that thrive in this setup
Seed them thick so the tote fills in fast
Avoid the sad, patchy “few leaves here and there” result that makes people quit
Step 4: Let the system work You’ll:
Check one or two simple things a few times a week (takes about 30 minutes a week)
Spot early warnings before they turn into problems
Step 5: Harvest and repeat You’ll:
Cut so the greens keep coming back
Stagger a few totes so something’s always ready
Package “living salad totes” if you want to sell them
That’s the engine. Inside the guide, I walk you through every piece with photos, diagrams, and plain instructions you can follow even when you’re tired and done for the day.
Here’s What You Get
Indoor Mini Farm System (PDF)
Every step you need to create your indoor mini farm in just a few hours. From which totes to buy to how high to hang your lights to which seeds to plant first.
(Value $97)
Linked Supply List (PDF)
Instead of opening twenty tabs and guessing, you get a simple list with direct links to exactly what you need. You can be done shopping in minutes.
(Value $22)
Perpetual Planner (PDF)
This is the piece that keeps black thumbs alive. A simple perpetual planner that tells you, week by week, what to do so you never miss a refill or harvest.
(Value $29)
A simple way to keep enough oxygen in the system without any electronics
How often to refresh things so it stays clean
Do I ever rinse roots and swap water? Sure. But it’s quick, and it’s nowhere near a daily chore.
“How much space do I need?”
If you’ve got room for a baking sheet, you’ve got room for a mini farm.
One tote fits on:
A kitchen table
A wide windowsill
A shelf or simple stand
If you can spare that footprint, you can run this.
“What if I kill every plant I touch?”
Then you’re exactly who I had in mind.
This system was built assuming you’ve had plants die on you. The seeds and setup I give you are forgiving. The instructions are clear and direct. The troubleshooting section covers the “uhhh what is that” moments.
You don’t have to be naturally “good with plants.” You just have to follow the steps.
“How much food can I really grow?”
With one tote, once it’s rolling, you can pull several generous salads a week.
With a few totes on a simple rotation, you can:
Cover salad greens for your household
Have extra to share or sell
This isn’t about replacing an entire supermarket. It’s about taking one important category of food mostly into your own hands.
“Can I actually make money with this?”
This is a side income, not a lottery ticket.
But when you know how to:
Grow dense, healthy greens in a tote
Package them as “living salad gardens”
Offer them to people who’d rather buy from a human than a chain store
You can absolutely turn this into steady grocery money or a meaningful little income stream. Inside the system, I walk you through how I approach it.
“What if I’m already exhausted?”
Then you need a system that doesn’t act like another job.
The initial setup takes the most focus. That’s why I give you a clear checklist and walk you through it.
Once it’s running, daily care looks like:
A quick glance
A small top-up
A satisfying snip with scissors when it’s time to harvest
This is built to cooperate with real life, not compete with it.
Or turning your home into a jungle of cables and gadgets
If you’re even a little curious, here’s my suggestion:
Give yourself one tote, one month, and this system. See what happens.
Worst case? You learn a new skill and prove to yourself you can grow real food.
Best case? You’ve got a kitchen table mini farm quietly cutting your grocery bill and giving you options.
Real Readers. Real Mini Farms.
These are everyday readers who started with one tote on a bookshelf
and turned it into fresher food and extra cash.
Paid for itself in 3 weeks
★★★★★
“I was skeptical, but my first harvest more than covered the cost.
Now my kids snack on greens instead of chips.”
I started with one tote next to our kitchen table. Once I saw how
fast everything grew, I added two more and now I’m selling salad plants
to three of my neighbors.
Sara C., Columbus, OH
Grocery bill down, side income up
★★★★★
“This gave me a simple plan I could follow after the kids went to bed.”
I don’t have space for a ‘real’ garden, but the mini farm system
fits on a cheap bookshelf in our hallway. We eat off it every week,
and I sell six totes a month to cover our internet bill.
Jen S., Houston, TX
“Finally something that actually works”
★★★★★
“I’ve tried so many ‘systems’ that overpromised and fizzled out.
This one quietly does what it says.”
I work full time and needed something low-maintenance. I spend maybe
10 minutes twice a week checking water levels and harvesting.
The rest just… grows.
Sam L., Raleigh, NC
Tiny space, real harvests
★★★★★
“We live in an apartment and I honestly didn’t think this would work.”
We’re on the third floor with no balcony. The totes fits next to our
dining table and now my 7-year-old helps me harvest ‘our’ salad
every night. It feels like cheating the grocery store.
Pam D., Boise, ID
About the Author
Tyler Brown runs ProfitableHomesteader.com, a site dedicated to sharing side hustle ideas at home – including how he builds tiny indoor mini farms, growing heirloom greens in plastic totes and selling them to local families.
After years of testing containers, crops, and pricing, he built the Indoor Mini Farm System so regular people could skip the trial-and-error and start growing real food (and side income) on a single shelf.
If you’re ready to set up your own pump-free mini farm and start growing food indoors without wasting money on gadgets, you can get the step-by-step guide here:
2026’s Best Stay At Home Mom Job For Introverts (Hydroponic Mini Farms)
Revealed: how moms are earning money at home during nap time.
Every year, the internet crowns a “Top Stay At Home Mom Job” list.
Customer service. Virtual assistant. Sell custom Stanley tumblers. Start a YouTube channel. Rinse, repeat, new year… same list.
Meanwhile, you’re just trying to keep your kiddos alive, not scream at the grocery store receipt, and maybe—just maybe—have one side hustle from home that doesn’t drain the last 3% of your nervous system.
This is the story of the other option. The nap time side hustle for introverts almost nobody talks about:
Turning cheap storage totes into indoor mini farms and selling them as living salad bars to your neighbors.
The night everything snapped
It was 9:42 pm at the grocery store.
Her cart had:
Milk
Bread
Some fruit for the kids
One bag of salad, because she was trying to be “good”
She watched the numbers climb on the screen and felt that familiar burn behind her eyes.
How is lettuce this expensive? How am I supposed to do this every week?
She got home, put everyone to bed, and did what so many stay at home moms do when the house finally goes quiet:
She opened her phone and typed:
“stay at home mom jobs”
Then:
“work from home jobs for moms”
Then:
“side hustles from home introvert”
Every blog post slapped her with the same list:
Answer calls in a headset.
Do customer support chat.
Become a VA and “hop on Zoom with clients.”
Sell clothes or makeup to your friends.
Start a blog and “just post consistently for a few years.”
She imagined trying to take calls with a toddler screaming and a preschooler asking for snacks every six minutes.
Hard pass.
She didn’t need twenty more things to juggle. She needed something quiet, at home, that could actually make money from home without turning her into the family call center.
The problem with most “stay at home mom jobs” lists
Most “stay at home mom jobs” and “side jobs from home” fall into three flavors of misery:
You might be at home, but you’re still chained to someone else’s clock. You’re praying the kids don’t cough during a call.
2. You’re selling plastic junk to your friends
MLMs and party-based “opportunities” look like side hustles for introverts on paper… but then you’re:
DM’ing everyone you went to high school with.
Hosting “just a casual get-together” that’s actually a sales pitch.
Feeling sick every time you post on Facebook.
Your social life turns into a sales funnel. The money is… okay-ish, if you’re relentless. The emotional cost is brutal.
3. You’re fighting for pennies online
Take surveys. Click ads. Do microwork. Start a blog and hope it pays off in three to five years.
You’re up at midnight doing tasks that pay less than minimum wage while an algorithm decides if you get rent money this month.
Those might technically be online jobs for introverts, but they are not built for exhausted humans with kids and a real life.
You don’t need another hustle that eats nap time and gives you pocket change. You need one simple, high-value side hustle from home that works with your life.
The weird little idea in the corner of the kitchen
The next week, our mom (let’s call her Lauren) took her kids to a friend’s house.
In the corner of the friend’s small kitchen, by the window, was a shallow plastic storage tote bursting with ridiculous, lush green leaves.
“What is that?” Lauren asked.
“Oh,” her friend said, “that’s my mini farm. The kids cut leaves for their sandwiches.”
It wasn’t a full garden. It wasn’t fancy. Just a cheap tote, some kind of growing medium, and a jungle of salad greens.
Then the friend said the sentence that changed everything:
“Three other moms have asked me to make one for their house already.”
Lightbulb.
Not another “work from home job.” Not another affiliate link.
A product. A real, living, useful thing.
A high-value side hustle built on food.
The nap time mini farm side hustle, in plain English
Here’s what this actually is:
You take a shallow storage tote (the kind that costs a couple of dollars).
You set it up as a low tech indoor mini farm—no loud pumps, no giant racks, no sci-fi equipment.
You sow cut-and-come-again salad greens or herbs.
You let the tote quietly turn into a dense, living salad bar on a table, shelf, or windowsill.
You use it to feed your family.
And then you realize you can sell the entire planted tote as a ready-to-harvest indoor mini farm to other families on your street.
Instead of:
“Here’s another plastic thing you don’t need.”
You’re saying:
“Here’s fresh food growing in your kitchen.”
You are not hustling for clicks. You’re growing something tangible.
Why this hits different when the economy is weird
Every time the economy hiccups, three things happen:
Search traffic for “stay at home mom jobs,” “make money from home,” and “side hustles from home” explodes.
Grocery prices quietly climb.
Everyone’s stress hits the ceiling.
People want two things at the same time:
Food that doesn’t feel like a luxury item.
A way to earn that doesn’t require begging, scamming, or burning out.
Your hydroponic mini farms give them both.
They are:
High value – a tote brimming with living greens on a windowsill is worth more than another trinket.
Locally scarce – they can’t grab this at Walmart.
Emotionally calming – it’s food security in a box.
This is not another “join my downline” pitch. It’s a small, recession-aware side job from home built around something that actually matters.
Why this is a real side hustle for introverts
Most “side hustles for introverts” still involve people… just over WiFi.
Client calls. Slack messages. Zoom “quick chats” that never end.
Your mini farm side hustle is different:
You can take orders by text, DM, or a simple form.
You can arrange porch pickups or drop-offs.
You don’t have to be “on” all day. You answer messages when the house is quiet.
The plants do the loudest talking.
Someone sees your tote and says:
“Oh my God, that’s gorgeous. Can you make one for me?”
You don’t pitch. You just say: “Sure, they’re $45. I’ll have one ready next week.”
No scripts. No pressure. Just “yes” or “no.”
This is make money from home on introvert settings: low stimulation, minimal small talk, maximum control.
How this fits into nap time (for real)
Here’s how a week looks when you run this as a stay at home mom job instead of a “someday” hobby.
Nap time block: 15–20 minutes
Kids finally sleep.
You:
Rinse a tote.
Add your growing medium.
Sprinkle seeds in your pattern.
Water. Label. Done.
Take a photo.
Back to dishes, emails, sitting in the hallway scrolling TikTok. Whatever.
After bedtime: 10–15 minutes
You:
Post your photo in a small local group or text thread.
“I’ve got two salad mini farms ready for next week. Living salad bars for your kitchen. They’re $45 each. First come first served.”
Answer a couple of DMs.
Mark down names in a notebook or notes app.
Total “work” time: maybe half an hour on a busy day. The plants handle the rest while you deal with snacks, math homework, and the third episode of the same cartoon.
On chaotic weeks (sickness, teething, school disasters), you simply plant fewer totes. This is flexible by design.
The money math (no hype, just numbers)
Let’s keep it stupid simple.
Tote: grab on sale for a couple of bucks.
Growing medium + seeds: a few dollars per tote once you buy in slightly larger quantities.
Water & basic nutrients: very low ongoing cost.
Your total cost per tote is low. Your perceived value per tote is high:
A full, thriving salad bar or herb garden that lives in someone’s kitchen and keeps producing.
How much do they sell for?
A recent reader survey of people who’ve downloaded the Indoor Mini Farm System showed people are happy to pay $30–$60 per tote for a ready-to-harvest mini farm. Some areas are willing to pay even more, depending on the greens you’re growing.
Even small scale:
2 totes per week at $45 = $360/month.
3 totes per week = $540/month.
Turn up production when you have more energy or demand.
This isn’t the “quit your partner’s job in 30 days” pitch. It’s a real, flexible side hustle from home that pays actual bills.
Real Readers. Real Mini Farms.
These are everyday readers who started with one tote on a bookshelf
and turned it into fresher food and extra cash.
Paid for itself in 3 weeks
★★★★★
“I was skeptical, but my first harvest more than covered the cost.
Now my kids snack on greens instead of chips.”
I started with one tote next to our kitchen table. Once I saw how
fast everything grew, I added two more and now I’m selling salad plants
to three of my neighbors.
Sara C., Columbus, OH
Grocery bill down, side income up
★★★★★
“This gave me a simple plan I could follow after the kids went to bed.”
I don’t have space for a ‘real’ garden, but the mini farm system
fits on a cheap bookshelf in our hallway. We eat off it every week,
and I sell six totes a month to cover our internet bill.
Jen S., Houston, TX
“Finally something that actually works”
★★★★★
“I’ve tried so many ‘systems’ that overpromised and fizzled out.
This one quietly does what it says.”
I work full time and needed something low-maintenance. I spend maybe
10 minutes twice a week checking water levels and harvesting.
The rest just… grows.
Sam L., Raleigh, NC
Tiny space, real harvests
★★★★★
“We live in an apartment and I honestly didn’t think this would work.”
We’re on the third floor with no balcony. The totes fits next to our
dining table and now my 7-year-old helps me harvest ‘our’ salad
every night. It feels like cheating the grocery store.
Pam D., Boise, ID
“Is this really better than a normal work from home job for moms?”
Here’s the honest comparison.
Most work from home jobs for moms are:
Time-boxed: someone else controls your hours.
Noise-boxed: your house has to be quiet on command.
Stress-boxed: your income depends on being constantly reachable.
Your hydoponic mini farm side hustle:
Lets you pick when you work (nap time, bedtime, weekends).
Lets you control how many orders you take each week.
Builds a customer base, not just a resume line.
It’s not for every mom. It’s for the one who reads “online jobs for introverts” lists and still feels a pit in her stomach because even those feel too people-heavy.
It’s for the mom who wants her work to produce something real.
“Hydroponic” sounds complicated… is it?
Fair question.
When people hear “hydroponic,” they picture:
Loud pumps
Bright, glaring lights
Tangled tubes and timers
Hundreds of dollars in equipment
The way we do it?
Think “low tech, indoor-friendly farmer’s bed in a tote.”
Passive water systems instead of loud machinery.
Simple growing medium.
Totes designed for small spaces and rentals.
Options for both window light and modest supplemental lighting if needed.
You don’t need to become a scientist. You need a clear, copy-and-paste setup that someone has already tested in a normal, messy home.
The plug-and-play blueprint: Indoor Mini Farm System
You could piece this together yourself:
17 YouTube videos.
3 Reddit threads.
6 trial-and-error totes.
A few sad crop failures.
Or you can follow a system that was built specifically as:
“A side hustle for introvert moms who want to grow food indoors and sell extra mini farms to neighbors.”
That’s what the Indoor Mini Farm System is.
Here’s What You Get
Indoor Mini Farm System (PDF)
Every step you need to create your indoor mini farm in just a few hours. From which totes to buy to how high to hang your lights to which seeds to plant first.
(Value $97)
Linked Supply List (PDF)
Instead of opening twenty tabs and guessing, you get a simple list with direct links to exactly what you need. You can be done shopping in minutes.
(Value $22)
Perpetual Planner (PDF)
This is the piece that keeps black thumbs alive. A simple perpetual planner that tells you, week by week, what to do so you never miss a refill or harvest.
(Value $29)
You’re not signing up for a big brand’s work from home job. You’re building a tiny, quiet business that lives on your table and your neighbors’ windowsills.
Quick FAQ (because your brain is already firing questions)
“Is this really a good stay at home mom job, or just a cute idea?” It’s a real stay at home mom job if you treat it like one. You’re producing a high-value product people can’t grab at the store, with flexible capacity and honest pricing. You decide how many totes you plant and sell each week.
“I’m extremely introverted. Do I have to talk to people all day?” Nope. Most of your communication can happen via text, DM, or short posts in local groups. Your “sales pitch” is basically: photo of lush mini farm + “I have two available this week, DM if you want one.”
“How much space do I need?” Not much. One tote is roughly the footprint of a baking tray. You can start with a single mini farm on a table or shelf near a window. The Indoor Mini Farm System is designed for renters and small homes, not farmhouse kitchens. With a compact setup, you can enjoy fresh herbs and vegetables right at home. The mini indoor farm benefits include easy access to fresh produce and the satisfaction of growing your own food, all while enhancing your living space. Plus, it’s a fun way to introduce kids to gardening and healthy eating habits. By utilizing the best hydroponic systems for beginners, you can easily cultivate a variety of plants regardless of your experience level. These systems allow for optimal growth conditions, making your indoor gardening journey both successful and enjoyable. As you expand your mini farm, you’ll find endless possibilities for incorporating new plants into your home.
“What if I just want to feed my family and never sell anything?” Then this becomes an extremely efficient indoor food system for you. The same setups that make money as a side hustle from home also keep you in greens in the dead of winter. With a little creativity and dedication, you can cultivate a variety of vegetables and herbs year-round, ensuring your family enjoys fresh, nutritious produce. If you find yourself with surplus greens, it can easily turn into a way to start a hydroponic side hustle, allowing you to share your bounty with friends and neighbors. This not only enhances your family’s meals but can also provide a fun and rewarding hobby that benefits your community.
“What if everything changes next year?” Grocery prices may wobble, remote work trends may flip, algorithms may shift… but people will still need food. A living salad bar on their windowsill will always feel better than another box of stuff.
The quiet revolution in your kitchen
You will still have chaotic mornings. You will still reheat your coffee three times. You will still step on LEGO in the dark.
But in the corner of your kitchen, a shallow plastic tote will be quietly doing something powerful:
Turning cheap supplies into real food.
Turning your nap time into something that pays back.
Turning “I wish I had a way to make money from home” into “I run a mini farm business out of my kitchen.”
Tyler Brown runs ProfitableHomesteader.com, a site dedicated to sharing side hustle ideas at home – including how he builds tiny indoor mini farms, growing heirloom greens in plastic totes and selling them to local families.
After years of testing containers, crops, and pricing, he built the Indoor Mini Farm System so regular people could skip the trial-and-error and start growing real food (and side income) on a single shelf.
If you’re ready to set up your own pump-free mini farm and start growing food indoors without wasting money on gadgets, you can get the step-by-step guide here:
How A “Bookshelf Farm” Helped One Mom Feed Her Kids And Earn An Extra $200/Month
Gwen stared at the grocery receipt like it was a warning label.
The total felt wrong. Higher again. Always higher.
She had done everything “right.” Generic brands. Fewer treats. More “healthy stuff” for the kids because every other article she saw was about ultra processed food and what it does to growing brains.
But the number at the bottom of the receipt didn’t care how hard she tried.
Once home, she did what most of us do when we are stressed and tired. She scrolled.
Another headline about layoffs in her industry.
Another story about contaminated food.
Another think piece about those new weight loss drugs, and how they might not be as safe as she had hoped.
By the time she fell asleep, Gwen had convinced herself of two things:
Things are getting shakier than anyone wants to admit.
Her kids still need real food, every single day, no matter what the government or grocery chains do.
She wanted a backup. Not a bunker. Not a TikTok side hustle where she was shipping plastic trinkets around the world.
Something small, sane, and real.
Something that quietly fed her kids and gave her a little extra money, without turning her life upside down.
The problem was time.
She didn’t have hours to weed a garden or learn a whole new trade. She had two kids, a job that felt like it was on thin ice, and evenings that disappeared into homework, dishes, and “Mom, where are my shoes.”
So she did what most people do.
She worried. Then she tried to forget about it.
Until she saw a photo that stopped her thumb.
A bookshelf. Not filled with books.
Filled with food.
The “Bookshelf Farm” That Shouldn’t Work… But Does
The photo looked almost fake.
Instead of dusty paperbacks, there were rows of shallow storage totes on a sturdy shelf. Each lid had neat little holes, and out of those holes were explosions of green.
Kale. Chard. A few herbs she could not name.
Under each shelf, simple grow lights. Nothing fancy. No complicated control panels or spaghetti of wires.
Because if you have ever tried to grow things while raising kids, you already know the truth:
You don’t forget to feed your kids. You do forget to water your plants.
Every time.
What she was looking at was not a pretty Pinterest project. It was a system.
A way to grow real food in five square feet of space, with no daily watering, no soil, no weeding, and no praying that the weather cooperates.
Not a backyard dream. A bookshelf reality.
How A Mini Farm Actually Works (In Plain English)
Let me pull back the curtain for a second.
My name is Tyler Brown. I grew up in North Carolina, married my high school sweetheart, and yes, we have land.
But most of the food that really matters to my family right now isn’t coming from a big picturesque garden.
It comes from a few plastic totes on a shelf.
Here’s the simple version of what Gwen saw.
You take opaque, shallow storage totes.
You drill holes in the lids for small plant cups.
You fill the tote with water and nutrients.
You put the planted cups in the holes.
You set the tote on a shelf with a basic grow light above it.
That’s it.
There’s no pump buzzing in the background. No hoses. No timers.
The roots sit in the water and drink what they need. As they grow, they pull the water level down and grow air roots. Every few weeks, you rinse the roots and refill the tote.
You can ignore the whole thing for days at a time and nothing dies.
The plants don’t care that you had a rough week at work. They don’t care that your kid had the stomach flu and you forgot what day it was.
They just grow.
For Gwen, that meant one mini farm could give her enough greens for smoothies for about a week.
Ten mini farms could feed her kids more real food than she ever thought possible from a rental kitchen, and give her something else that mattered just as much.
Options.
“I Don’t Want To Sell Junk”
Here’s where a lot of parents get stuck.
It’s not just about food. It’s about money.
Gwen knew she should have some kind of backup income. Everyone should. But every time she thought about it, she felt gross.
The world doesn’t need more cheap plastic thingamajigs.
She didn’t want to pester her friends with yet another “hey girl, I have an opportunity for you” DM.
She wanted a way to bring in extra money that actually helped people.
When you grow food on a bookshelf, something interesting happens.
You realize that:
Baby plants are worth more than seeds.
Ready to harvest greens are worth more than baby plants.
Most people want the food, not a learning curve.
So instead of trying to “get rich online,” Gwen could do something simple and honest.
She could sell:
Weekly smoothie greens bundles.
Salad mixes for busy neighbors.
Subscription plant boxes for other parents who wanted to dip a toe into growing.
No funnels. No webinars. No pretending to be a guru.
Just good food, for people who live down the street.
Lisa from Burlington did exactly that:
“Earned $200 in my first 30 days… The confidence I got from building a mini farm is priceless. My kids love seeing the plants grow, and the extra income is changing our budget.”
Ten mini farms, sold out each month, is roughly $300 in profit.
Not lottery money. But the kind of money that makes the grocery bill hurt less. The kind of money that turns “I hope my job lasts” into “I have at least one thing I control.”
And if you never sold a single leaf, you would still have something most people do not.
Food that starts in your own living room.
“But I Kill Every Plant I Touch”
This is the other voice in the back of Gwen’s head.
Maybe yours too.
You’ve tried to grow a vegetable garden before. Everything fizzled. Dramatically.
So why would this be any different?
Because the system was built for people who forget to water things.
Daniel from Asheville put it better than I ever could:
“I have a black thumb, but really wanted to grow fresh food at home. I was skeptical, but the Mini Farm System made it foolproof. Thanks to the bonus planner, I haven’t missed a harvest cycle yet. And the marketing plan is genius. I never would have thought of selling plants as a subscription, but my neighbors are thrilled.”
When I put the Indoor Mini Farm System together, I did it with people like Gwen and Daniel in mind.
Parents who are not trying to become full time farmers. They just want something that:
Fits in a corner of their kitchen or living room.
Takes under 30 minutes a week to maintain.
Does not die when life gets busy.
So the system walks you through:
Exactly which totes, lights, and supplies to buy, with direct links.
How to set them up in a few hours, even if you have never used a drill.
What to plant first so you see fast results and don’t get discouraged.
How to use a simple perpetual planner so you always know “this week, I do this.”
You’re never staring at a tray of half dead plants wondering what went wrong.
You are simply following a checklist that has already been tested in real homes.
Quiet Preparedness, Without The Bunker
There’s something else Gwen liked, even though she might not say it out loud.
She wanted to be ready if things get worse. But she didn’t want to be the “crazy prepper friend” who’s always talking about it.
The indoor mini farm is the perfect middle path.
To the outside world, it looks like an interesting hobby. A cool talking point when someone visits.
In reality, it’s:
A steady stream of real, nutrient dense food.
A way to stretch every grocery dollar further.
A soft landing if prices spike or shelves run low.
A small, ethical side income if she decides to sell.
No bunker. No fifteen year supply of powdered soup.
Just living plants, under lights, that keep doing their thing while you are at work or helping with homework.
This is the belief I will happily put a line in the sand around:
You don’t need land to feed your family. You can grow and sell high value plants that actually help people, on a tiny footprint, in a way that feels admirable.
You can be the calm parent who quietly took responsibility, without trying to drag anyone else into your anxiety.
What Gwen Used To Get Started
Here’s the part where most plans pieces turn into a circus.
So let’s keep it simple.
If you’re reading this and thinking, “I want that, but I have no idea where to start,” that’s exactly why I created:
The Indoor Mini Farm System
It’s a step by step PDF guide that shows you how to build and run your own bookshelf farm in a weekend.
Here’s What You Get
Indoor Mini Farm System (PDF)
Every step you need to create your indoor mini farm in just a few hours. From which totes to buy to how high to hang your lights to which seeds to plant first.
(Value $97)
Linked Supply List (PDF)
Instead of opening twenty tabs and guessing, you get a simple list with direct links to exactly what you need. You can be done shopping in minutes.
(Value $22)
Perpetual Planner (PDF)
This is the piece that keeps black thumbs alive. A simple perpetual planner that tells you, week by week, what to do so you never miss a refill or harvest.
(Value $29)
If the only thing this did was give your kids smoothies made from greens you grew yourself for a few months, it would be worth that.
If it helps you earn even 100 dollars in extra income, it pays for itself more than once.
A lot of people do more than that.
Real Readers. Real Mini Farms.
These are everyday readers who started with one tote on a bookshelf
and turned it into fresher food and extra cash.
Paid for itself in 3 weeks
★★★★★
“I was skeptical, but my first harvest more than covered the cost.
Now my kids snack on greens instead of chips.”
I started with one tote next to our kitchen table. Once I saw how
fast everything grew, I added two more and now I’m selling salad plants
to three of my neighbors.
Sara C., Columbus, OH
Grocery bill down, side income up
★★★★★
“This gave me a simple plan I could follow after the kids went to bed.”
I don’t have space for a ‘real’ garden, but the mini farm system
fits on a cheap bookshelf in our hallway. We eat off it every week,
and I sell six totes a month to cover our internet bill.
Jen S., Houston, TX
“Finally something that actually works”
★★★★★
“I’ve tried so many ‘systems’ that overpromised and fizzled out.
This one quietly does what it says.”
I work full time and needed something low-maintenance. I spend maybe
10 minutes twice a week checking water levels and harvesting.
The rest just… grows.
Sam L., Raleigh, NC
Tiny space, real harvests
★★★★★
“We live in an apartment and I honestly didn’t think this would work.”
We’re on the third floor with no balcony. The totes fits next to our
dining table and now my 7-year-old helps me harvest ‘our’ salad
every night. It feels like cheating the grocery store.
Pam D., Boise, ID
And if you decide you want help selling out every harvest, there’s also a short companion guide called Sold Out Every Time you can pick up later.
In that guide, I walk you through exactly how to:
Price your plants and greens so they move fast and still feel fair.
Offer simple subscriptions your neighbors are excited to renew.
Sell without feeling like a pushy salesperson.
As a thank you, I’ll send you an infographic about my three favorite plants to grow hydroponically.
Everything is covered by a 30 day guarantee.
If you get the guide and think, “Nope, this is not for me,” just email me and let me know. I’ll refund you out of my own pocket. No quiz. No guilt.
If You Feel That Little Nudge
If you’ve read this far, something in you already knows what I am about to say.
You don’t control the government. You don’t control your company’s decisions. You can’t make grocery chains suddenly care more.
You can control what is growing five feet from your kitchen table.
You can control whether your kids see food as “something that shows up in a bag” or “something that grows because we took care of it.”
You can give yourself a small, quiet income stream that doesn’t depend on someone else’s algorithm or agenda.
That starts with one simple decision:
Set up your first mini farm.
Whether you end up with ten mini farms and a waiting list of neighbors, or just a steady supply of greens for your own blender, you’ll be glad you started now instead of waiting for the next scary headline.
Tyler Brown runs ProfitableHomesteader.com, a site dedicated to sharing side hustle ideas at home – including how he builds tiny indoor mini farms, growing heirloom greens in plastic totes and selling them to local families.
After years of testing containers, crops, and pricing, he built the Indoor Mini Farm System so regular people could skip the trial-and-error and start growing real food (and side income) on a single shelf.
If you’re ready to set up your own pump-free mini farm and start growing food indoors without wasting money on gadgets, you can get the step-by-step guide here:
How to Start a Hydroponic Side Hustle for Reliable Monthly Income from Home in 2026
Revealed: the key to a high profit hydroponic side hustle for recession-proof income you can earn from home.
When the economy falters, most advice boils down to one thing:
“Cut back and pray you don’t need a second job.”
Personally, I don’t like that plan. It puts way too much faith in systems that are tenuous, especially when the economy heads into recession.
A few years ago, I took a completely different path. I started a hydroponic side hustle building hydroponic mini farms that can live on a bookshelf, keep my family fed, and turn a healthy profit. The best part? This gardening hack works even in small spaces and when you don’t have much time.
We’re talking:
A wire shelf
Shallow storage totes
Heirloom and specialty greens
Local families on simple subscriptions
In this article I’m going to show you why selling heirloom greens as a subscription is such a strong model, what the margins actually look like, and how my Indoor Mini Farm System walks you through the growing and selling piece step by step. If you just want to grow food indoors for your own family first, start with my guide on How to Grow Food Indoors on a Shelf.
If you’ve ever wanted to find a work from home side hustle to earn money at home in your PJs, this is for you.
Grow Real Food Indoors For Profit
✅ Beginner-friendly mini farm you can build in a weekend
Most people hear hydroponics and think expensive gear, complicated pumps, and a room full of tubes and lights.
That’s not what I do.
A hydroponic side hustle mini farm, the way I teach it in the Indoor Mini Farm System, is:
A shallow plastic storage tote
Net cups with growing medium
A simple nutrient solution
Heirloom and specialty greens and herbs that customers love
The whole thing sitting on a shelf where you can reach it
Each tote becomes a ready-to-harvest mini farm—basically a living salad bar or smoothie box your customers can cut from again and again. Better still, it’s nearly passive income you can make from home.
Now pair that with a subscription model:
Local families sign up for a set number of mini farms per month
You grow, deliver, and swap out totes on a schedule
That means predictable income, month after month
That combination—indoor mini farms + subscriptions—is what turns this from “fun experiment” into an actual high-profit hydroponic side hustle from home. This unique blend not only allows for a rewarding venture but also fits seamlessly into a busy lifestyle, making it one of the best jobs for introverted moms. By cultivating fresh produce in a controlled environment, they can enjoy the therapeutic aspects of gardening while generating a supplemental income. As these mini farms thrive, so do the opportunities for growth, leading to a fulfilling and sustainable business.
Why heirloom greens still sell when the economy is shaky
In a recession or downturn, people don’t stop eating. They change how they spend.
They:
Skip restaurant meals
Pay close attention to grocery prices
Side-eye limp lettuce that goes bad in two days
Get tired of the same three boring greens
Focus more on getting the most nutrition for their dollar
Heirloom and specialty greens answer all of that at once:
They look incredible
They taste better than standard varieties
They make basic meals feel special again
They often deliver more nutrition per bite
Think purple lady bok choy, amaranth leaves, chijimisai, red-veined sorrel, and deep green lettuces that never touched a truck or a warehouse.
Most stores don’t carry them fresh and local. If they do, it’s expensive and inconsistent.
So when a neighbor says, “Hey, I grow fresh heirloom greens and deliver them on a subscription—do you want in?” people sign up.
You’re not fighting recession behavior; you’re aligning with it:
Better food
Less waste
Predictable cost
That’s a strong base for a recession-resistant side hustle.
The living mini farm model: stop selling single heads of bok choy
When I first tried making money from greens, I did it the hard way:
Soil
Raised beds
Endless watering
Saturdays spent weeding
Harvesting individual heads and bagging leaves
Trying to sell them one by one at the local farmer’s market
I burned time and energy for very little money.
Then I switched to the living mini farm model, and everything changed.
Instead of selling a single head of bok choy, I sell an entire ready-to-harvest mini farm tote:
It’s planted with heirloom and specialty greens
It keeps producing for weeks
The customer cuts what they want, when they want it
They get months of meals from one purchase
You’re no longer pricing a single vegetable. You’re pricing a compact, living food system.
That lets you:
Charge more per sale
Do less harvest labor
Spend most of your “work time” on setup and delivery, not micro-tasks
Rule #1 in my playbook:
Sell the mini farm, not the loose leaves.
The margins: real numbers from a realistic hydroponic side hustle
Let’s talk about profit, because that’s where most side hustles fall apart.
With indoor mini farms, the numbers are on your side.
Seed cost
A packet of unusual, hydroponic-friendly seeds is often priced under $4 for around 200 seeds.
Even if you only use 100 of those seeds, that’s 100 plants from a four dollar investment.
Hardware cost per mini farm
For each mini farm you’re looking at:
Shallow storage tote
Net cups
Growing medium
Nutrient solution
Even if you’re not chasing the absolute cheapest supplies, you’re typically around $5 in hardware and inputs per mini farm.
Worst-case pricing
Let’s run worst-case numbers so you can see how much room you have when pricing hydroponic greens.
Say you underprice on purpose just to get people hooked:
Mini farm tote price: $15
Your cost in materials: ~$3
Hands-on setup time: about 10 minutes per mini farm for planting and mixing nutrients
That’s roughly:
5× return on materials, and
About $70/hour for your time, even at that low price
Most people charge more once they see the demand for high-value hydroponic greens (I talk about specific pricing strategies inside the Indoor Mini Farm System guide), but even at $15, the math beats a lot of second jobs.
Why subscriptions turn this hydroponic side hustle into reliable income
One-off sales feel good in the moment, but they don’t calm your brain about bills.
Selling hydroponic greens subscriptions, though, means passive monthly income you can trust.
Here’s a simple, realistic subscription model for selling the greens you grow that comes straight out of my system:
You offer a Heirloom Greens Mini Farm Subscription
Each family subscribes to two mini farms per month (salad boxes, smoothie boxes, herb boxes, or a mix)
Each mini farm runs about two months before you need to replant
With just 10 families, that looks like:
20 totes delivered per month
~40 totes in rotation in their homes at any moment
Now layer in reasonable pricing.
Say you charge $30 per mini farm tote (which is completely justified given the amount of food and the convenience): By investing in a mini farm tote, customers not only gain access to fresh, organic produce but also become part of a sustainable food system. This innovative approach empowers individuals to cultivate their own gardens, effectively turning seeds into profits while minimizing environmental impact. The combination of quality products and the convenience of home gardening makes this investment worthwhile for both seasoned gardeners and newcomers alike.
20 totes × $30 = $600/month
That’s almost completely passive side hustle income from ten families.
If you later:
Raise prices to $45 as your reputation grows
Add a “family plan” with more totes
Bring on more families
…you can very realistically push this toward five figures per month even if you only have a small space for hydroponic systems.
Is $600 going to wipe out a huge mortgage on its own? Maybe not. But it can:
Cover a serious chunk of the payment
Handle property taxes when averaged out monthly
Cover your grocery bill with plenty of profit left over
That’s the scale we’re talking about with only ten families.
Why this hydroponic side hustle actually works in small spaces
Traditional “farming for money” advice assumes you have:
A lot of land
A garage for a complicated hydroponics system
A truck to do all those deliveries
A farmers’ market nearby
The Indoor Mini Farm System makes farming for money as close to passive income as you can get.
You’re building:
Shallow hydroponic totes
On simple wire shelves
In a spare corner, hallway, laundry room, basement, or sunny wall
And if you want it to be really easy, have customers pick up their food from your porch.
No soil. No tilling. No weeds. No bugs.
You can run your hydroponic mini farms from:
An apartment
A townhouse
A rental where you’re not allowed to touch the yard
If you move, your system packs into the car and comes with you.
That’s what makes this a great portable side hustle instead of something that ties you to a specific property.
Why neighbors actually love subscribing to mini farms
Let’s flip perspectives and look at this through your customers’ eyes.
The heirloom greens subscription solves multiple problems at once:
They always have fresh, interesting greens. Not the same sad lettuce, not mystery greens in a plastic box. Real flavor. Real nutrients.
They waste less. Because they’re cutting from a living mini farm, greens last longer and get used more.
They know exactly who grew their food. “We get our greens from a neighbor down the street” feels better than “whatever was on sale.”
The math makes sense. A $30 tote that produces multiple large salads or smoothies feels like a solid deal—especially when store prices keep creeping up.
Once families get used to this, they often tell me, “We don’t want to go back to store greens.” That’s the kind of loyalty you want in a subscription food business.
Common mistakes people make when starting a hydroponic side hustle
I’ve tested a lot of variations on this idea—enough to see the same pitfalls over and over.
Here are a few:
Trying to grow everything. They plant 15 different crops and end up with chaos. In the Indoor Mini Farm System I have you start with a short list of proven heirloom greens that perform well in shallow hydroponics and sell easily.
Selling harvested greens instead of mini farms. This is the fastest way to turn a promising idea into a job you resent. We already talked about why: too much labor per sale.
No subscription offer. If you don’t ask people to subscribe, you become “that person who sells greens sometimes.” The guide gives you exact wording to turn one-off buyers into subscribers without feeling pushy.
Over complicating the setup. Fancy gear doesn’t make this more profitable. A simple, dialed-in system does. My guide tells you exactly which totes, net cups, and nutrient setup I use so you don’t waste money on gimmicks.
Avoiding those four mistakes alone will save you months of trial and error.
The missing piece: a complete Indoor Mini Farm System that covers growing and selling
On paper, the plan looks straightforward:
Build indoor hydroponic mini farms in plastic shoeboxes
Grow heirloom greens
Sell them on subscription
Use the income to help pay the mortgage
In real life, the questions pile up fast:
What size and depth of totes actually work best indoors?
Exactly how do you lay out the net cups and spacing?
Which greens perform well in a passive hydroponic setup and which ones flop?
How do you time your planting so subscriptions don’t leave gaps?
What do you say when you approach neighbors about subscribing?
How do you price mini farms and subscriptions for your area?
It’s not a loose collection of tips. It’s a step-by-step system that shows you:
The exact containers, net cups, growing medium, and nutrients to buy
How to assemble and run your indoor mini farm so it stays low-maintenance
Which heirloom and specialty greens I recommend starting with and why
How to do the planting and replanting math for steady subscription deliveries
How to structure and price your offers (including simple “smoothie box” and “salad bar” subscriptions)
Scripts and examples for talking to neighbors in a way that feels friendly, not salesy
It’s the only hydroponics guide on the market that covers both the growing and the selling side in this high-profit way, all the way through subscriptions.
If you want a hydroponic side hustle that can help pay real bills, that combination matters.
How to start your own mini farm side hustle this month
You don’t have to overhaul your life to get started. Here’s a simple path:
Read the Indoor Mini Farm System once through. Get the overall picture so the details make sense.
Set up your first shelf and a handful of totes. Follow the hardware and layout instructions. This is usually an afternoon project.
Plant your first batch of heirloom greens. Use the starter crop list from the guide. No need to freestyle yet.
While your first batch grows, line up your first 3–5 customers. Use the scripts and pricing guidance. Aim for families who already care about food quality.
Deliver your first mini farms and invite subscribers to stay on. This is where the subscription model kicks in.
Scale to your first ten families and beyond. Once the system feels easy at a small scale, add more families until you hit your first income target.
From there, you can decide whether you want this to cover:
Groceries
All your expenses and then some.
Here’s What You Get
Indoor Mini Farm System (PDF)
Every step you need to create your indoor mini farm in just a few hours. From which totes to buy to how high to hang your lights to which seeds to plant first.
(Value $97)
Linked Supply List (PDF)
Instead of opening twenty tabs and guessing, you get a simple list with direct links to exactly what you need. You can be done shopping in minutes.
(Value $22)
Perpetual Planner (PDF)
This is the piece that keeps black thumbs alive. A simple perpetual planner that tells you, week by week, what to do so you never miss a refill or harvest.
(Value $29)
FAQ: Hydroponic side hustle questions I get all the time
Is a hydroponic side hustle like this actually legal? Every area is different, but many neighborhoods already have people selling eggs, baked goods, or produce informally.
Do I need expensive grow lights? Not always. Plenty of people start near south- or east-facing windows. In lower-light homes, a basic, affordable LED setup is enough. I recommend specific options in the guide so you don’t overspend.
Will this work if I’ve killed plants before? Yes. Mini farms are forgiving because water and nutrients are consistent. The system is written for regular people, not expert gardeners.
How many totes do I need to get to $600/month in my hydroponic side hustle? Using the model in this article (ten families × two totes per month at $30 each), you’re looking at roughly 40 totes in rotation.
Ready to build a hydroponic mini farm side hustle that actually moves the needle?
You can’t control the economy. You can’t control grocery prices or interest rates.
You can control:
What grows on your shelves
Who you sell it to
How predictable that income becomes
Selling heirloom greens as a subscription using an indoor hydroponic mini farm system is one of the most practical, high-margin, from-home side hustles I’ve ever found.
It turns plastic shoeboxes, seeds, and a bit of shelf space into something that can help pay your mortgage—even when everything else feels expensive and uncertain.
If you’re ready to stop daydreaming and start building, your next step is simple:
Get the Indoor Mini Farm System, set up your first mini farms, and start your own hydroponic side hustle this month.
About the Author
Tyler Brown runs ProfitableHomesteader.com, a site dedicated to sharing side hustle ideas at home – including how he builds tiny indoor mini farms, growing heirloom greens in plastic totes and selling them to local families.
After years of testing containers, crops, and pricing, he built the Indoor Mini Farm System so regular people could skip the trial-and-error and start growing real food (and side income) on a single shelf.
If you’re ready to set up your own pump-free mini farm and start growing food indoors without wasting money on gadgets, you can get the step-by-step guide here: