Container Gardening for Beginners: Grow Real Food Anywhere

Most gardening advice assumes you have a backyard. A patch of earth. Somewhere to put raised beds and drive stakes for tomato cages. But a huge portion of people who want to grow their own food live in apartments, townhouses, or homes with a concrete patio and not much else.

Container gardening is the answer — and it works better than most people expect. I’ve grown enough cherry tomatoes in a 15-gallon pot to supply my family through most of the summer. I’ve had basil in a 5-gallon bucket that outlasted three store-bought plants. And I’ve watched neighbors with nothing but a south-facing balcony grow more cucumbers than they knew what to do with.

This guide covers everything a beginner needs to know to start growing food in containers — what containers to use, what soil to fill them with, which crops work best, and how to keep everything alive without it becoming a second job.

Table of Contents

Why Container Gardening Works

Growing in containers isn’t a consolation prize for people without a yard. It has genuine advantages over in-ground gardening in many situations:

  • Total control over soil quality — You fill the container with exactly what the plant needs. No rocky clay, no compacted subsoil, no drainage problems.
  • Mobility — Move plants to follow the sun, bring them in before a frost, rearrange as needed.
  • Fewer soil-borne pests and diseases — Fresh potting mix in a clean container starts pest-free every season.
  • Works anywhere — Patio, balcony, rooftop, driveway, fire escape. Any surface that can hold weight and receives light.
  • Easy to scale — Start with two pots. Add more as you get comfortable. No commitment to permanent beds.

The limitations are real too — containers dry out faster than in-ground beds, need more frequent fertilizing, and limit root space for large crops. But for most vegetables and all herbs, these are manageable tradeoffs.

Choosing the Right Containers

Size is the most important factor. The single biggest container gardening mistake beginners make is choosing pots that are too small. Roots need room to grow, and small containers dry out in hours during summer heat.

CropMinimum Container SizeNotes
Herbs (basil, cilantro, chives)1–2 gallonCan share a larger pot
Lettuce and salad greens2–5 gallonWide, shallow containers work well
Spinach, kale, chard5 gallonDeeper is better for kale
Cherry tomatoes10–15 gallonBigger = better yield. Don’t undersize.
Full-size tomatoes15–20 gallonNeed strong support too
Cucumbers5–10 gallonTrellis or cage required
Peppers5–10 gallonExcellent container crop
Bush beans5–7 gallonWide container, multiple plants
Zucchini15+ gallonVery large plant — needs space

Container Materials

Plastic pots — Lightweight, inexpensive, retain moisture well. The standard choice for most container gardeners. Look for food-safe plastic if you’re concerned about leaching (most nursery pots are fine).

Fabric grow bags — Excellent drainage and air pruning of roots (prevents root circling). Affordable, collapsible for storage. Dry out faster than plastic, so water more frequently in hot weather.

Terracotta — Beautiful but heavy and dries out very quickly. Better for herbs that prefer drier conditions (rosemary, thyme) than for moisture-loving vegetables.

Food-safe buckets — 5-gallon buckets from hardware stores work perfectly for most vegetables. Drill 4–6 drainage holes in the bottom. Cheap, durable, and stackable.

Whatever you have — Old colanders, wooden crates lined with burlap, galvanized tubs, even grow bags made from burlap feed sacks. Container gardening is forgiving of improvisation as long as there’s adequate drainage and volume.

Drainage Is Non-Negotiable

Every container must have drainage holes. Roots sitting in waterlogged soil rot quickly. If a container doesn’t have holes, drill or punch them before planting. Don’t put gravel at the bottom — it doesn’t improve drainage and actually raises the water table inside the pot.

The Right Soil Mix for Containers

Never use garden soil or topsoil from your yard in containers. It compacts, drains poorly, and often introduces pests and diseases. Container plants need a light, well-draining mix that holds moisture without becoming waterlogged.

A Simple DIY Container Mix

Equal parts of:

  • Quality potting mix (not “potting soil” — the mix, which is lighter and airier)
  • Perlite — improves drainage and aeration
  • Compost — adds nutrients and beneficial biology

This mix drains well, holds enough moisture between waterings, and provides a good nutrient base. It works for vegetables, herbs, and flowers alike.

For a pre-made option, a quality premium potting mix (FoxFarm, Black Gold, or similar) is excellent out of the bag and doesn’t require amendment for most crops.

Best Crops for Container Gardening

Absolute Beginners: Start Here

Cherry tomatoes are the gateway crop for container gardeners. Varieties like ‘Tumbling Tom,’ ‘Sweet 100,’ and ‘Sun Gold’ were practically bred for container growing — compact, prolific, and forgiving. A 15-gallon pot in full sun produces more tomatoes than most families can eat fresh, with plenty for sauce and preserving.

Basil grows so well in a pot that it becomes almost effortless. One large basil plant in a 2-gallon pot, harvested regularly by pinching the tips, provides all the fresh basil most families need through the season.

Lettuce and salad greens are ideal for wide, shallow containers — even window boxes. They don’t need deep root space, grow quickly, and can be harvested leaf by leaf for weeks. In hot climates, move the container to afternoon shade to prevent bolting.

High Reward for a Little More Effort

Cucumbers grow vertically, so a 5–10 gallon pot against a fence or trellis produces an impressive harvest from a small footprint. Water consistently — uneven watering causes bitter fruits.

Peppers — both sweet and hot — are outstanding container crops. They’re compact, heat-loving, and productive over a long season. A single pepper plant in a 7-gallon pot will produce more than most families use fresh.

Kale and chard in a 5-gallon pot can be harvested repeatedly for months as a cut-and-come-again crop. Start them in early spring, harvest outer leaves through fall.

Avoid in Containers (Usually)

Corn, melons, full-size pumpkins, and indeterminate tomato varieties in anything smaller than a 20-gallon container. These crops need significant root space and won’t perform well when constrained. Stick to compact or dwarf varieties if you want to try them.

Watering: The Most Common Mistake

Inconsistent watering is the leading cause of container gardening failures. Containers dry out much faster than in-ground beds — especially in summer heat, especially in fabric grow bags, especially with large thirsty plants like tomatoes.

How to Know When to Water

Stick your finger 2 inches into the soil. If it’s dry at that depth, water thoroughly. If it’s still moist, wait. This simple check beats any schedule because it responds to actual conditions rather than the calendar.

In peak summer heat, large containers with fruiting crops may need watering daily. Smaller herb pots may need it every 2–3 days. Check rather than guess.

How to Water Properly

Water slowly and deeply until it runs freely from the drainage holes. This ensures the entire root zone is moistened and flushes any salt buildup from fertilizers. Shallow watering that only wets the top inch encourages roots to stay near the surface, making the plant more vulnerable to drying out.

Self-Watering Containers

Self-watering containers have a reservoir at the bottom that wicks water up to roots as needed. They dramatically reduce watering frequency and are excellent for tomatoes and peppers, which need consistent moisture. Worth the slightly higher upfront cost if you travel or have a busy schedule.

Fertilizing Container Plants

Nutrients wash out of containers faster than in-ground soil — every time you water, some fertility leaches through the drainage holes. Container plants need regular feeding to maintain productivity through the season.

  • Slow-release granular fertilizer — Mix into the potting medium at planting time. Feeds plants for 3–6 months with no further attention. Good base-level nutrition.
  • Liquid fertilizer — Applied every 2–4 weeks during the growing season. More precise and immediately available to plants. Fish emulsion and liquid kelp are good organic options; balanced synthetic fertilizers work faster.
  • Compost top-dressing — Add an inch of compost to the surface of containers each season. Feeds plants slowly and improves soil structure.

Watch your plants: pale yellow leaves often indicate nitrogen deficiency (needs more fertilizer); purple-tinged leaves often indicate phosphorus deficiency; brown leaf edges can mean over-fertilizing or inconsistent watering.

Sunlight and Placement

Most vegetables need 6–8 hours of direct sunlight per day. This is the constraint that determines what you can grow more than anything else.

Light LevelHours of Direct SunWhat You Can Grow
Full sun6–8+ hoursTomatoes, peppers, cucumbers, beans — everything
Partial sun4–6 hoursLettuce, spinach, kale, chard, herbs (most)
Partial shade2–4 hoursLettuce, mint, chives, parsley — shade-tolerant crops only
Full shade<2 hoursVery limited. Consider an indoor setup with grow lights instead.

If your outdoor space doesn’t get adequate sun, the most practical solution is to move growing indoors with artificial lighting. A simple LED grow light setup produces excellent results for leafy greens and herbs regardless of your home’s orientation — and it works year-round, not just in summer. That’s where an indoor hydroponic garden becomes the better tool for the job.

Container Garden Setups for Small Spaces

Apartment Balcony (50–100 sq ft)

Use railing planters for herbs and trailing plants. Stack containers vertically with a tiered plant stand. One or two large containers (15 gallon) for cherry tomatoes or cucumbers. Stick to compact varieties bred for containers. Check weight limits if you’re stacking heavy pots on a balcony.

Patio or Driveway (100–300 sq ft)

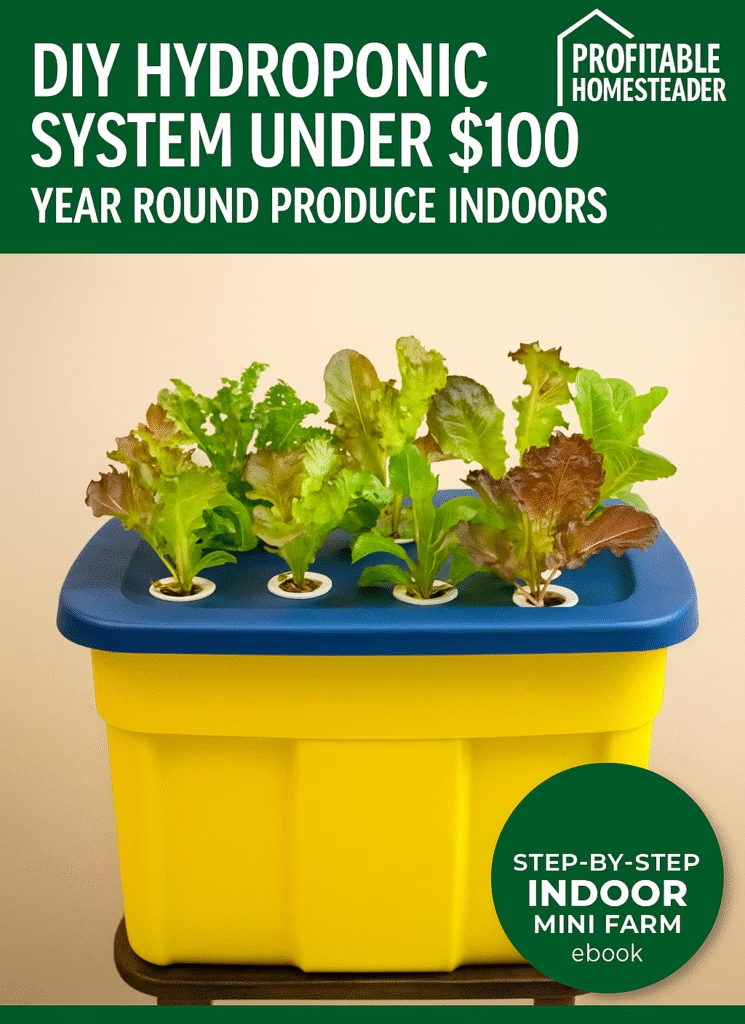
A rolling cart or plant trolley lets you move large containers to chase sun across the day. Group containers close together to reduce evaporation. A simple DIY self-watering container system using 5-gallon buckets nested inside each other creates excellent moisture management for almost no cost.

Small Backyard With Limited Sun

Grow shade-tolerant crops (lettuce, kale, herbs) in the shadier spots. Use containers to move sun-loving crops (tomatoes, peppers) to whatever patches of full sun you do have — even if it’s just the sunniest corner of the yard. Supplement with an indoor growing setup for year-round greens.

When to Upgrade to Hydroponics

Container gardening is excellent for outdoor crops — tomatoes, peppers, cucumbers, and herbs in the warm season. But it has one significant limitation: it doesn’t work well indoors for year-round growing, because soil-based containers are messy, heavy, attract fungus gnats, and don’t perform well under artificial light.

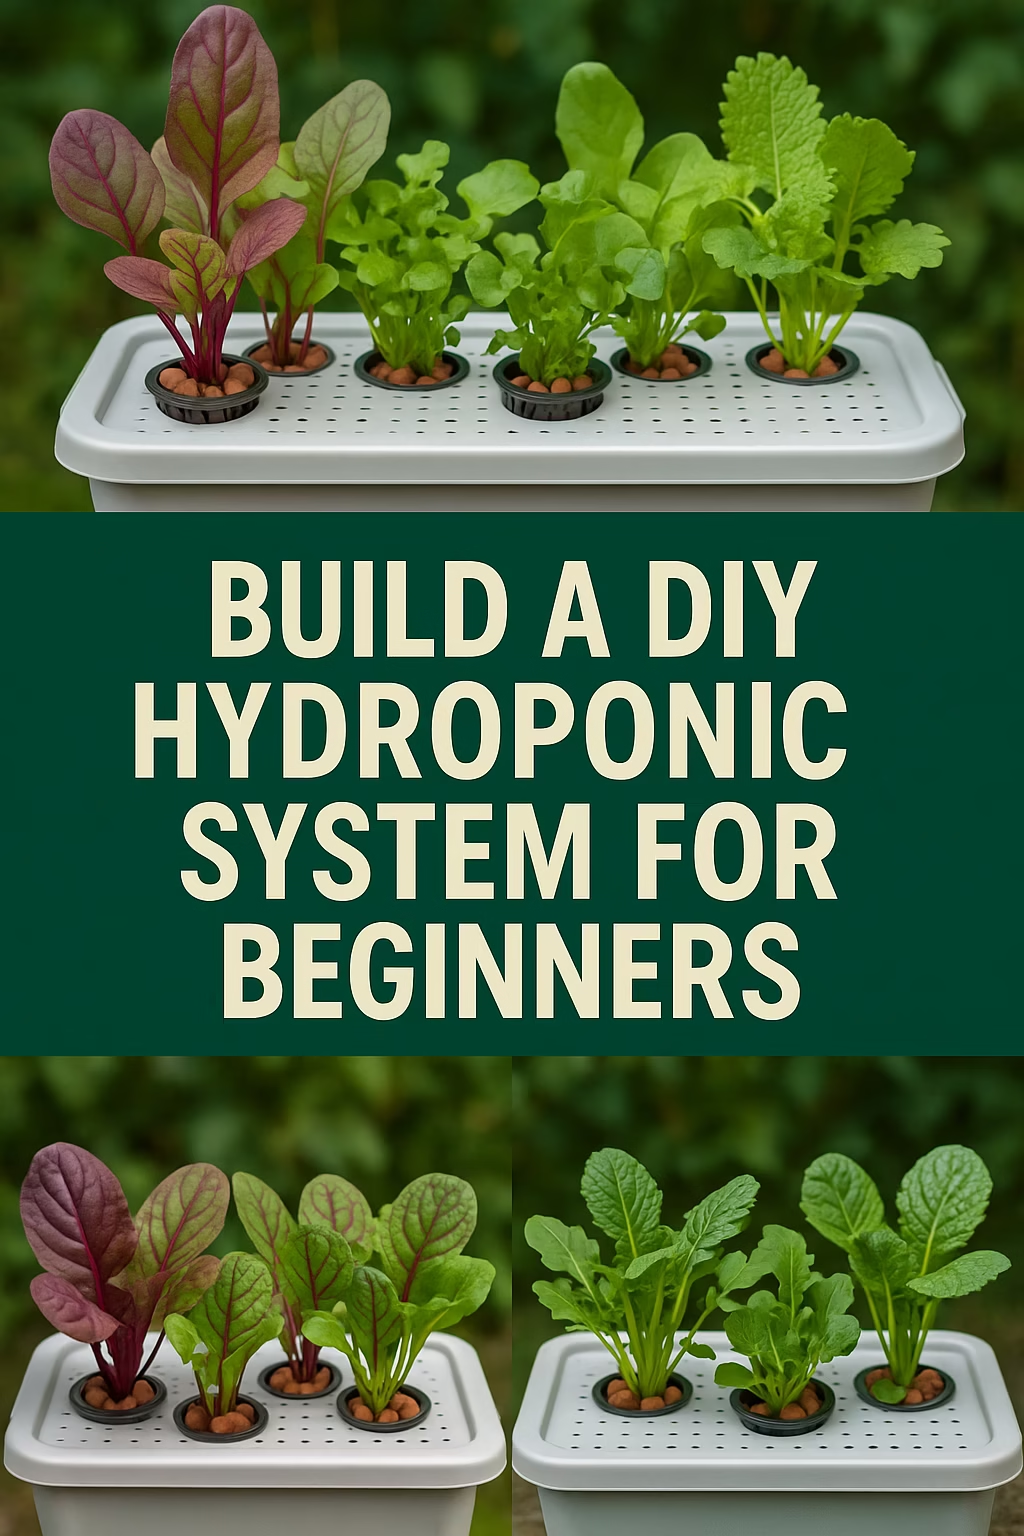
That’s the gap hydroponics fills. For indoor year-round growing of leafy greens and herbs, a simple Kratky hydroponic system outperforms soil containers in every meaningful way — faster growth, no pests, no mess, and consistent results in any season. Many home growers end up with both: containers outdoors for summer vegetables, hydroponics indoors for year-round greens. It’s a natural and very effective combination.

For a full picture of the best crops to grow in each system and how they complement each other, the crop selection guide covers both approaches side by side.

And if you’re curious what it looks like when indoor growing goes beyond feeding your family and starts generating a small income from selling living plants to neighbors — the Indoor Mini Farm System is the complete guide to that model.

Frequently Asked Questions

What is the easiest vegetable to grow in containers?

Cherry tomatoes, lettuce, and herbs (especially basil) are consistently the easiest and most rewarding container vegetables for beginners. Cherry tomato varieties like ‘Tumbling Tom’ and ‘Sweet 100’ are compact, prolific, and forgiving. Lettuce grows quickly in any wide, shallow container and can be harvested leaf by leaf for weeks.

Can you grow tomatoes in containers?

Absolutely — cherry tomatoes especially. Use at least a 15-gallon container, a quality potting mix, consistent watering, and full sun (6–8 hours). Support the plant with a stake or cage. Choose compact varieties labeled “determinate” or “patio” for best results in containers. Full-size indeterminate tomatoes can be grown in containers but need at least 20 gallons and significant support.

How often should I water container vegetables?

Check rather than schedule — stick a finger 2 inches into the soil and water when it’s dry at that depth. In summer heat, large containers may need daily watering. Smaller pots and cooler weather require less frequent watering. The goal is consistent moisture without waterlogging — let the soil guide you rather than the calendar.

What soil should I use for container gardening?

Use a quality potting mix — not garden soil or topsoil, which compacts and drains poorly in containers. A mix of potting mix, perlite, and compost in equal parts is excellent DIY option. Pre-made premium potting mixes (FoxFarm, Black Gold) work well straight from the bag for most vegetables.

Can I do container gardening without a balcony?

Yes — a sunny windowsill handles herbs and lettuce. A grow light opens up almost any indoor space for year-round growing. If you have no outdoor space at all, an indoor hydroponic setup is often more practical than trying to grow in containers indoors with natural light alone. Many people in apartments without outdoor access run productive indoor growing systems year-round using LED grow lights and a simple hydroponic setup.


Container gardening is one of the most accessible ways to start growing your own food — and one of the most flexible. Start with a pot of cherry tomatoes and a pot of basil. Go from there. When you’re ready to add year-round indoor growing to the mix, the Indoor Mini Farm System is the complete guide to getting it running.

Year-Round Vegetable Garden Plan: Grow Food Every Month

Most vegetable gardens produce for about four months a year. You plant in spring, harvest through summer, and by October it’s over until next May. Six months of nothing — while grocery prices keep climbing and the produce section keeps disappointing.

It doesn’t have to work that way. With a little planning and one key addition to your growing setup, you can have fresh vegetables and herbs available every month of the year. Not just salad greens — real, varied, productive growing in every season.

This is the year-round vegetable garden plan I’ve refined over several growing seasons: which crops to plant and when, how to bridge the seasonal gaps, and how to use indoor growing to fill the months that outdoor gardening simply can’t cover.

Table of Contents

Why Most Gardens Only Produce Half the Year

The typical vegetable garden plan goes like this: wait until after the last frost, plant everything in May, harvest through July and August, watch it wind down in September. That’s four months of production in a twelve-month year.

The gaps exist because most gardeners only think about one season at a time. They miss the cool-weather window in early spring when lettuce, spinach, and peas thrive. They don’t replant in fall when temperatures drop back into the ideal range for greens. And they have no system at all for winter.

Closing those gaps doesn’t require a greenhouse or a complicated system. It requires paying attention to what grows in each season — and having a simple indoor solution for the months that outdoor growing genuinely can’t cover.

The Four-Season System

A true year-round garden operates in four distinct modes, each with its own crop focus and timing:

  1. Cool-season outdoor growing (spring and fall) — Leafy greens, brassicas, root vegetables, peas
  2. Warm-season outdoor growing (summer) — Tomatoes, cucumbers, peppers, beans, squash
  3. Indoor growing year-round — Lettuce, herbs, spinach, kale, and other greens running continuously regardless of season
  4. Preservation — Extending the summer harvest into fall and winter through freezing, canning, and drying

The indoor piece is what most gardeners are missing. A simple indoor hydroponic setup produces fresh greens and herbs in January just as readily as in July — and it takes about 30 minutes a week to maintain. It’s the piece that turns a seasonal garden into a year-round food source.

Spring Planting Plan (March–May)

Spring is the most underutilized season in most vegetable gardens. Gardeners wait until it’s warm enough for tomatoes — but a whole class of crops thrives in cool, even frost-tolerant conditions that arrive weeks earlier.

Early Spring (Soil Temperature 40°F+, 6–8 Weeks Before Last Frost)

These crops can go in the ground while nights are still cold — some even tolerate light frost:

  • Peas — Direct sow. One of the earliest crops possible. Sweet, productive, and done before summer heat arrives.
  • Spinach — Direct sow or transplant. Germinates in cold soil (as low as 35°F). Ready in 40–50 days.
  • Lettuce — Transplant starts (or direct sow). Thrives in cool temps. Bolts when summer heat arrives.
  • Kale and chard — Transplant or direct sow. Cold-hardy, productive, and cut-and-come-again.
  • Radishes — Direct sow. Ready in 25–30 days. Quick indicator crop while waiting for slower plants.
  • Carrots and beets — Direct sow. Germinate slowly but handle cold well once up.

Mid-Spring (2–4 Weeks Before Last Frost)

Start warm-season crops indoors under lights — they’ll be ready to transplant after the last frost date:

  • Tomatoes (6–8 weeks before last frost)
  • Peppers (8–10 weeks before last frost — they’re slow)
  • Cucumbers (3–4 weeks before last frost)
  • Squash and zucchini (3–4 weeks before last frost)

Starting transplants indoors extends your warm-season production window by 4–6 weeks compared to direct sowing after the last frost.

Summer Planting Plan (June–August)

Summer is when most gardeners feel confident — and when most of the visible, satisfying harvest happens. The key is keeping production continuous rather than having a glut in July and nothing in August.

What to Grow

  • Tomatoes — The centerpiece of most summer gardens. Plant after last frost, stake or cage, water consistently. Harvest from July through first frost.
  • Cucumbers — Fast producers. Plant near a fence or trellis. Pick frequently to keep plants producing — leaving mature cucumbers on the vine signals the plant to stop flowering.
  • Zucchini and summer squash — Enormously productive. One or two plants is usually enough for a family. Check daily at peak season — they go from small to enormous overnight.
  • Beans (bush and pole) — Direct sow after last frost. Bush beans mature quickly (50–55 days); pole beans produce longer. Succession plant every 3 weeks for continuous harvest.
  • Basil — Loves heat. Plant after last frost, harvest frequently by pinching growing tips.
  • Peppers — Slow to start but productive through summer. Both sweet and hot varieties are excellent.

Midsummer Plantings (July)

July isn’t just for harvesting — it’s also time to plan for fall. Start these crops now for a fall harvest:

  • Broccoli and cabbage transplants (for fall harvest)
  • A second succession of beans (for late summer harvest)
  • Kale starts (for fall and winter harvest)
  • Fall lettuce starts (transplant out in August when temperatures drop)

Fall Planting Plan (September–November)

Fall is the most underrated growing season. Temperatures drop back into the ideal range for cool-weather crops, pest pressure is usually lower than in spring, and many crops taste better after a light frost.

Fall Cool-Season Crops

Plant 6–8 weeks before your first expected frost date for a solid fall harvest:

  • Spinach — Very frost-hardy. Can be harvested well into November in many climates, and will overwinter under a cold frame.
  • Lettuce — Fast fall crop if started from transplants. Harvest before hard freezes.
  • Kale — Improves with frost. One of the most cold-hardy vegetables — many varieties survive well below freezing. A late-fall kale harvest is often the sweetest of the year.
  • Arugula — Cold-tolerant and fast. Excellent under row cover through November and December in mild climates.
  • Garlic — Plant in October, harvest the following July. The lowest-maintenance crop in the garden — put it in and forget it until summer.
  • Overwintering onions — Sets planted in fall produce early spring onions before anything else is growing.

Extending Fall with Row Cover

A simple row cover (floating fabric draped over plants, $10–$20 for a season supply) adds 4–6°F of frost protection and extends your fall harvest by 3–6 weeks. It’s one of the highest-return investments in season extension — cheap, reusable, and requires no special structure.

Winter Growing: The Indoor Solution

Here’s the honest reality: in most of North America, outdoor growing stops somewhere between November and March. No row cover, cold frame, or season extension technique fully replaces that lost production time. To grow food in winter, you need to grow it indoors.

The good news is that indoor growing has become remarkably simple and affordable. A basic hydroponic setup on a shelf — LED grow light, a tote or two of nutrient solution, and some net pots — produces a continuous supply of lettuce, herbs, kale, spinach, and arugula through even the darkest winter months.

The Kratky method is the simplest entry point: no pump, no electricity beyond a grow light, no complexity. Set it up once and it runs with minimal attention — checking pH and water level every few days, harvesting when plants are ready, replanting immediately after. The cycle never stops.

This is the piece that transforms a seasonal vegetable garden into a genuine year-round food source. Everything else in this guide extends your outdoor season — the indoor system is what actually closes the gap.

For a complete walkthrough of setting up an indoor growing system, the DIY hydroponics guide covers system options, costs, and the best crops for indoor production.

Succession Planting: The Key to Continuous Harvest

The most common feast-or-famine problem in vegetable gardens — too much zucchini in July, nothing in August — is solved by succession planting: staggering your plantings so that as one batch finishes, the next is just starting to produce.

Simple succession planting rules:

  • For fast crops (lettuce, radishes, beans): plant a new batch every 2–3 weeks
  • For slow crops (tomatoes, peppers): one planting is usually enough — they produce over a long window
  • For cut-and-come-again crops (kale, chard, basil): harvest regularly to keep plants productive rather than planting new successions
  • Indoors, stagger your hydroponic totes — start a new tote every 2 weeks and you’ll always have plants at different stages of growth, meaning continuous harvests rather than a glut all at once

Quick Reference: Crops by Season

CropSpringSummerFallWinter (Indoor)
Lettuce⚠️ Bolts
Spinach⚠️ Bolts
Kale✅ (best)
Basil⚠️ After frost✅ (best)⚠️ Before frost
Tomatoes🌱 Start indoors✅ (best)✅ Until frost
Cucumbers✅ (best)⚠️ Until frost
Peppers🌱 Start indoors✅ (best)✅ Until frost
Peas✅ (best)❌ Too hot
Beans⚠️ After last frost✅ (best)⚠️ Early fall
Garlic🌱 Growing✅ Harvest July✅ Plant Oct🌱 Dormant
Herbs (mixed)✅ Indoors

Preserving the Surplus for Lean Months

A year-round garden plan isn’t just about what you’re growing in real time — it’s about stretching summer’s abundance into the months when production slows. Preservation is what makes the math work for true food self-sufficiency.

  • Freeze tomatoes whole (no prep needed) for winter soups, sauces, and stews. One productive summer plant can yield enough frozen tomatoes for most of winter’s cooking needs.
  • Freeze herbs in ice cube trays with olive oil — ready-to-use herb cubes for winter cooking.
  • Freeze beans and peas — blanch for 2 minutes, cool in ice water, freeze in portions. Lasts 8–12 months.
  • Dry herbs — bundle and hang basil, oregano, and thyme upside down in a warm, dry space. Ready in 1–2 weeks.
  • Can or ferment cucumbers into pickles — extends a summer glut into a year-round pantry staple.
  • Store winter squash — properly cured butternut and acorn squash keep 3–6 months in a cool, dry location with no processing needed.

Combined with your year-round indoor growing, a well-preserved summer harvest means your dependence on the grocery store’s produce section gets genuinely small — and that’s a good feeling.

For the indoor piece that keeps fresh greens and herbs going through every month, the Indoor Mini Farm System is the complete guide — from setup through to selling the surplus if you end up growing more than your family can eat.

Frequently Asked Questions

Can you grow vegetables year-round without a greenhouse?

Yes — with a combination of outdoor cool-season growing in spring and fall, warm-season growing in summer, and an indoor hydroponic setup for winter. A greenhouse extends outdoor growing and is a great investment if you have space and budget, but it’s not necessary for year-round food production when you have a simple indoor growing system.

What vegetables can I grow in winter?

Outdoors in mild climates (zones 7–10): kale, spinach, arugula, chard, and overwintering onions and garlic survive light frosts and can be harvested through winter with row cover protection. In colder climates, indoor growing is the practical solution — leafy greens and herbs grow extremely well under LED grow lights year-round regardless of outdoor temperatures.

What should I plant first in a new vegetable garden?

Start with crops that give quick feedback and high value: lettuce, radishes, and herbs in spring — they’re ready in 25–45 days and teach you the fundamentals of your space. Add tomatoes and cucumbers for summer. The fastest path to a year-round system is adding an indoor growing setup in parallel with your first outdoor season.

How do I keep a vegetable garden producing all summer?

Succession planting is the key — stagger new plantings of fast crops every 2–3 weeks rather than planting everything at once. Harvest frequently to keep plants productive: pick cucumbers, beans, and zucchini every 1–2 days at peak season. Remove spent plants promptly and replant the space immediately rather than leaving beds empty.

What’s the most productive vegetable garden layout?

Raised beds with intensive planting (no walking rows) maximize production per square foot. Group crops by water and light needs. Use vertical space with trellises for cucumbers, beans, and tomatoes. Add a permanent perennial bed for asparagus, strawberries, and perennial herbs. Complement all of it with an indoor growing setup for year-round greens and herbs.


A year-round vegetable garden is simpler than it sounds — it’s mostly a matter of knowing what to plant when, and having a plan for the months that outdoor growing can’t cover. If you’re ready to set up the indoor piece that makes it genuinely year-round, the Indoor Mini Farm System is the complete guide to getting it running fast.

Vertical Gardening for Small Spaces: Double Your Harvest Without More Ground

The most underused growing space in any small yard, patio, or balcony isn’t on the ground — it’s above it. Fences, walls, railings, and simple trellis structures represent hundreds of square feet of potential growing space that most gardeners never use.

Vertical gardening is the practice of training plants upward instead of letting them sprawl — or mounting growing containers on vertical surfaces to make use of walls and fences. Done well, it can double or triple the productive capacity of a small space without requiring an inch more of ground.

Here’s how to do it effectively, what grows best vertically, and how to structure a vertical garden that actually produces food rather than just looking interesting.

Table of Contents

Why Vertical Gardening Works

The math is compelling. A 4×8 ft raised bed gives you 32 square feet of growing space. Add a 6-foot trellis along the back of that bed and you’ve effectively added another 48 square feet of productive surface — with no additional footprint. That’s a 150% increase in growing capacity from one simple structure.

Beyond the space efficiency, vertical growing has practical benefits:

  • Better air circulation — reduces fungal disease problems common in dense ground-level plantings
  • Easier harvesting — cucumbers and beans at eye level are far easier to pick consistently than those hidden under sprawling foliage
  • More sun exposure — vertical plants don’t shade each other the way sprawling crops do
  • Cleaner produce — fruits growing off the ground have fewer pest and rot issues
  • Better use of rental or shared spaces — a trellis against a fence or wall uses space that’s “free” in a way ground space often isn’t

Best Crops for Trellis Growing

Not every plant grows vertically naturally — but many of the most productive food crops are natural climbers or can be trained upward with simple support.

Cucumbers

Cucumbers are among the best vertical crops available. They climb naturally using tendrils, grow quickly, and produce far more prolifically when grown vertically than when left to sprawl on the ground. A single cucumber plant on a 5-ft trellis produces more fruit than the same plant sprawling over 8 square feet — and the fruits are straighter, cleaner, and easier to spot.

Plant 12–18 inches apart along the base of a trellis. Guide young vines upward for the first few weeks and they’ll take over from there. Pick every 1–2 days at peak season to keep plants producing.

Pole Beans

Pole beans grow 6–8 feet tall and produce over a much longer season than bush beans. They’re one of the most space-efficient food crops you can grow vertically — a row of poles or a simple A-frame trellis supports 6–8 plants in a 2-foot footprint and produces beans for 8–10 weeks.

A traditional Native American “Three Sisters” planting — corn, beans, and squash — uses the corn stalks as the trellis for the beans, an elegant vertical solution that predates modern gardening by centuries.

Tomatoes

Indeterminate tomato varieties (the ones that keep growing all season) are most productive when trained vertically. The standard approach — cage or stake — is vertical gardening in its simplest form. But you can take it further: a Florida weave trellis system using T-posts and twine allows you to plant tomatoes in a dense row and train them upward, packing more plants into a linear bed than any cage system allows.

Peas

Sugar snap peas and snow peas climb naturally and grow quickly in cool weather. A simple netting or wire mesh trellis handles them easily. They’re a perfect spring vertical crop — productive before the season warms up enough for cucumbers and beans.

Winter Squash and Pumpkins (Small Varieties)

Small-fruited varieties like ‘Delicata,’ ‘Acorn,’ and small sugar pumpkins can be trained up a sturdy trellis. Heavier fruits need support — a simple mesh sling made from netting or old pantyhose cradling each fruit works perfectly and prevents the trellis from being pulled over.

Crops That Don’t Work Vertically

Root vegetables, corn, and sprawling crops like watermelon and large pumpkins don’t translate well to vertical growing. For these, ground-level beds or containers are still the right approach.

Wall Planters and Pocket Gardens

Beyond trellising climbing plants, vertical growing includes mounting containers directly on walls, fences, and structures to grow crops that don’t climb naturally.

Felt Pocket Planters

Fabric pocket planters — available in sizes from a dozen pockets to 50+ — mount on any fence or wall with simple hooks. Each pocket holds a small plant: herbs, lettuce, strawberries, or small flowering plants. A single 12-pocket panel on a 4-foot fence section can grow 12 herb plants in a space that would otherwise be completely unused.

They dry out quickly, so pocket planters work best for crops that don’t need deep root space (herbs, lettuce, strawberries) and require attention to watering — daily in hot weather.

Rail Planters

Planters designed to hang from railings are excellent for balcony and deck growing. Both the inner and outer surface of a railing can support planters — a balcony with 20 feet of railing can effectively have 40 feet of linear planting space using both sides. Best for herbs, lettuce, strawberries, and trailing plants.

Pallet Gardens

A wooden pallet stood vertically, lined with landscape fabric, and filled with potting mix becomes an instant vertical garden. Works well for shallow-rooted herbs and lettuce. Use heat-treated (HT) pallets only — avoid pallets marked MB (methyl bromide treated). Free from many hardware stores and construction sites.

Tower Gardens and Vertical Systems

Tower garden systems — vertical columns with planting pockets around the outside — take vertical growing to its logical extreme. They grow 20–30 plants in a 2-foot circular footprint. Most use a pump to circulate nutrient solution from a reservoir at the base up through the column, where it drips down past the roots of each plant.

Commercial tower systems (like Tower Garden’s branded product) are expensive — $500–$800+. But DIY versions using PVC pipe or stacked containers can be built for $50–$150 and work on the same principle. They’re excellent for lettuce, herbs, spinach, and strawberries — crops with compact root systems that grow well in the limited soil volume of a tower pocket.

If you’re interested in a tower system for indoor growing, the NFT (Nutrient Film Technique) tower approach used in indoor hydroponic gardens is a well-proven option that scales easily from a single tower to a full shelf of them.

Trellis Structures: What to Build or Buy

Simple A-Frame Trellis

Two wooden panels (1×2 lumber with twine or wire mesh stapled across) leaned against each other and tied at the top. Plant on both sides — cucumbers on the outside, lettuces in the shaded interior. Folds flat for storage. Cost to build: $15–$25.

T-Post and Wire/Netting

Metal T-posts (from any farm supply or hardware store, $3–$6 each) driven into the ground with livestock wire or netting strung between them. Extremely durable, handles heavy crops. Best for a permanent or semi-permanent installation along a fence line or at the back of raised beds. A 10-foot section costs $20–$40 and lasts many years.

Florida Weave (Tomatoes)

T-posts or wooden stakes placed between tomato plants, with twine woven back and forth between stakes at each successive height as plants grow. No cages needed — efficient, cheap, and allows dense planting. Add a new row of twine every 6–8 inches as the plants grow.

Existing Structures

Fences, deck railings, pergolas, and even downspout brackets are all potential trellis supports. Before buying anything, walk around your space and identify existing vertical structures that could support a climbing plant with nothing more than a few hooks or zip ties.

Vertical Gardening on a Balcony or Patio

A balcony is almost entirely vertical surface — railing on at least two sides, walls on one or two more. Used well, a 60-square-foot balcony can grow a surprising amount of food:

  • Railing planters on both sides of the railing — 20 feet of railing = 40 ft of herb and lettuce growing space
  • One or two large containers (15 gallon) on the floor for cherry tomatoes, cucumbers, or peppers with vertical support
  • A wall-mounted pocket planter on any solid wall surface — 12–20 pockets of herbs
  • An overhead trellis or string system from the balcony ceiling or railing supports for a trailing cucumber or bean plant

The weight consideration is real on balconies — check your building’s load rating before putting multiple large containers in one spot. Distribute weight along the railing edges rather than concentrating it in the center.

Going Vertical Indoors

Vertical growing isn’t just for outdoor spaces. Indoors, a wire shelving unit with LED grow lights mounted on the underside of each shelf is the most common and effective form of vertical indoor growing — each shelf is its own growing level, stacked vertically in a 4-foot footprint.

A standard 5-tier wire shelf unit gives you five growing levels in less than 4 square feet of floor space. With a grow light under each shelf and a Kratky hydroponic tote on each level, you can grow 30–60 plants in a spare corner of a room.

That kind of density — growing vertically indoors with hydroponics — is exactly what makes a small indoor system capable of producing more food than most families can eat. And when you’re growing more than you can eat, that surplus becomes something worth selling. The Indoor Mini Farm System is built around precisely this kind of efficient, vertically-stacked indoor production.

Tips for Success with Vertical Growing

Train early. Guide young vines onto their trellis when they’re small and flexible. Once they’ve sprawled on the ground, they’re harder to redirect without damage. A few minutes per week of tucking and tying at the start of the season pays off through summer.

Water more often. Wall planters and pocket gardens dry out faster than ground-level beds. Check them daily in summer and be prepared to water twice a day during heat waves. A drip irrigation system is worth the investment for any significant wall planting.

Use the shade strategically. Tall trellised plants cast shade — use it. Plant heat-sensitive crops (lettuce, spinach) on the north side of a trellis where they’ll be shaded in summer afternoon heat. This extends their productive season by weeks.

Build your trellis before planting. Trying to install a trellis structure around established plants damages roots and stems. Put the support in place first, then plant at the base.

Harvest frequently. This is doubly important for vertical crops like cucumbers and beans — plants produce more when harvested consistently. A cucumber left to yellow and go to seed on the vine signals the whole plant to stop producing. Pick young and often.

For more on the best crops to grow in small spaces generally — both vertically and in containers — the crop selection guide covers what grows best where. And if you’re thinking about combining outdoor vertical growing with an indoor hydroponic system for year-round production, the small homestead food production guide maps out how the two systems work together.

Frequently Asked Questions

What vegetables grow best vertically?

Cucumbers, pole beans, peas, tomatoes (indeterminate varieties), and small-fruited squash are the most productive vertical food crops. They’re natural climbers or easily trained upward, produce prolifically when given adequate support, and are significantly easier to harvest when grown vertically than when left to sprawl.

How do I build a simple vegetable trellis?

The simplest functional trellis is two 6-foot wooden stakes (or T-posts) driven into the ground 4–6 feet apart, with garden netting or wire mesh stapled or zip-tied between them. Total cost: $10–$20. Sufficient for cucumbers, beans, and peas. For tomatoes, add a third stake in the middle and use the Florida weave method with twine.

Can I do vertical gardening in an apartment?

Yes — railing planters, wall-mounted pocket planters, and tiered plant stands all work on apartment balconies. Indoors, a wire shelving unit with LED grow lights is one of the most effective vertical growing systems available, allowing you to grow 30–60 plants in a small floor footprint year-round.

What is the most space-efficient way to grow vegetables?

Combining vertical outdoor growing (trellised cucumbers, beans, and tomatoes) with an indoor hydroponic shelf system maximizes food production per square foot more than any other approach. The outdoor trellis turns linear fence space into productive growing area; the indoor shelf system stacks multiple growing levels vertically in a small footprint.

Do vertical gardens need special soil?

Wall planters and pocket gardens need a very lightweight, well-draining potting mix — standard potting mix with added perlite works well. Heavy garden soil compacts in vertical containers and can pull the structure off the wall. For climbing crops grown at ground level or in raised beds, normal well-amended garden soil or raised bed mix is fine.


Vertical growing is one of the highest-return changes you can make to a small garden — it costs little, requires no new ground space, and dramatically increases what you can produce. Combine it with an indoor growing system and you’ve got year-round food production in a genuinely small footprint. If you’re ready to set up the indoor piece, the Indoor Mini Farm System is the complete guide to getting it running.

Best Crops for Self-Sufficiency: What to Grow to Actually Feed Your Family

Self-sufficiency isn’t about growing everything — it’s about growing the right things. The crops that make the biggest difference to your actual food independence are rarely the ones that get the most attention in gardening media.

Corn looks impressive. Giant pumpkins are fun. But neither is going to meaningfully reduce your dependence on the grocery store. What will? Fast-growing leafy greens you eat every week. Herbs that cost $4 a bunch and take 30 days to grow. Tomatoes that produce 20 pounds from a single plant through the summer.

This guide cuts through the noise and focuses on the crops that genuinely move the needle — ranked by their practical value to a home grower trying to feed their family from their own land.

Table of Contents

How to Evaluate a Crop for Self-Sufficiency

When deciding what to grow, I use four criteria:

  1. Grocery value per square foot — How much would this cost to buy, and how much can I produce per unit of growing space?
  2. Frequency of use — Does my family eat this every week, or occasionally? Weekly staples have the highest impact.
  3. Ease of growing — Does it require specialized knowledge or equipment, or can a beginner grow it reliably?
  4. Season length — Does it produce once a year, or continuously over a long window?

The crops that score highest on all four criteria are almost always leafy greens, herbs, and summer fruiting vegetables. Not grains, not large livestock feed crops, not exotic specialty items — the fundamentals.

Tier 1: Grow These First (Highest Value Per Effort)

Salad Greens and Lettuce

Nothing in the garden delivers faster, more consistent value than lettuce and salad greens. A head of organic lettuce costs $4–$7 at the grocery store and lasts 3–5 days in the fridge. A hydroponic tote growing six heads takes 35 days and costs about $2 in nutrients and seeds to run. The math is immediate and obvious.

The additional advantage: greens grow year-round indoors. A passive Kratky hydroponic system on a shelf produces continuous lettuce in January just as readily as in July. No other crop offers that combination of speed, value, and year-round availability. For anyone serious about food self-sufficiency, this is the first system to build.

Value per sq ft per year: $40–$100+
Time to first harvest: 30–45 days
Season: Year-round indoors; spring and fall outdoors

Fresh Herbs

Fresh herbs are the single highest value-per-square-foot crop most home growers never think of as strategic. A bunch of fresh basil at the store costs $3–$5 and wilts in four days. A single basil plant in a hydroponic system, harvested regularly by pinching the tips, produces more basil than most families can use — continuously — for months.

Multiply that across cilantro, mint, parsley, chives, dill, and thyme, and you’ve eliminated one of the most consistent weekly grocery purchases most families make. Fresh herbs are expensive precisely because they’re perishable — and growing your own solves the perishability problem entirely.

Value per sq ft per year: $60–$150+
Time to first harvest: 28–40 days
Season: Year-round indoors

Kale and Spinach

Both are cut-and-come-again crops that produce continuously when harvested regularly. Both are expensive to buy organic and used frequently by health-conscious families. Both grow exceptionally well in hydroponic systems indoors, meaning they’re available in December as easily as in June.

Kale in particular is one of the most nutritionally dense crops you can grow — and one of the most cold-tolerant outdoors, extending your outdoor season well into fall. Grow it both indoors year-round and outdoors in spring and fall for maximum output.

Value per sq ft per year: $30–$80
Time to first harvest: 40–60 days (then continuous)
Season: Year-round indoors; spring, fall, and winter outdoors in mild climates

Tier 2: High-Value Summer Crops

Cherry Tomatoes

A single cherry tomato plant in a 15-gallon container or raised bed will produce 10–20 pounds of fruit through the summer. At $4–$6 per pint at the store, that’s $40–$80 of produce from one plant. Cherry tomato varieties — especially ‘Sun Gold,’ ‘Sweet 100,’ and ‘Juliet’ — are prolific, disease-resistant, and significantly better-tasting than anything available in supermarkets.

Grow 3–4 plants for a family of four and you’ll have more tomatoes than you can eat fresh, with plenty to freeze whole for winter cooking.

Cucumbers

Cucumbers are one of the most productive crops per square foot when grown vertically. A single plant trained up a trellis produces 15–25 cucumbers through the season — more if harvested consistently every 1–2 days. They’re also excellent for preserving: a summer’s cucumber surplus becomes a year of homemade pickles.

Zucchini and Summer Squash

The most prolific vegetable in the garden — to a fault. One or two plants is genuinely sufficient for a family of four. Plant only what you can use or give away. The upside: zero effort for enormous production. The downside: you will be giving zucchini to your neighbors whether they want it or not.

Beans

Pole beans in particular are excellent for self-sufficiency — they produce over a long season, grow vertically, fix nitrogen in the soil (improving it for subsequent crops), and freeze beautifully for winter use. A 10-foot row of pole beans produces enough fresh beans for regular family meals plus a full freezer supply.

Peppers

Both sweet and hot peppers are compact, productive, and store well dried or frozen. Hot peppers are particularly efficient — a single plant produces more than most families use fresh, and dried hot peppers keep for years. Sweet peppers freeze well and are expensive to buy organic year-round.

Tier 3: Calorie and Storage Crops

These crops provide calories and long-term storage rather than fresh weekly produce. They require more space but contribute meaningfully to genuine food self-sufficiency — the ability to feed yourself through winter from what you’ve grown and preserved.

Winter Squash

Butternut, acorn, and delicata squash store for 3–6 months in a cool location with no processing required. A 4×8 raised bed or trellis system can produce 20–40 pounds of winter squash — a meaningful calorie contribution that lasts from fall harvest through the following spring.

Potatoes

One of the most calorie-dense crops per square foot available to home growers. Grow in deep raised beds, straw bales, or large containers. A 4×4 bed can produce 25–50 pounds of potatoes. Store in a cool, dark location for months. Fingerling and specialty varieties that are expensive at the store are easy to grow at home.

Garlic

Plant in October, harvest in July. Zero maintenance in between. A 4×4 bed planted with garlic cloves produces 50–80 heads — a year’s supply for most families from a single planting. Hardneck varieties store 6–8 months; softneck varieties store up to 12 months. Garlic is one of the highest grocery value-per-square-foot crops that most home growers underutilize.

Dried Beans

Grow pole or bush bean varieties specifically for dry bean production — let them fully mature and dry on the vine, then shell and store. Dried beans store for years and provide significant protein. More space-intensive than other options but contributes meaningfully to true food security.

Perennial Crops: Plant Once, Harvest for Years

Perennial food crops are among the highest long-term return investments a homesteader can make. You do the work once and harvest for years or decades. Every self-sufficiency garden should include a perennial zone.

CropYears to ProductionProductive LifespanNotes
Asparagus2–320+ yearsPlant crowns, not seeds. Worth the wait.
Strawberries1 (partial), 2 (full)3–5 years per plantingRunners fill in gaps. Very high value.
Raspberries210–15 yearsProduce prolifically once established.
Blueberries3–550+ yearsSlow to establish, extraordinary long-term return.
Apple/pear trees3–5 (dwarf varieties)25–50 yearsDwarf varieties suit small spaces.
Perennial herbs1IndefiniteThyme, oregano, sage, chives — plant once.
Rhubarb220+ yearsVery low maintenance. Excellent for preserves.

Crops That Aren’t Worth It for Most Home Growers

Corn — Requires large blocks for pollination, produces once per season, and takes up enormous space for relatively low grocery value. Not worth it unless you have significant land.

Melons — Space-hungry, require extended heat, and inexpensive to buy in season. The space is better used for higher-value crops.

Wheat and other grains — Possible to grow in large quantities but require significant acreage, specialized harvesting equipment, and processing infrastructure to be practical at the homestead scale. Buy grains; grow vegetables.

Celery — Notoriously difficult to grow, requires consistent moisture and a long season, and is cheap to buy. Not worth the effort for most home growers.

Making Greens and Herbs Year-Round with Hydroponics

The single biggest limitation of a self-sufficiency garden is the seasonal gap — the months when nothing is producing outdoors. In northern climates that’s 4–6 months per year. During that window, the grocery store reclaims all the ground you gained during the growing season.

Closing that gap is the highest-leverage thing most home growers can do to improve their actual food independence. And the most practical way to close it is with indoor growing — specifically, a simple hydroponic system that produces leafy greens and herbs continuously, regardless of season.

The best crops for indoor hydroponic growing — lettuce, kale, spinach, basil, cilantro, watercress, arugula — are exactly the Tier 1 crops in this guide. The same crops that are most valuable to grow are also the most suited to indoor hydroponic production. That’s not a coincidence.

Set up an indoor system running year-round alongside your outdoor garden and you’ve effectively doubled or tripled your productive season. That’s where real food self-sufficiency starts to feel achievable — and where the Indoor Mini Farm System fits in as the indoor complement to everything you’re growing outside.

Frequently Asked Questions

What crops give the best return for a self-sufficient garden?

Salad greens, fresh herbs, cherry tomatoes, cucumbers, kale, and garlic consistently deliver the highest value per square foot for self-sufficiency gardeners. These crops are expensive to buy organic, perishable (meaning you’re always buying them fresh), and productive in small spaces. Start with these before expanding to calorie crops that require more space and experience.

What vegetables should I grow to be self-sufficient?

Focus on crops your family eats every week that are expensive or perishable: salad greens, herbs, tomatoes, cucumbers, peppers, beans, and winter squash for storage. Add garlic, potatoes, and dried beans if you have space. Include an indoor growing system for year-round greens and herbs — the seasonal gap is the biggest obstacle to genuine self-sufficiency.

How much garden space do I need to feed a family?

For fresh vegetables, herbs, and some preserved surplus, a family of four can source a significant portion of their produce from 200–400 square feet of well-managed raised bed space plus an indoor growing system. Complete caloric self-sufficiency requires much more land — typically half an acre or more — but most homesteaders focus on high-value fresh crops rather than staple calories, which makes a small space genuinely meaningful.

What is the most productive food crop per square foot?

Fresh herbs and salad greens consistently rank highest in value produced per square foot — especially when grown hydroponically indoors year-round. A single square foot of hydroponic growing space can produce $40–$150 worth of herbs and greens per year. Outdoor crops with high value per square foot include cherry tomatoes, pole beans, and garlic.


Start with the high-value crops — the ones your family eats every week that cost the most to buy. Add an indoor system for year-round greens. Build outward from there. That’s the path to genuine food self-sufficiency, one harvest at a time. If you’re ready to set up the indoor piece, the Indoor Mini Farm System is the place to start.

Winter Gardening Techniques: Grow Food All Year (Even in the Cold)

Most gardeners put the garden to bed in October and don’t think about it again until March. That’s five months of buying everything from the grocery store — five months of gap in what could be a year-round food production system.

Winter gardening isn’t about fighting the cold to grow tomatoes in January. It’s about understanding which crops thrive in cool and even cold conditions, using simple structures to extend those crops further, and — for the months when outdoor growing genuinely isn’t possible — having an indoor system that doesn’t stop just because it’s cold outside.

Here’s what actually works for growing food through winter, organized from the simplest techniques to the more involved.

Table of Contents

Cold-Hardy Crops That Grow Through Winter

Before you invest in any season extension structure, understand what can survive winter outdoors in your climate without protection. More crops handle cold than most gardeners realize — and many of them actually taste better after frost.

Crops That Survive Hard Frost (Below 28°F)

  • Kale — The most cold-hardy common vegetable. Many varieties survive temperatures well below 20°F. Flavor improves dramatically after frost — the plant converts starches to sugars as a cold protection mechanism. A kale harvest in January is often the sweetest of the year.
  • Collard greens — Even hardier than kale. A staple of winter gardens in the American South, collards handle repeated freezing and thawing without damage.
  • Brussels sprouts — Planted in summer, harvested in fall and through winter. Frost improves flavor. One of the best long-season cold-weather crops.
  • Parsnips and carrots — Left in the ground through frost, these root vegetables become sweeter. In many climates you can harvest directly from frozen ground through winter. Heavy mulching keeps the soil workable longer.
  • Garlic — Planted in fall, overwinters in the ground, harvested the following summer. Fully frost-hardy.
  • Overwintering onion sets — Planted in fall, produce early-spring onions before anything else is growing.

Crops That Handle Light Frost (28–32°F)

  • Spinach — Hardy to around 20°F with some protection. Can be sown in fall for overwintering in mild climates (zones 6+). Survives light snow and emerges in early spring.
  • Arugula — Surprisingly cold-tolerant. Grows slowly through winter under row cover and picks up speed as days lengthen in late winter.
  • Claytonia (miner’s lettuce) — One of the most cold-hardy salad crops available. Grows through winter in most zones with minimal protection.
  • Mâche (corn salad) — Specifically bred for winter growing. Germinates in cold, grows slowly all winter, and is ready to harvest in early spring. Mild, nutty flavor.
  • Swiss chard — Hardy to around 25°F. May die back in hard freezes but often regrows from the root when temperatures moderate.

The Frost Sweetening Effect

Many cold-hardy crops taste significantly better after frost exposure. Kale, Brussels sprouts, parsnips, carrots, and collards all convert starches to sugars when temperatures drop — a natural antifreeze mechanism that makes them noticeably sweeter. A November harvest of frost-kissed kale is genuinely different from the same plant harvested in August. This is one of the underappreciated pleasures of winter gardening.

Row Cover: The Cheapest Season Extender

Floating row cover — lightweight spunbonded fabric draped directly over plants — is the single most cost-effective season extension tool available. It admits light and water while trapping warmth from the soil, typically adding 4–8°F of frost protection depending on the weight used.

Row Cover Weights

  • Lightweight (0.5–0.9 oz/sq yd) — Primarily for pest exclusion and light frost protection (to about 28°F). Transmits 85–95% of light. Suitable for spring and fall use.
  • Medium weight (1.0–1.5 oz/sq yd) — Protection to about 24–26°F. Good all-purpose winter cover. Transmits 70–85% of light.
  • Heavy weight (2.0 oz/sq yd) — Protection to about 20°F. Transmits less light (30–50%) so best for short periods or crops that tolerate low light.

How to Use Row Cover

Drape directly over plants and secure edges with soil, rocks, or landscape staples. For taller crops, use wire hoops (made from 9-gauge wire bent into arches) to keep fabric off plants — fabric touching plants transmits cold more readily than fabric held above them. A roll of row cover ($10–$20) handles a full 4×8 bed and lasts multiple seasons.

Remove on warm days (above 40°F) to prevent overheating under heavy cover. Lightweight cover can stay on continuously — it’s breathable and won’t overheat plants even on mild winter days.

Cold Frames: A Step Up in Protection

A cold frame is essentially a bottomless box with a transparent lid — a mini greenhouse that sits directly on the garden bed. It captures solar heat during the day and releases it slowly at night, creating a microclimate that’s typically 10–15°F warmer than outside air temperatures.

In zone 6 (where winter lows regularly reach 0–10°F), a well-built cold frame extends the growing season by 4–6 weeks in both spring and fall, and allows cold-hardy crops like spinach, mâche, and arugula to survive through most of winter.

Simple Cold Frame Build

The simplest cold frame uses a salvaged storm window or old glass door as the lid, supported by four boards forming a rectangular box. The back should be taller than the front (angling the lid toward the south to capture more winter sun). A 4×4 ft cold frame with an old window lid costs almost nothing to build and dramatically extends your season.

Prop the lid open on warm days to prevent overheating — temperatures inside a cold frame can spike rapidly on sunny winter days even when outside air is cold. A simple stick prop works fine.

What to Grow in a Cold Frame

  • Spinach — sow in fall, overwinter in cold frame, harvest through winter and early spring
  • Mâche and claytonia — specifically bred for cold frame winter production
  • Arugula — grows slowly through winter, more productive than outdoors
  • Lettuce — survives milder winters (zones 7+) in a cold frame; marginal in colder zones
  • Kale and chard transplants — protection from the worst cold extends harvest

Low Tunnels and Hoop Houses

A low tunnel is a row cover or plastic film stretched over wire hoops — a step up from draping fabric directly on plants. It creates a more structured microclimate and makes it easier to vent on warm days by simply rolling up one side.

A hoop house (also called a high tunnel) is the larger version — tall enough to walk in, covering a full bed or section of garden. It’s the most effective season extension structure short of a full greenhouse, and can be built for $200–$500 for a 10×20 ft structure using EMT conduit and greenhouse plastic.

What Hoop Houses Enable

  • Zone 5–6: Year-round cold-hardy greens; tomatoes and peppers 4–6 weeks earlier in spring and later in fall
  • Zone 7–8: Near year-round outdoor vegetable production; winter lettuce, spinach, and herbs without supplemental heat
  • Zone 9–10: Essentially year-round growing for all crops including warm-season vegetables

A hoop house is a significant investment — both in cost and in time to build — but the payoff in growing season extension is substantial. For serious homesteaders in cold climates, it’s often the single most impactful infrastructure addition after the basic garden beds are established.

Heavy Mulching for Root Crop Overwintering

Many root crops can be left in the ground through winter and harvested as needed — a living root cellar that requires no infrastructure beyond a thick layer of mulch. This works particularly well for:

  • Carrots — Cover with 6–12 inches of straw mulch after the ground begins to freeze. Harvest directly from under the mulch through winter. Flavor improves continuously with cold exposure.
  • Parsnips — Even more cold-tolerant than carrots. Leave in ground all winter; harvest in early spring after frost sweetening. Some growers leave them until after the first spring thaw for maximum sweetness.
  • Beets — Hardy to about 25°F. Cover with mulch for deeper cold. Harvest until the ground freezes solid.
  • Jerusalem artichokes — Extremely cold-hardy tubers. Leave in the ground, harvest as needed through winter wherever the ground isn’t frozen solid.

Indoor Growing: The Real Winter Solution

All of the techniques above extend your outdoor season — they don’t replace it when temperatures drop below what even cold-hardy crops can handle. In zones 5 and colder, there are genuinely months where outdoor growing stops entirely regardless of how many cold frames you have. That’s when indoor growing becomes not just convenient but essential.

A simple indoor hydroponic setup — a shelf with LED grow lights and one or two passive growing totes — produces fresh lettuce, herbs, kale, spinach, and arugula in January just as readily as in July. It runs completely independent of outdoor conditions, costs $4–$10 per month to operate, and requires about 30 minutes of attention per week.

This isn’t a seasonal supplement — it’s a parallel system that runs 12 months a year. Combined with outdoor cold-frame growing and preserved summer produce, it closes the winter gap that makes “year-round food production” feel unachievable for most northern-climate gardeners.

The Kratky method is the simplest indoor starting point: no pump, no electricity beyond a grow light, no complexity. The complete DIY hydroponics guide covers all system options and costs. And for the full picture of how an indoor system integrates with an outdoor garden across all four seasons, the year-round vegetable garden plan maps it all out.

Winter Growing Calendar

CropPlant/SowMethodHarvest Window
GarlicOctoberIn-groundFollowing July
Overwintering onion setsOctoberIn-groundMarch–April
Spinach (overwintering)August–SeptemberCold frame or row coverNovember–April
MâcheSeptember–OctoberCold frameDecember–March
ArugulaSeptemberCold frame or row coverNovember–February
KaleJuly–August (transplant)Outdoors (very cold-hardy)November–February
Carrots (overwintering)SummerIn-ground under heavy mulchNovember–February
Lettuce (indoor hydroponic)Any timeIndoor grow light30–45 days after sowing, continuous
Herbs (indoor hydroponic)Any timeIndoor grow light28–35 days after sowing, continuous

If you’re ready to build the indoor piece that makes this calendar work through the coldest months, the Indoor Mini Farm System is the complete guide to getting it running — from setup through to harvesting consistently every week of the year.

Frequently Asked Questions

What vegetables can you grow in winter outdoors?

Kale, collard greens, and Brussels sprouts are the hardiest, surviving temperatures well below 20°F. Spinach, arugula, mâche, and claytonia survive light to moderate frost with or without protection. Carrots and parsnips can be left in the ground under heavy mulch through most northern winters. The colder your climate, the more you’ll rely on cold frames, row cover, and indoor growing to extend your season.

Do vegetables taste different after frost?

Many do — and better. Kale, Brussels sprouts, parsnips, carrots, and collards all convert starches to sugars as a cold-adaptation mechanism. Frost-sweetened kale harvested in November or December is noticeably milder and sweeter than the same variety harvested in August. This is one of the genuine pleasures of winter and fall gardening.

How do you keep a garden going in winter?

Use a combination of approaches: plant cold-hardy crops (kale, spinach, garlic) in fall for winter harvest; extend their season with row cover or a cold frame; overwinter root crops (carrots, parsnips) under heavy mulch; and run an indoor hydroponic growing system for fresh greens and herbs year-round regardless of outdoor temperatures. No single technique covers all of winter — the combination does.

Is a cold frame worth building?

Yes, for most gardeners in zones 5–8. A simple cold frame built from salvaged materials costs almost nothing and extends your outdoor season by 4–6 weeks in both spring and fall. For overwintering spinach, mâche, and arugula through winter, it’s the most cost-effective structure available. A more sophisticated hoop house extends the season further and is worth considering once you’re committed to year-round outdoor growing.

What is the easiest winter vegetable to grow?

Outdoors: kale requires the least intervention of any winter vegetable — plant it in summer, harvest through fall and winter with no protection needed in most zones. In a cold frame: mâche (corn salad) is specifically designed for winter production and requires almost no attention. Indoors: lettuce in a simple Kratky hydroponic setup is the easiest year-round crop available — 30–45 days from seed to harvest, continuous production, minimal maintenance.


Winter gardening isn’t about fighting the cold — it’s about working with it. Plant the right crops, use the right structures, and build an indoor system for the months outdoor growing genuinely can’t cover. If you’re ready to set up that indoor piece, the Indoor Mini Farm System is the complete guide to year-round food production from inside your home.

Homestead Garden Layout Ideas: Design a More Productive Growing Space

How you arrange your growing space matters almost as much as what you grow in it. A poorly planned layout means wasted sun, awkward access, poor soil management, and plants competing when they should be complementing each other. A well-designed one makes the same square footage significantly more productive — and significantly more enjoyable to work in.

This guide covers the best homestead garden layout ideas for small lots — from simple raised bed arrangements to integrated systems that combine outdoor beds, vertical growing, and indoor production into a coherent whole.

Table of Contents

Layout Principles That Apply to Every Garden

Before getting into specific configurations, a few principles apply regardless of your lot size or growing goals.

Sun First, Everything Else Second

Place your most productive vegetable beds in the location with the most direct sunlight — full sun (6–8+ hours) for fruiting crops, partial sun (4–6 hours) for leafy greens and cool-season crops. This sounds obvious but is frequently violated when people place beds where they look nice rather than where they’ll actually produce. No amount of good soil or careful planting compensates for inadequate light.

Orient Beds North-South

Running your beds north-south (the long side facing east-west) ensures that all plants receive roughly equal light throughout the day. East-west oriented beds tend to have the north side shaded by the south side plants as they grow taller. If you have tall trellises, position them at the north end of the bed so they shade only empty space (or deliberately planted shade-tolerant crops).

Prioritize Access

Every part of a garden bed should be reachable from a path without stepping in the bed. The standard raised bed width of 4 feet is based on this — most people can reach 2 feet comfortably from either side. Wider beds look efficient on paper but create compaction problems when you inevitably have to step in them.

Keep paths at least 18–24 inches wide for comfortable access with a wheelbarrow. Permanent pathways that are mulched or paved save enormous ongoing labor by suppressing weeds without maintenance.

Group by Water Needs

Thirsty crops (tomatoes, cucumbers, squash) are easiest to manage when they’re in the same zone, ideally with drip irrigation on one line. Cool-season crops (lettuce, spinach, kale) need less water and can be in a different zone or on a separate irrigation line. Herbs, once established, prefer drier conditions than most vegetables.

Raised Bed Layout Ideas

The Simple Parallel Layout (Best Starting Point)

Two to four 4×8 ft beds arranged in parallel rows with 24-inch paths between them. This is the standard layout for good reason — it’s simple to build, easy to manage, and highly productive. Total footprint for four beds: approximately 20×12 ft.

Place a trellis structure at the north end of each bed for vertical crops (cucumbers, beans, tomatoes). Plant tall crops at the north end of each bed, medium crops in the middle, and low crops at the south end to minimize shading.

The U-Shape Layout

Three beds arranged in a U configuration with a central workspace. This layout gives you access to all beds from the center without walking around the perimeter. Excellent for small or square spaces where a linear arrangement would be awkward. Good for accommodating a central water source, compost bin, or tool storage in the middle of the working space.

The Keyhole Layout

A circular or curved bed with a narrow path cut into the center like a keyhole. You access the whole bed from the center path without walking around the perimeter. Space-efficient and ergonomic — reduces the total path area required compared to rectangular beds. Particularly useful on uneven terrain where straight beds don’t work well.

The Intensive Square Foot Layout

Beds are divided into 1-foot squares, each planted with a specific number of plants based on their mature size (one tomato per square, four lettuce plants per square, 16 carrots per square, etc.). Maximizes production per square foot by eliminating wasted space between plants. Requires more planning upfront but dramatically increases yield per bed compared to traditional row planting.

Homestead Zoning: Organizing Your Space by Use

Beyond individual bed placement, thinking about your space in zones helps organize activities logically and reduces the friction of daily homestead tasks.

Zone 1: High-Frequency Zone (Closest to House)

The beds, containers, and systems you visit every day — your primary vegetable garden, your herb pots, your indoor growing shelf. Everything you harvest from daily should be as close to your kitchen as possible. A 10-second trip to pick fresh herbs is something you’ll actually do; a 10-minute walk to a back garden bed often isn’t.

This is also where your indoor growing system fits — immediately accessible, integrated into your daily routine, not a separate expedition.

Zone 2: Regular-Tending Zone (Mid-Distance)

Crops you check every 2–3 days: tomatoes, cucumbers, beans, squash. Your main vegetable beds. Compost bins. Irrigation controls. These get visited multiple times per week during peak season but don’t require daily access.

Zone 3: Low-Frequency Zone (Furthest from House)

Crops and systems that need weekly or less frequent attention: fruit trees, berry bushes, garlic and onion beds, cover crops, any small livestock. These don’t need to be close to the house and benefit from being in areas that may not be ideal for intensive vegetable production.

Integrating Vertical Growing

Every homestead layout should include vertical growing infrastructure — it’s the single most effective way to increase production per square foot without expanding your footprint. The key is designing vertical structures into the layout from the beginning rather than adding them as an afterthought.

  • Fence lines — The perimeter fence of any yard is free vertical structure. A row of cucumbers, beans, or even small squash trained up an existing fence adds significant production with zero additional footprint.
  • Trellis at bed ends — A permanent T-post and wire trellis at the north end of each raised bed handles all your vertical crops without requiring a separate structure.
  • Arbors and pergolas — Train grapes, hops, hardy kiwi, or annual climbers (scarlet runner beans, cucumbers) over a patio arbor. Provides shade in summer and food overhead.
  • Wall-mounted pocket planters — On any south-facing wall or fence, vertical pocket planters add herb and strawberry growing space from surfaces that otherwise contribute nothing to production.

For a full breakdown of vertical growing strategies and structures, the vertical gardening guide covers everything from simple trellis builds to tower garden systems.

Where to Put Perennials

Perennial crops — fruit trees, berry bushes, asparagus, artichokes, perennial herbs — need permanent spots in your layout because disturbing established perennials is counterproductive. Plan their placement carefully before committing.

Perennial Placement Rules

  • Plant on the north side of annual beds so they don’t shade them. A row of blueberry bushes or a dwarf apple tree on the north border of your garden creates a productive windbreak without shading your vegetable beds.
  • Create a dedicated perennial bed that won’t be disturbed by annual crop rotation. A 4×8 or 4×12 ft permanent bed for asparagus, strawberries, and perennial herbs gives you a stable, productive zone that improves every year.
  • Account for mature size. A dwarf apple tree looks manageable at planting but shades a significant area at maturity. A semi-dwarf apple tree 15 years later is a substantial structure. Plan for what things will become, not what they are when you plant them.
  • Group fruit trees to aid pollination. Most apple, pear, and cherry varieties need cross-pollination from another variety. Plant compatible varieties within 50 feet of each other.

Connecting Indoor and Outdoor Growing

The most productive homestead layouts treat indoor and outdoor growing as one integrated system rather than two separate activities. This means thinking about how your indoor shelf and your outdoor beds work together to produce food through every season.

In practice, this looks like:

  • Using your indoor grow light setup to start transplants in late winter for the outdoor spring garden — tomatoes, peppers, cucumbers — instead of buying starts
  • Running your indoor hydroponic greens system year-round so there’s never a gap in fresh leafy produce regardless of outdoor season
  • Moving production between indoor and outdoor as seasons shift — more outdoors in summer, more indoors in winter
  • Using your outdoor garden’s compost to improve the growing environment for soil-based indoor starts

For a complete picture of how this seasonal integration works through the year, the year-round vegetable garden plan maps out what’s growing where in each season. And for the best crops to grow on the indoor side of that system, the self-sufficiency crop guide ranks them by practical value.

Layout Ideas for Very Small Lots

If you have less than 500 square feet of outdoor growing space, strategic layout becomes even more important. Here’s how to maximize a very small footprint:

The One-Bed Intensive Layout

One 4×8 ft raised bed planted using square foot method, with a trellis at the north end for vertical crops. That single bed, intensively managed, can produce a meaningful amount of food: 4–6 tomatoes (or cucumbers) vertically, plus 12–16 lettuce plants, herbs along the edges, and beans running up the trellis. It’s not a complete food garden, but it’s a highly productive use of minimal space.

The Container and Wall Layout

No raised beds at all — grow everything in containers on a patio or balcony, using every vertical surface available. Two large containers (15 gallon) for cherry tomatoes, three 5-gallon containers for cucumbers or peppers, wall-mounted pocket planters for herbs, and railing planters for lettuce. Combined with an indoor hydroponic system for year-round greens, this fully patio-based approach produces a surprising amount of food from zero ground space.

For the full container approach, the container gardening guide covers what works and what doesn’t in detail.

Companion Planting Within the Layout

Companion planting — growing mutually beneficial plants together — adds another layer of efficiency to any layout. The best-documented companion combinations for a homestead garden:

PlantGood CompanionsWhy It Works
TomatoesBasil, marigolds, carrotsBasil may repel aphids; marigolds deter nematodes and whiteflies
BeansCorn, squash, carrotsBeans fix nitrogen; corn provides structure; squash suppresses weeds
CucumbersDill, beans, sunflowersDill attracts beneficial insects; sunflowers provide trellis support
LettuceCarrots, radishes, tall cropsGrows in shade of taller plants; radishes deter lettuce aphids
Kale/brassicasDill, celery, onionsDill and onions repel cabbage worms and aphids
GarlicAlmost everythingBroad pest-deterrent effect; especially good near roses and fruit trees

The Three Sisters combination — corn, beans, and squash — is the most famous companion planting system, developed by Native American farmers over centuries. The corn provides a trellis for the beans; the beans fix nitrogen; the squash’s large leaves shade the ground, suppressing weeds and retaining moisture. Plant them together in a 4×4 ft block for a self-supporting, productive combination that improves soil as it grows.

If growing your own food is the goal, the most important companion to your outdoor layout is an indoor growing system that keeps producing through winter. The Indoor Mini Farm System is the complete guide to building that indoor complement — the part of the system that makes year-round food production genuinely possible regardless of your outdoor layout or climate.

Frequently Asked Questions

How should I layout a small vegetable garden?

Start with one or two 4×8 ft raised beds oriented north-south in the sunniest part of your space, with a trellis at the north end for vertical crops. Add a permanent perennial border on the north side if you have room. Keep paths 18–24 inches wide for comfortable access. Place the most-used crops (herbs, salad greens) closest to the house. Add beds or containers as your confidence and space allow.

What is the most productive small garden layout?

The combination of intensive raised bed growing (square foot method) with vertical structures for climbing crops consistently produces the most food per square foot. Adding an indoor growing system for year-round greens significantly increases total annual output from the same footprint. For a very small lot, the container-and-wall approach — maximizing every vertical surface — can rival traditional bed growing in total yield.

How do I design a homestead garden?

Observe your space for a full season before making permanent changes. Map sun, shade, water access, and wind. Organize by zones based on visit frequency — daily-use crops near the house, weekly-tended crops further out. Place annual beds in full sun, perennials where they won’t shade annuals. Integrate vertical growing throughout. Plan for indoor growing as a year-round complement to outdoor production.

Should raised beds run north-south or east-west?

North-south orientation — the long sides of the bed facing east and west — gives all plants roughly equal sun exposure throughout the day and is generally preferred for most vegetables. East-west beds tend to have the northern plants shaded by southern ones as they grow. The exception: if you have a slope, orient beds across the slope (on contour) to prevent erosion and runoff, regardless of compass direction.


A good layout makes every hour in the garden more productive and every harvest more satisfying. Design it thoughtfully once and it pays off for years. If you’re ready to add the indoor piece that makes the whole system work year-round, the Indoor Mini Farm System is the complete guide to getting it running alongside your outdoor garden.

Growing Greens for Profit: The Home Grower’s Income Guide

Of all the crops a home grower can produce for income, leafy greens — lettuce, kale, spinach, arugula, watercress — offer one of the most favorable combinations of fast growth, high value, year-round demand, and minimal production cost.

The challenge with selling greens isn’t demand — it’s the model. Harvesting individual leaves and selling them by the pound is labor-intensive for modest return. But there’s a better way that most growers never consider: selling the living plant rather than the harvested crop.

This guide covers the most practical model for growing greens for profit at home — what to grow, how to grow it efficiently, how to sell it, and what you can realistically earn from a small indoor operation.

Table of Contents

Why Greens Are One of the Best Profit Crops

Fresh leafy greens check every box for a viable small-scale profit crop:

  • High grocery value. Organic lettuce runs $4–$7 per head. Specialty greens like watercress and arugula run $4–$8 per bunch. These are expensive relative to their weight — which means the margin for a grower is significant.
  • Short production cycle. Lettuce is ready to harvest in 30–45 days from transplant. That’s 8–12 crop cycles per year from the same growing space, compounding your annual production.
  • Year-round demand. Unlike summer squash or corn, salad greens are purchased every week by most families, regardless of season. The demand doesn’t stop in November.
  • Excellent indoor growing candidates. Greens grow just as well — often better — under LED grow lights as they do in a summer garden. That means year-round production from an indoor setup regardless of climate or season.
  • Low production cost. Seeds, nutrients, water, and electricity for a Kratky hydroponic setup cost $2–$4 per tote of 6 plants. The margin between production cost and retail value is exceptional.

The Living Plant Model: Why It Works Better Than Selling Cut Greens

The conventional model for selling greens is to harvest them, bag them, and sell them by weight. A bag of mixed salad greens sells for $5–$8. You spend significant time harvesting, washing, drying, and bagging. Your margin per hour of labor is modest.

The living plant model is different — and significantly more profitable per hour of work.

Instead of harvesting your greens, you sell the entire growing tote — plant, growing medium, and remaining nutrient solution — to your customer. They take it home, put it on a sunny windowsill or under a simple grow light, and harvest from it themselves for weeks. When the tote is spent, they come back for another.

Here’s why this model works so much better economically:

  • Higher price point. A living lettuce tote sells for $30–$50. The same plants harvested and bagged would sell for $8–$15. The living plant delivers ongoing value the customer can see — they’re willing to pay for it.
  • Less labor. You do zero harvesting, washing, or packaging. You grow the plants, hand the customer a tote, and immediately plant a new one. The customer does the harvesting work.
  • Longer “shelf life.” A bag of cut greens lasts 5–7 days. A living tote lasts 4–8 weeks on a customer’s windowsill. That longevity justifies the premium price and reduces the urgency pressure on your growing schedule.
  • Natural recurring sales. When the tote is done, the customer needs a new one. This creates an organic repeat purchase cycle without any marketing effort.

This is the exact model the Indoor Mini Farm System is built around — growing living plants efficiently and building a neighborhood customer base that generates consistent recurring income.

Best Greens to Grow for Profit

GreenDays to HarvestSell Price Per ToteNotes
Butterhead lettuce35–45$30–$45Classic, broad appeal. Most popular seller.
Romaine35–45$30–$45Familiar variety. Very productive per tote.
Mixed leaf lettuce30–40$30–$50Visual variety appeals to customers.
Kale50–60 (then ongoing)$35–$50Superfood appeal. Cut-and-come-again longevity.
Spinach40–50$30–$45Very popular. Prefers cooler temperatures.
Arugula30–40$35–$55Premium positioning. Less common, commands higher price.
Watercress20–30$35–$55Fastest growing. Rarely available fresh locally.
Swiss chard (rainbow)50–60$35–$50Visual appeal. Cut-and-come-again longevity.

Start with butterhead or romaine lettuce — they’re fast, reliable, and have the broadest customer appeal. Once you have a steady flow of lettuce customers, add kale or arugula as premium options for health-conscious buyers.

The Growing System: Kratky Hydroponics

The Kratky passive hydroponic method is the ideal production system for a living plant selling operation. Here’s why:

  • No pump required. No pump means no electricity cost beyond the grow light, no equipment maintenance, no noise.
  • Self-contained totes. Each tote is a complete, portable unit. When you sell a tote, you hand the customer the entire self-contained system — the plant, the growing medium, and the remaining nutrient solution. The customer doesn’t need to do anything except put it in a light.
  • Minimal maintenance. Check pH and water level every 3–4 days. That’s genuinely all the active maintenance required during a grow cycle.
  • Scales simply. Add more totes as demand grows. No additional infrastructure beyond shelf space and grow lights.

The full setup — shelving unit, LED grow lights, totes, net pots, nutrients, and pH kit — runs $150–$250 for a system that produces 2–3 totes per week. That’s the complete capital investment for a production system generating $240–$450 per month at market prices.

For a detailed setup guide, the indoor hydroponic garden setup guide covers everything from equipment to first harvest. And if you want to understand nutrient management for a production system, the hydroponic nutrients guide covers what you need.

Production Math: What You Can Actually Earn

Let’s run the numbers honestly.

Single Tote Production Cycle

ItemCost
Seeds (lettuce, 6 plants)$0.30
Nutrients (per tote)$0.50
Electricity (grow light, 35 days)$1.50
WaterNegligible
Growing medium (amortized)$0.50
Total production cost per tote~$2.80
Selling price per tote$35–$45
Gross margin per tote$32–$42

Monthly Production Scenarios

Totes Sold Per WeekMonthly RevenueMonthly Production CostNet Monthly Income
2$280–$360~$22$258–$338
4$560–$720~$45$515–$675
8$1,120–$1,440~$90$1,030–$1,350

The time to produce and sell 4 totes per week — planting, monitoring, and delivery — is approximately 2–3 hours. That’s an effective hourly rate of $170–$225 per hour of work. These are genuinely exceptional economics for a home-based operation.

The limiting factor isn’t usually production capacity — it’s customer demand. Building from 2 totes/week to 8 requires finding and maintaining 8–10 recurring customers. That process takes a few months of consistent effort but compounds: happy customers refer neighbors, and each referral adds to a growing passive income stream.

How to Find Buyers

Start With Your Immediate Network

Your first customers are almost certainly people you already know. Tell your neighbors what you’re doing. Bring a tote to a neighbor’s door and offer it at a discount for their first try. Word of mouth from one enthusiastic customer is worth more than any marketing you’ll do.

Nextdoor and Neighborhood Facebook Groups

A simple post — “I’m a local grower producing organic living lettuce totes ready to harvest from your windowsill — $35, I deliver within [X] miles” — reaches hundreds of nearby households instantly. A photo of a lush, ready-to-harvest tote does the selling. This is the most effective single marketing channel for a neighborhood selling operation.

Local Facebook Marketplace

List your totes as a local pickup or delivery item. Consistent presence in local food groups builds name recognition over time. Respond promptly to inquiries — speed of response is one of the biggest factors in whether a marketplace inquiry converts to a sale.

Farmers Markets

A living lettuce tote display at a farmers market is genuinely unusual — most vendors sell cut produce. The novelty draws attention and creates conversations that lead to sales. More importantly, every market customer who buys a tote is a potential weekly neighbor customer. Follow up with a card that includes your contact info and encourage them to reach out directly for future orders.

Local Restaurants and Cafes

Restaurants that focus on fresh, local ingredients are worth approaching — especially for specialty greens like arugula, watercress, and herb varieties they struggle to source fresh. A consistent weekly supply is more valuable to a restaurant buyer than occasional availability. Pricing for restaurant sales is typically below direct consumer pricing but the volume and reliability offset the lower margin.

Scaling Up

Once your initial customer base is established and you’re consistently selling your current production, scaling is a matter of adding shelf capacity and grow lights — the same infrastructure, more of it.

A second shelving unit doubles production with no additional customer acquisition cost if your existing customers have referred others. The marginal cost of additional capacity is low; the marginal revenue from existing customers at higher production is high.

At larger scale — 20+ totes per week — you’ll want to think about production scheduling more systematically: staggering plantings so you have 3–4 totes ready every week rather than 20 all at once, optimizing your nutrient mixing routine, and possibly adding a subscription model so customers pre-commit to regular deliveries.

The full system for building from first customer to a consistent weekly production and selling operation is exactly what the Indoor Mini Farm System walks through — from growing setup through customer acquisition and the subscription model that makes it genuinely passive income.

Frequently Asked Questions

Is growing greens for profit realistic from a home?

Yes — it’s one of the most realistic small-scale agricultural income models available. The economics are straightforward: low production cost, high retail value, short production cycle, and year-round demand. The living plant model specifically is well-suited to home growing because it eliminates the labor-intensive harvesting and packaging steps that make cut produce sales less efficient at small scale.

How much can you make growing lettuce at home?

A home operation selling 4 living lettuce totes per week at $35–$45 each generates $560–$720 per month in revenue with production costs under $50/month. At 2–3 hours of work per week, that represents an effective hourly rate of $150–$225. Scaling to 8 totes per week at the same pricing generates $1,100–$1,400 per month from a spare bedroom shelf system.

What greens are most profitable to grow?

Butterhead and romaine lettuce sell most consistently due to broad customer appeal and fast production cycles. Arugula and watercress command premium prices ($35–$55 per tote) due to their specialty positioning and limited local availability. Kale totes have strong appeal to health-conscious buyers and last longer than lettuce, justifying their price point. Starting with lettuce and adding specialty greens as your customer base grows is the optimal progression.

Do I need a license to sell home-grown greens?

In most states, selling fresh produce and living plants directly to consumers requires no license at small scale. See the guide to selling produce from home legally for a full breakdown of what’s required in your state and situation.


Growing greens for profit is one of the most accessible home-based income streams available — fast to start, inexpensive to set up, and genuinely excellent economics per hour of work. The Indoor Mini Farm System is the complete guide to building the production and selling system that makes it work consistently.

Hydroponic Lettuce Business From Home: The Complete Setup Guide

A home-based hydroponic lettuce business sounds like something between a hobby and a pipe dream. It’s neither. It’s one of the most straightforward small-scale agricultural income models available — and one that works especially well because it doesn’t require land, a commercial kitchen, or a farmers market permit to get started.

The model is simple: grow full-size lettuce in a passive hydroponic system, sell the living plant rather than the harvested crop, deliver to neighbors, repeat. The economics are genuinely good. The time requirement is minimal. The startup cost is low enough to recoup within the first month of sales.

Here’s exactly how to build it.

Table of Contents

Why Lettuce Is the Right Starting Crop

Lettuce isn’t glamorous. It’s not a high-status crop. But it has a combination of characteristics that make it nearly ideal as a home business crop:

  • Fast. 30–45 days from seed to a ready-to-sell tote. That’s 8–10 complete crop cycles per year from the same growing space.
  • Reliable. Lettuce is one of the most forgiving hydroponic crops. pH variation, minor temperature swings, and beginner mistakes rarely cause complete crop failure. You will produce sellable plants consistently.
  • High perceived value. Organic lettuce at the grocery store costs $4–$7 per head. A living tote of six heads, ready to harvest continuously for weeks, has obvious value well above that.
  • Universal demand. Every household buys salad greens. The market for lettuce is not a niche — it’s everyone around you.
  • Year-round indoors. Unlike outdoor crops, hydroponic lettuce grows the same in December as in June. Your production is constant; your income is constant.

You can add specialty greens — kale, arugula, watercress, spinach — as your business grows. But lettuce is the crop that builds your customer base and proves the model. Start there.

The Business Model Explained

The key insight that separates a profitable home lettuce operation from a labor-intensive one is the selling model: you sell living plants, not harvested greens.

Traditional produce selling requires harvesting, washing, drying, packaging, and selling — significant labor for modest margins. The living plant model eliminates all of that. You grow the plant to full size in a hydroponic tote, hand the entire tote to your customer, and they harvest it themselves over the following weeks from their windowsill.

Your production workflow is simply: seed, transplant, grow, sell, repeat. No harvesting. No packaging. No perishability pressure on your end. When the customer’s tote is done, they contact you for another one. The product sells itself through the experience of using it.

This model works because customers are paying for ongoing value — weeks of fresh food that’s better than anything in the grocery store — not just a single purchase. The price reflects that ongoing value rather than the cost of a single head of lettuce. A tote priced at $35–$45 is a bargain for the customer and a highly profitable product for you.

Startup Costs and Equipment

The complete equipment list for a home hydroponic lettuce operation producing 3–4 totes per week:

ItemCostNotes
Wire shelving unit (5-tier, 18×48″)$60–$90Holds 2 totes per shelf, 5 shelves = 10 totes capacity
LED grow lights (one per shelf)$25–$40 each45W full-spectrum panel; need one per shelf
Outlet timers (one per shelf)$10–$15 eachSet 16 hrs on / 8 hrs off
Storage totes with lids (10–18 gal, opaque)$5–$10 eachStart with 4–6; add as demand grows
2-inch net pots (50-pack)$6–$8Lasts many grows
Hydroton clay pebbles (small bag)$10–$15Reusable indefinitely
Hydroponic nutrients (MaxiGro or similar)$12–$18Lasts 6+ months for small operation
pH test kit and pH Up/Down$15–$20Essential — don’t skip
Seeds (lettuce varieties)$5–$10Start with 2–3 varieties
Total startup investment~$200–$300For 4-tote/week capacity

At $35–$45 per tote and 4 totes per week, you recoup this investment in 2–3 weeks of sales. The ongoing monthly cost — nutrients, seeds, electricity — runs $15–$25 for this scale of operation.

Production: From Seed to Sale

Week 1: Germination

Sow lettuce seeds in small rockwool cubes or directly into net pots with clay pebbles. Keep moist and in a warm location (65–72°F). Germination takes 3–5 days. Once seeds have sprouted and show their first true leaves, they’re ready to move to the Kratky totes.

Weeks 2–5: Main Grow

Transplant seedlings into net pots in your prepared totes. Mix nutrient solution to the correct concentration (EC 0.8–1.4 for lettuce), adjust pH to 5.8–6.2, and fill totes to just below the net pot bottom. Place under grow lights on a 16-hour timer. Check pH every 3–4 days. Monitor water level weekly.

Growth accelerates in weeks 3–5. By week 5–6, you have a full, lush tote ready to sell.

Sale and Replant

When the tote is ready, arrange delivery or pickup with your customer. The tote goes with them — growing medium, plants, and remaining nutrient solution included. They don’t need any equipment or knowledge beyond a windowsill or lamp. Immediately rinse the net pots, prepare a new tote, and plant the next batch. The cycle never stops.

To maintain consistent weekly supply, stagger your plantings. If you want to sell 4 totes per week and each tote takes 5 weeks to grow, you need 20 totes in various stages of growth at any given time. A 5-tier shelving unit with 4 totes per shelf handles this volume comfortably.

Pricing Your Lettuce Totes

Price based on value to the customer, not cost of production. A tote of 6 heads of ready-to-harvest organic lettuce that will produce food for 4–8 weeks is worth $35–$50 to most households. That’s less than a week’s worth of bagged salad from the grocery store, for weeks of fresh food.

Pricing guidelines:

  • Standard lettuce tote (6 plants): $30–$45
  • Premium or mixed variety tote: $40–$55
  • Kale or specialty greens tote: $35–$50
  • Delivery surcharge (optional): $3–$5 for deliveries beyond 1 mile
  • Subscription discount: 10–15% off for customers who commit to monthly orders

Don’t underprice to compete with grocery stores — you’re not competing with grocery stores. You’re offering something fundamentally different: a living food source with no waste, no wilting, and weeks of harvests from a single purchase.

Finding Your First Customers

Your first customer is almost certainly a neighbor. Here’s the progression that works:

  1. Give one away first. Bring a ready-to-harvest tote to a neighbor and say “I’m starting a small growing operation — I’d love your feedback on this.” Most people are delighted. Most become customers.
  2. Post on Nextdoor. A photo of a lush, ready-to-harvest tote with a simple description gets attention. “Local grower — organic living lettuce totes, harvest-ready, $35 delivered to your door” is enough to start.
  3. Ask for referrals. Every happy customer knows 5–10 people who would be interested. Ask explicitly: “Do you know anyone else who’d like one?”
  4. Build a subscription list. Once you have 5–6 regular customers, offer a monthly subscription at a small discount. Predictable recurring revenue makes production planning much easier.

Weekly Operations Routine

TaskFrequencyTime
Check pH on all totesEvery 3–4 days10 minutes
Check water levelsWeekly5 minutes
Plant new totes (to replace sold ones)Weekly15 minutes
Harvest assessment (which totes are ready)Weekly5 minutes
Customer communication and delivery coordinationAs needed15–20 minutes
Total weekly time50–60 minutes

For 4 totes per week sold, the total active work time is under an hour per week. That’s the core appeal of this model — exceptional economics per hour of effort.

Realistic Income Projections

Net Income
StageTotes/WeekMonthly RevenueMonthly Cost
Getting started2$280–$360~$20$260–$340
Established (3 months)5$700–$900~$40$660–$860
Scaled (6–12 months)10$1,400–$1,800~$75$1,325–$1,725

The trajectory from 2 to 10 totes per week is primarily a customer acquisition challenge, not a production challenge. The production infrastructure scales cheaply. Finding and retaining 10–12 regular customers is the real work of building this business — and it’s work that mostly happens in the first 3–6 months.

Selling fresh produce and living plants directly to consumers is permitted in virtually every state with no special license at the scale a home operation operates. You’re selling an agricultural product, not a processed food — the regulatory burden is minimal. For a full breakdown, the guide to selling produce from home legally covers what each state requires and what you need to know about taxes on home-based produce sales.

The complete production-to-customer system for building this business — including the exact growing setup, customer acquisition process, and subscription model — is what the Indoor Mini Farm System walks through in full detail.

Frequently Asked Questions

How much can you make selling hydroponic lettuce from home?

A home operation selling 4–5 living lettuce totes per week at $35–$45 each generates $560–$900 per month in revenue with production costs under $50. Scaling to 10 totes per week generates $1,400–$1,800 monthly. The time requirement is under two hours per week at either scale, making this one of the highest hourly-rate home businesses available.

Is a home hydroponic lettuce business realistic?

Yes — it’s one of the more realistic small-scale agricultural income models precisely because it doesn’t require land, a commercial kitchen, a business license (for fresh produce in most states), or significant startup capital. The main constraint is customer acquisition, not production. Once you have 8–12 regular customers, the operation is self-sustaining with minimal marketing effort.

How long does it take to grow lettuce hydroponically?

30–45 days from transplant to a full, ready-to-sell tote of lettuce. Some faster varieties are ready in 28–30 days. This short production cycle means you can complete 8–10 full crop cycles per year from the same growing space — a major advantage over slower crops.

What hydroponic system is best for a lettuce business?

The Kratky passive method is ideal for a home lettuce business because it requires no pump, no electricity beyond a grow light, and produces self-contained portable totes that the customer takes home with the plant. It’s the simplest setup, the cheapest to run, and the most compatible with the living plant selling model. The Kratky method guide covers the full setup.


A home hydroponic lettuce business is genuinely achievable — straightforward economics, minimal time commitment, and a product that sells itself through the experience of using it. The Indoor Mini Farm System is the complete guide to building it from setup through to a consistent weekly income.

Selling Herbs From Your Garden: The Complete Home Grower’s Guide

Herbs are the sleeper crop of home-based income growing. A bunch of fresh basil at the grocery store costs $3–$5 and wilts in four days. A cilantro plant costs the same and lasts a week if you’re lucky. The grocery store model for fresh herbs is genuinely bad — expensive, wasteful, and rarely what you actually want when you reach for it.

That structural problem in how herbs are sold is your opportunity. You can grow fresh herbs continuously at home — indoors, year-round — and sell them to neighbors who are tired of paying high prices for something that goes bad before they use it. The demand is reliable, the margins are excellent, and the growing is simple.

This guide covers exactly which herbs sell best, how to grow them productively at home, how to price and sell them, and how to build a reliable herb income stream alongside other growing activities.

Table of Contents

Why Herbs Are an Ideal Home Income Crop

Fresh herbs have a combination of characteristics that make them unusually well-suited to home growing for income:

  • High value per ounce. Fresh herbs are among the most expensive produce items by weight in any grocery store. Basil runs $25–$40 per pound retail. That’s a meaningful margin for a home grower producing it for cents per ounce.
  • Perishable — the best kind of product to sell. Herbs wilt and lose flavor quickly. Customers who want fresh herbs need them regularly, which creates reliable recurring sales that don’t need to be resold each time.
  • Continuous harvest. Unlike tomatoes or cucumbers that produce in a defined window, herbs like basil, mint, and chives produce continuously when harvested regularly. One plant can provide months of product.
  • Indoor-friendly. Herbs grow exceptionally well under LED grow lights, making them a year-round crop for indoor growers regardless of season or climate.
  • Broad appeal. Every household uses herbs. The market isn’t niche — it’s everyone who cooks.

Best Herbs to Sell (and What They Earn)

HerbRetail Price (grocery)Living Plant Sale PriceCut Bunch PriceNotes
Basil$3–$5/bunch$8–$15/plant$3–$5/bunchBest seller. Grows explosively under lights. Year-round indoors.
Cilantro$2–$4/bunch$6–$10/plant$2–$4/bunchHigh demand. Bolts in heat — ideal for indoor growing.
Mint$3–$5/bunch$6–$12/plant$3–$5/bunchExtremely vigorous. Multiple varieties (peppermint, spearmint, mojito mint).
Chives$2–$4/bunch$6–$10/plant$2–$3/bunchFast, reliable, cut-and-come-again. Very low maintenance.
Parsley$2–$4/bunch$6–$10/plant$2–$4/bunchBoth flat-leaf and curly sell well. Good fill-in crop.
Dill$2–$4/bunch$6–$10/plant$2–$4/bunchSeasonal in many areas; indoor growing makes it year-round.
Thai basil$4–$6/bunch$10–$16/plant$4–$6/bunchSpecialty positioning. Popular with Asian food lovers and restaurants.
Lemon balm$4–$7/bunch$8–$14/plant$4–$6/bunchLess common, premium price. Herbal tea and cocktail market.
Shiso (perilla)$5–$8/bunch$10–$18/plant$5–$8/bunchSpecialty herb, excellent restaurant market. Hard to find locally.

Start with basil, cilantro, and mint — the three herbs that have the widest customer appeal, grow fastest, and sell most consistently. Add specialty herbs like Thai basil and shiso once you have an established customer base that includes restaurant buyers.

Growing Herbs for Sale: Indoor vs. Outdoor

Indoor Hydroponic Growing (Recommended)

Growing herbs hydroponically indoors under LED grow lights is the most reliable approach for year-round production. The Kratky passive method works extremely well for most herbs — no pump, minimal maintenance, consistent production.

Key advantages of indoor herb growing for selling:

  • Year-round production regardless of season
  • No outdoor pests or disease pressure
  • Controlled environment produces consistent, clean, visually appealing plants
  • Faster growth under optimal conditions than outdoor soil growing
  • Ability to produce herbs like cilantro and dill year-round that bolt quickly outdoors in warm weather

Herbs that grow especially well hydroponically: basil (grows explosively — needs frequent harvesting to stay productive), cilantro, mint, chives, dill, and watercress. The complete crop guide covers the best herbs for hydroponic growing in more detail.

Outdoor Growing (Seasonal Supplement)

Outdoor herb growing is excellent as a seasonal supplement to an indoor operation. Perennial herbs — thyme, oregano, sage, chives, mint — establish themselves outdoors and require almost zero maintenance once planted. They provide consistent product through the outdoor growing season and can be propagated to expand your indoor collection through the winter.

Basil grown outdoors in full sun during summer is faster and more productive than indoor growing, though it’s vulnerable to the first frost. Use outdoor production to supplement your indoor system during peak summer months.

Selling Living Plants vs. Cut Bunches

You have two basic options for how to sell herbs: as cut bunches or as living plants. Both have a place in a well-rounded herb selling operation.

Living Herb Plants

A living basil plant in a pot sells for $8–$15 — significantly more than a cut bunch at $3–$5. The customer gets weeks of fresh basil rather than a bunch that wilts in days. They’re happy to pay more because the value is obvious and ongoing.

For an indoor hydroponic operation, selling living herbs in small net pots or transplanted into soil containers is the most natural model. Customers take the plant home, harvest from it, and come back for another when it’s spent. The repeat purchase cycle is built into the product.

Cut Bunches

Cut herb bundles are the right product for farmers markets, where customers want something to take home and use today. Bundles of 3–5 stems wrapped with a rubber band or twist tie, priced at $3–$5 each, sell quickly at market booths. Mix variety bundles (basil + chives + parsley) are popular because they replicate the fresh herb variety most recipes call for.

The best strategy: sell living plants direct-to-neighbor for recurring income, and sell cut bunches at farmers markets to reach new customers who then become living plant customers over time.

How to Price Your Herbs

Price living plants at 2–3x the retail grocery price for a single bunch — you’re selling something that lasts much longer and delivers much more value. A $4 grocery bunch of basil wilts in 4 days. An $12 living basil plant harvests for 4–6 weeks. The value proposition is clear and the price is justified.

For cut bunches, price at grocery store specialty shop levels — not discount grocery levels. You’re providing something local, fresh, and often organic; price accordingly.

  • Living herb plant (single): $8–$15
  • Living herb trio (3 complementary herbs in one pot or tray): $20–$30
  • Cut bunch (single herb): $3–$5
  • Mixed herb bundle (3 herb varieties): $6–$10
  • Specialty herb (Thai basil, shiso, lemon balm): 25–50% premium over standard pricing

Where to Sell Your Herbs

Neighbors (Best Starting Point)

Direct neighbor sales through Nextdoor and neighborhood Facebook groups build the most valuable customer relationships. A neighbor who buys a basil plant from you every month is low-effort recurring income. Start there, build your base, and add other channels once the neighbor operation is running smoothly.

Farmers Markets

Herb displays are among the most visually compelling at any farmers market — fragrant, colorful, and immediately appealing. A well-arranged herb booth draws customers who wouldn’t have stopped for produce. Cut bunches and living pots both sell well. The farmers market guide covers booth setup and selling strategy in detail.

Restaurants and Cafes

Restaurants are excellent buyers for specialty herbs they struggle to source locally — Thai basil, fresh dill, shiso, lemon balm, and microherb garnishes. Approach restaurants with a sample of what you grow and a simple weekly availability and pricing sheet. Restaurant buyers pay wholesale prices (typically 40–60% of retail) but order consistently and in quantity, making them efficient to supply.

Local Grocery Stores and Co-ops

Smaller independent grocery stores and food co-ops often source from local growers where the large chains won’t. Approach the produce manager with samples. Expect to supply on consignment initially (you’re paid for what sells) or at wholesale pricing. This channel requires consistent, reliable supply and is better suited to an established operation than a startup.

Value-Added Herb Products

Extending fresh herbs into preserved products dramatically increases margin and shelf life. Where cottage food laws permit:

  • Dried herb blends — Herbes de Provence, Italian seasoning, chimichurri blend, za’atar. $8–$14 per small jar. Very long shelf life. Excellent gift market.
  • Herb-infused oils — Garlic-herb olive oil, basil oil, rosemary oil. $10–$16 per bottle. Popular at farmers markets and as gifts. Check your state’s cottage food law — infused oils sometimes have specific requirements.
  • Herb-infused vinegars — Tarragon vinegar, basil vinegar, herb blends. Lower regulatory complexity than oils. $8–$12 per bottle.
  • Herb salts — Blend dried herbs with flaky sea salt. Incredibly easy to make. $8–$14 per jar. One of the highest-margin value-added products available from a herb garden.
  • Fresh herb tea blends — Mint, lemon balm, chamomile, and other herbal tea herbs dried and blended. $6–$12 per tin. Strong market among tea drinkers.

Value-added herb products work best as a complement to fresh herb sales — they extend your seasonal outdoor production into a year-round product line and give you something to sell at holiday markets when fresh produce isn’t available.

For the complete model of building a home-based growing income from scratch — starting with herbs and lettuce and building into a consistent monthly income — the Indoor Mini Farm System covers everything from setup through to a stable customer base.

Frequently Asked Questions

What herbs are most profitable to grow and sell?

Basil consistently tops the profitability list for home herb growers — it grows fast, harvests continuously, sells at a premium as a living plant, and has universal demand. Specialty herbs like Thai basil, shiso, and lemon balm command higher per-unit prices due to their limited local availability. For cut bunches at farmers markets, cilantro and mixed herb bundles are reliable high-volume sellers.

Can you make money selling herbs from a home garden?

Yes — it’s one of the more accessible home-based produce income streams precisely because herbs are expensive to buy, perishable, and used by virtually everyone. A small indoor herb operation selling living plants to neighbors and cut bunches at a farmers market can generate $200–$600 per month from a single shelving unit with minimal time investment.

Do I need a license to sell herbs from my garden?

For fresh herbs and living plants sold directly to consumers, most states require no license at small scale. Processed herb products — dried blends, infused oils, herb salts — fall under cottage food laws that vary by state. See the guide to selling produce from home legally for the full breakdown.

What is the fastest herb to grow for profit?

Basil and cilantro are both ready for first harvest in 28–35 days from transplant under good growing conditions. Chives are even faster — 20–25 days for established plants to regrow after cutting. For a home hydroponic operation, basil is generally the fastest path to sellable product with the highest per-unit return.


Herbs are one of the highest-margin crops a home grower can sell — high value, continuous harvest, year-round demand. Start with basil, cilantro, and mint, build a small neighbor customer base, and expand from there. If you’re building the indoor growing system that makes it year-round, the Indoor Mini Farm System is the complete guide.

Grow Food Indoors (No Green Thumb Required)

Revealed: How anyone can turn 5 square feet into a productive indoor food garden.

Grow food indoors, no green thumb required.

Lucy stared at the sad basil plant on her windowsill like it was personally mocking her.

She had tried. Really tried.
Watered it. Forgot to water it. Overwatered it. Moved it to the “good window.”
It still died like clockwork.

Which would have been fine… except grocery prices kept climbing, and every week she felt the same thought creep in:

“I should be able to grow something.”

Not a big garden. Not a homestead fantasy.
Just a small, sane backup.

Something that quietly feeds her family.

But she didn’t have time for weeding, watering, bugs, and weather roulette.

So she did what tired people do.

She scrolled.

And that’s when she saw a photo that stopped her thumb:

A shelf.
Not filled with books.

Filled with food.

The indoor garden that works for people who kill plants

The caption said: “No green thumb required.”

And underneath it, someone wrote:

“This basically waters itself. I only touch it once a week.”

That was exactly what she needed.

Because if you’ve ever tried to grow anything while juggling real life, you already know the truth:

You don’t forget to feed your kids.
You do forget to water your plants.

Every time.

What Lucy was looking at wasn’t a cute hobby.

It was a system.

A tiny indoor mini farm designed to keep producing food even when you’re busy, tired, or inconsistent.

Why most indoor gardening fails (and why this doesn’t)

Most “indoor gardening” dies for three boring reasons:

  1. Water isn’t consistent
  2. Light isn’t consistent
  3. Nutrients aren’t consistent

That’s it.

So instead of asking you to become a plant whisperer, the Indoor Mini Farm method does something smarter:

It builds a setup where water and light and nutrients stop depending on your mood and memory.

That’s why it works even when you don’t have a green thumb.

Real Readers. Real Mini Farms.

These are everyday readers who started with one tote on a bookshelf and turned it into fresher food and extra cash.

Paid for itself in 3 weeks
“I was skeptical, but my first harvest more than covered the cost. Now my kids snack on greens instead of chips.”

I started with one tote next to our kitchen table. Once I saw how fast everything grew, I added two more and now I’m selling salad plants to three of my neighbors.

Sara C., Columbus, OH

Grocery bill down, side income up
“This gave me a simple plan I could follow after the kids went to bed.”

I don’t have space for a ‘real’ garden, but the mini farm system fits on a cheap bookshelf in our hallway. We eat off it every week, and I sell six totes a month to cover our internet bill.

Jen S., Houston, TX

“Finally something that actually works”
“I’ve tried so many ‘systems’ that overpromised and fizzled out. This one quietly does what it says.”

I work full time and needed something low-maintenance. I spend maybe 10 minutes twice a week checking water levels and harvesting. The rest just… grows.

Sam L., Raleigh, NC

Tiny space, real harvests
“We live in an apartment and I honestly didn’t think this would work.”

We’re on the third floor with no balcony. The totes fits next to our dining table and now my 7-year-old helps me harvest ‘our’ salad every night. It feels like cheating the grocery store.

Pam D., Boise, ID

The method in plain English

Here’s the concept:

  • A clean indoor grow zone that doesn’t turn your house into a dirt project
  • A consistent light setup so plants stop stretching and stalling
  • A simple routine that keeps water + nutrients on track without daily babysitting

No land required.
No outdoor weather required.
No daily babysitting required.

Inside the Indoor Mini Farm System, I show you the exact setup I use (including the linked supply list and the simple routine that keeps it idiot-proof).

Because the difference between “I tried indoor plants” and “I grow food indoors” is not motivation.

It’s having a repeatable system.

What you can grow first

If you want quick confidence, start with easy greens that forgive mistakes:

  • loose-leaf lettuce
  • baby greens
  • spinach
  • a few herbs

The System includes the exact “start here” plan so you don’t waste weeks on crops that are harder than they look.

“But I kill every plant I touch.”

Perfect. That was the exact problem I was dealing with too. I wanted to grow food to feed my family. Be able to avoid pesticides, maximize nutrients… but the reality was I’d neglect the raised beds and before I knew it, rabbits had stolen what little I’d managed to grow.

So I started testing hydroponic approaches because they’re lower maintenance and can be kept indoors where it’s easier to keep an eye on the plants. I didn’t expect such a learning curve, though! And after investing in one pre-built system that grows just a few tiny plants, I knew I couldn’t buy enough hydroponics systems to make it worthwhile.

Month by month, experiment by experiment I built the mini farm system, learning from other hydroponic approaches like Kratky and deep water culture (DWC) and more, I made tweaks and adjustments along the way to determine how to best keep my plants growing, healthy, and thriving. And ultimately, I developed the Indoor Mini Farm System.

This is built for people who:

  • forget things
  • get busy
  • do not want a second job called “plant care”
  • still want real food that doesn’t come from a truck

It’s quiet preparedness without the bunker energy. (And yes, I mean that literally.)

The side benefit nobody expects

Once you can grow food indoors reliably, something interesting happens:

You stop thinking like a consumer.
You start thinking like someone who can produce.

And if you ever decide to sell, the model is simple and local.

Not funnels. Not webinars. Not being a guru.
Just food, for people who live down the street.

(If you want the “sell it” path, my hydroponic side hustle write-up breaks down why subscriptions work so well.)

Here’s What You Get

Indoor Mini Farm System (PDF)

Every step you need to create your indoor mini farm in just a few hours. From which totes to buy to how high to hang your lights to which seeds to plant first.
(Value $97)

Linked Supply List (PDF)

Instead of opening twenty tabs and guessing, you get a simple list with direct links to exactly what you need. You can be done shopping in minutes.
(Value $22)

Perpetual Planner (PDF)

This is the piece that keeps black thumbs alive. A simple perpetual planner that tells you, week by week, what to do so you never miss a refill or harvest.
(Value $29)

Just $47 for everything


About the Author

Tyler Brown runs ProfitableHomesteader.com, a site dedicated to sharing side hustle ideas at home – including how he builds tiny indoor mini farms, growing heirloom greens in plastic totes and selling them to local families.

After years of testing containers, crops, and pricing, he built the Indoor Mini Farm System so regular people could skip the trial-and-error and start growing real food (and side income) on a single shelf.

If you’re ready to set up your own pump-free mini farm and start growing food indoors without wasting money on gadgets, you can get the step-by-step guide here:

Best DIY Hydroponic System for Beginners, Easy Indoor Food Garden

Revealed: The top secrets on setting up an easy DIY hydroponic system for beginners that you can create in just 5 square feet.

A DIY hydroponic system used to sound like something only science teachers and YouTube engineers could pull off.

Tangled tubing.
Loud pumps.
Timers.
Leaks.

The kind of project that slowly takes over your spare room and your sanity.

But if all you really want is this:

  • Fresh, real greens you grew yourself
  • A system that fits on a shelf
  • No pump noise, no plumbing
  • Something you can build on a weekend without blowing your budget

…you don’t need any of that.

You can build a DIY hydroponic system for beginners that lives on a shelf, feeds your family, and costs under $100 to get started.

That’s the kind of system I run in my own home.

In this article I’m going to show you:

  • The simple, pump-free indoor hydroponic system I use
  • What it actually costs to set up (with real numbers)
  • How it compares to the expensive “smart gardens” and complicated rigs
  • The basic framework I follow to turn that DIY build into a mini farm system

If you’ve been waiting for “the beginner-friendly version,” this is it.

Why most “beginner” hydroponic setups feel overwhelming

When I first started looking up DIY hydroponic systems, I kept running into two extremes:

  1. High-tech countertop kits
    • Gorgeous designs
    • Subscription pods
    • Apps and lights and notifications
    • Big price tag
    • Very little actual food output
  2. Complex DIY builds
    • PVC pipes
    • Pumps and reservoirs
    • Timers and air stones
    • Enough parts and tools to build a small spaceship

Neither one matched what I wanted:

  • Real food
  • Simple hardware
  • Quiet
  • Small space friendly
  • Affordable to start

So I went looking for a third path:
pump-free, beginner-friendly hydroponics that didn’t demand a degree or a loan.

That’s what I use now, and what I teach in my Indoor Mini Farm System.


The heart of my DIY hydroponic system: mini farms in storage totes

At the center of my setup is a very low-tech idea:

“If a plant has water and light, it doesn’t care how fancy the container is.”

Instead of tubes and pumps, I use shallow plastic storage totes as mini farm beds.

Each tote becomes a self-contained indoor hydroponic garden:

  • The lid has holes for net cups
  • The cups hold a simple growing medium
  • The tote holds water and nutrients
  • Roots grow down, leaves grow up
  • A basic grow light or shop light sits above it on a shelf

No pumps.
No timers.
Just gravity, light, and a smart layout.

It’s technically a form of passive hydroponics, but you don’t need to know the terminology to benefit from it. You just need to know how to put the parts together.


What you actually need to get started (for under $100)

Let’s break down what a beginner hydroponic system like this really costs.

Prices will vary depending on where you live and what you already have, but here’s a realistic ballpark.

1. Totes (your mini farm beds)

  • 2–4 opaque shallow storage totes
  • Think “shoebox” size, not giant bins

Approximate cost: $3–$8 each
Even with 4 totes, you’re usually under $30.

2. Net cups + growing medium

  • Net cups that fit the holes you’ll cut in the lids
  • Rockwool or similar inert growing medium for starting seeds

Approximate cost: $10–$20 total
You won’t use all of it at once, so some of this is “future you” inventory.

3. Nutrient solution

  • A basic hydroponic nutrient mix formulated for leafy greens

Approximate cost: $15–$25
One bottle goes a long way, especially in a small system.

4. Light
If you don’t have a very bright south-facing window, you’ll want a basic light. For beginners, this might be:

  • A full-spectrum LED shop light
  • Or a simple grow light bar

Approximate cost: $25–$40

5. A shelf
If you already have a wire shelf, you’re set. If not, a basic multi-tier shelf is often in the $30–$60 range, but that’s a one-time expense you can use for storage too.

If we stay conservative:

  • 3 totes
  • Net cups + medium
  • Nutrients
  • One budget-friendly light

You’re realistically in the neighborhood of $70–$90 for your first DIY hydroponic system.

After that, your main recurring cost is seeds—often under $4 for a packet of 200+ seeds.

You don’t have to buy it all at once, either. In my guide, I show you how to start with a tiny setup and expand as you get comfortable.


What you can grow in a beginner indoor hydroponic system

People get excited and try to grow everything at once: tomatoes, peppers, strawberries, cucumbers, the works.

For a beginner hydroponic garden, I recommend a different approach:

I like to start by growing herbs indoors, along with a few leafy greens:

  • Lettuce (cut-and-come-again varieties)
  • Bok choy
  • Chijimisai
  • Kale and chard
  • Red-veined sorrel
  • Basil, cilantro, parsley

These crops:

  • Germinate quickly
  • Grow happily in shallow nutrient solution
  • Don’t need pollinators
  • Bounce back after you harvest leaves

They’re also the exact foods people complain are expensive and short-lived when bought at the store.

Once your system is dialed in and you feel confident, you can experiment with other plants. But if you want to start an indoor food garden and actually eat it, growing herbs indoors alongside your leafy is where you start.


What living with this system is actually like

Here’s what a typical week looks like with a pump-free DIY hydroponic system on a shelf:

  • Check water levels
  • Top off nutrient solution as needed
  • Clip greens for salads, sandwiches, smoothies, or stir-fries
  • Start a new batch of seeds before you run out of the current one

No hauling soil.
No dragging hoses.
No meditating next to the sound of a water pump all night.

The whole thing quietly does its job in the corner of your kitchen, dining room, or hallway.

If you’ve ever felt like an indoor food garden was this huge, messy project that needed land and big tools, an indoor hydroponic system like this rewrites that story.


Why a DIY hydroponic system is better than a single expensive gadget

Let’s talk about those sleek countertop hydroponic kits for a second.

They’re beautiful.
They’re fun.
They’re also often:

  • Locked into proprietary pods or shapes
  • Too small to replace much grocery store volume
  • Priced like furniture, not like kitchen tools

As an indoor food garden goes, it’s not that they’re not bad. They’re just not designed to feed a household or support a side hustle.

A DIY hydroponic system for beginners using totes works differently:

  • You control the size
  • You control the crops
  • You can expand as you go
  • You’re not locked into a subscription model

And if you ever decide to grow more than your family needs, this same setup can become a mini farm system that feeds neighbors or supports a small side income for kitchen table income.

That’s exactly what I built my Indoor Mini Farm System guide around.


From “just growing” to “this could be extra income”

Not everyone wants to sell what they grow, and you don’t have to.

But once you see how much food you can grow on a shelf, it’s natural to start thinking:

  • “We can’t eat all this.”
  • “My friend keeps asking for some.”
  • “Could this cover a bill if I scaled it a little?”

The answer is yes.

The same DIY hydroponic system that feeds your family can be nudged into a hydroponic side hustle by: By selling fresh produce directly to local markets or customers, you can turn your hobby into a profitable venture. With the right marketing strategies, your hydroponic side hustle could thrive in a growing market for fresh, locally sourced food.

  • Planting mini farms intentionally as products
  • Offering them as “salad bars in a box” or “smoothie mini farms”
  • Putting a few families on simple monthly subscriptions

In my home, that’s what I do: I run mini farms in these totes and sell extras as ready-to-harvest mini farms and subscription greens.

That’s also why, when I wrote the Indoor Mini Farm System, I didn’t stop at “how to build the totes.” I included:

  • How many totes you need to hit specific goals
  • How to time your plantings so you don’t run out
  • Basic pricing and simple scripts for offering mini farms or subscriptions

You don’t have to turn your system into a business. But it feels good knowing you could.


Why I created the Indoor Mini Farm System (and who it’s for)

You can piece together a basic DIY hydroponic system from twenty different videos and blog posts.

It will probably eventually work—kind of.

Or you can follow a single, tested system that’s been designed specifically for:

  • Beginners who want to grow food indoors
  • People without yards or big budgets
  • Families who want to replace part of their grocery bill
  • Anyone curious about turning a small indoor hydroponic garden into a side hustle

That’s what the Indoor Mini Farm System is.

Inside, I give you:

  • Exact tote sizes and layouts I use for indoor mini farms
  • How to drill and space the holes for healthy roots
  • Seed lists and crop combinations that play nicely together in one tote
  • Light placement and timing recommendations
  • A simple schedule for planting, topping up, and harvesting
  • Optional sections on selling mini farms and subscriptions to neighbors

If you want to build an indoor hydroponic garden for under $100 and know it’s the right system from the start, this is the guide I made for you. In this guide, I will walk you through the essential components you’ll need to get started, ensuring you make informed choices that suit your budget. Additionally, I’ll highlight the best hydroponic plants for beginners, so you can quickly enjoy the rewards of your indoor garden. With the right setup and plant selection, you’ll be on your way to growing fresh produce in no time!

👉 Get the Indoor Mini Farm System and build your own beginner-friendly DIY hydroponic system this month. With the Indoor Mini Farm System, you can enjoy fresh produce right from the comfort of your home. As you explore the mini indoor farming benefits, you’ll discover how easy it is to grow herbs, vegetables, and fruits year-round. This innovative system is perfect for anyone looking to enhance their living space while promoting a sustainable lifestyle.


Your next step to start your DIY hydroponic system

If you’re tired of:

  • Buying sad greens in plastic boxes
  • Letting “someday I’ll grow food” float around in your head
  • Feeling like hydroponics is always “too expensive” or “too complicated”

…a simple, pump-free DIY hydroponic system on a shelf is the most realistic place to start.

One weekend.
A few totes.
A basic light.
Some seeds.

That’s it.

From there, you can decide:

  • Do you just want better salads?
  • Do you want your family’s greens mostly covered?
  • Do you want to explore a small mini farm side hustle?

Whatever you choose, you’ll know you have a system that can grow with you.

And that’s the real power of a DIY hydroponic system for beginners that doesn’t depend on gadgets, trends, or guesswork—just a clear plan and a shelf in your home.


About the Author

Tyler Brown runs ProfitableHomesteader.com, a site dedicated to sharing side hustle ideas at home – including how he builds tiny indoor mini farms, growing heirloom greens in plastic totes and selling them to local families.

After years of testing containers, crops, and pricing, he built the Indoor Mini Farm System so regular people could skip the trial-and-error and start growing real food (and side income) on a single shelf.

If you’re ready to set up your own pump-free mini farm and start growing food indoors without wasting money on gadgets, you can get the step-by-step guide here:

How to Grow Food Indoors (Without a Pricey Indoor Hydroponic Garden Kit)

Easy diy indoor hydroponic garden setup for small indoor vegetable garden.

Revealed: How an everyday family built an indoor hydroponic garden right in their kitchen.

When people hear I grow most of our greens indoors, they assume I’ve got one of those $600 smart gardens with an app and a subscription. In reality, I use simple shelves, grow lights, and affordable containers that allow me to grow food indoors easily without breaking the bank. It’s all about finding the right setup that works for your space and needs. With a little creativity, anyone can enjoy fresh produce year-round.

I don’t.

My “indoor hydroponic garden” lives on a simple wire shelf, in plastic shoeboxes I bought at the dollar store.

No pumps.
No timers.
No fancy pods.

Just water, nutrients, light, and a layout that lets the plants do what they’re wired to do: grow.

In this article, I’m going to show you:

  • How I grow food indoors using a simple DIY hydroponic system
  • Why I chose this setup over soil or expensive countertop kits
  • What I actually grow (and how much it replaces on our grocery bill)
  • The exact framework I use to turn a single shelf into a mini farm system

And if you want my step-by-step plans, I’ll show you where to get them at the end.


Why I Stopped Relying on the Grocery Store for Greens

A few years ago, I was standing in the lettuce aisle doing the same mental math you probably do:

  • $4–$5 for a plastic box of greens
  • That lasts… what… 2–3 decent salads if you’re lucky?
  • Half the time it goes slimy by the next day

Meanwhile, prices kept creeping up, and quality kept sliding down.

I didn’t want to build a huge outdoor garden. I just wanted:

  • Real food
  • In a small space
  • That didn’t depend on the grocery store staying reasonable

So I started looking into ways to grow food indoors.

Most advice fell into two camps:

  1. Complicated hydroponic systems with pumps, plumbing, and timers
  2. Cute countertop gadgets that looked nice but didn’t grow enough to provide food for a family

There had to be a middle ground.

That’s where I found the pump-free, no-noise style of hydroponics my family uses now.


The Indoor Hydroponic Garden That Lives on a Shelf

My whole system is built around one idea:

“If it can fit on a shelf, it can feed a family.”

Instead of individual pots or proprietary pods, I use shallow storage totes as mini hydroponic farms. Each tote is a self-contained indoor hydroponic garden that can grow a full “salad bar” of greens. These shallow storage totes allow for efficient space utilization and make it easy to manage multiple varieties of plants simultaneously. Additionally, they serve as accessible and affordable mini indoor farming solutions for anyone looking to grow their own fresh produce at home. With the right lighting and nutrient solutions, these mini hydroponic farms can thrive year-round, providing a sustainable source of greens.

At a high level, here’s what each mini farm looks like:

  • A shallow, opaque plastic tote (shoebox size)
  • Holes in the lid for net cups
  • A simple nutrient solution inside
  • Leafy greens and herbs planted in the cups
  • A basic shop light or grow light above the shelf

The roots grow down into the water, the leaves grow up toward the light, and the tote itself acts as the “bed.”

It’s a DIY hydroponic system, but it’s not the kind that takes over your life. Once it’s planted and topped up, it mostly requires no maintenance. You can easily set it up in a small space, making it perfect for urban dwellers. Many enthusiasts consider it one of the best hydroponic systems for beginners, as it allows for fresh produce with minimal fuss. Plus, the satisfaction of growing your own herbs and vegetables adds a rewarding touch to your home.


Why This Pump-Free Setup Works So Well Indoors

There are a lot of ways to do hydroponics. I chose the low-tech, no-pump style for a few reasons:

1. No moving parts to fail
No pumps means no humming noise, no timers to reset, no clogged filters and nothing to break at 2 a.m. It’s silent and simple.

2. Perfect for small spaces
Everything lives on a wire shelf against a wall. You could put it in a dining room, hallway, spare bedroom, or even a wide hallway—anywhere you can hang a light.

3. Shockingly low maintenance
Once the totes are planted, I’m mostly just:

  • Checking water levels
  • Topping off nutrients
  • Harvesting greens

It’s closer to “harvest management” than gardening-as-a-full-time-job.

4. Real grocery savings
Each mini farm can replace multiple clamshells of store greens. When they’re in full production, it feels like stealing from the grocery budget—in the best way.


What I Grow in My Indoor Hydroponic Garden

You can get wild with varieties, but if you’re new to growing food indoors, start with leafy greens that love hydroponics:

  • Chijimisai
  • Red-veined sorrel
  • Bok choy
  • Kale and chard
  • Cut-and-come-again lettuces
  • Tender herbs (basil, cilantro, etc.)

These plants:

  • Grow fast
  • Don’t need pollinators
  • Thrive in an indoor hydroponic system
  • Give you repeated harvests from a single planting

On a single 4-tier shelf, you can have:

  • Baby greens on one level
  • Full salad mixes on another
  • Stir-fry or smoothie greens on the next

Once everything fills in, it looks less like “a science project” and more like a tiny vertical vegetable garden in your hallway.


How Much Food Can You Actually Grow in an Indoor Hydroponic Garden?

Let’s talk about real numbers.

A single mini farm can produce:

  • Enough greens for several hearty salads each week
  • Or a steady supply of smoothie greens
  • For about two months before it needs re-seeding

Set up 4–6 mini farms, and you’re looking at:

  • Replacing multiple clamshells of “spring mix” each week
  • A constant rotation of fresh leaves
  • The option to let some totes go longer for full-size bok choy or chijimisai

It’s not magic. It’s math:

  • One packet of high-quality heirloom seeds: under $4
  • Roughly 100+ plants from that packet in a hydroponic system
  • Totes, net cups, rockwool, and nutrients: just a few dollars per mini farm

For pennies on the dollar, you’re growing an endless supply of greens and produce, right in your kitchen. The grocery savings add up fast. Not only are you enjoying fresh ingredients at your fingertips, but you’re also contributing to a more sustainable lifestyle. With just a few basic supplies and some sunlight, you can create a thriving garden without stepping outside. So why wait? Start your mini farm today and transform your cooking experience!


Why I Prefer Hydroponics to Indoor Soil Pots

Could you grow food indoors in pots of soil with a grow light? Sure.

I tried that.

Here’s why I still reach for my indoor hydroponic system instead:

  • No bags of soil to drag inside
  • No fungus gnats hiding in the potting mix
  • No over- or under-watering drama
  • Much faster growth and cleaner harvests

With hydroponics, everything is contained:

  • Water stays in the tote
  • Roots stay submerged
  • Nutrients are predictable
  • Cleanup is as simple as rinsing a container in the tub or outside

For a busy family, that matters.


The Part Most People Get Wrong About Growing Food Indoors

Most people either:

  1. Go all-in on an expensive, high-tech system, or
  2. Piecemeal a DIY hydroponic setup from six different tutorials and end up frustrated

What’s missing is a tested, beginner-friendly plan that:

  • Uses affordable, easy-to-find parts
  • Is sized for real families, not labs
  • Works in apartments and small homes
  • Can scale from “just our greens” to “small side hustle” if you want it to

That’s exactly why I put together my Indoor Mini Farm System.

It’s the complete blueprint I wish I had when I started:

  • Exact tote sizes, light heights, and spacing
  • Crop combos that play nicely together in the same mini farm
  • Optional side-hustle paths if you ever want to sell mini farms or subscriptions to neighbors

You can absolutely experiment your way into a working system.
I did.

But if you’d rather skip the false starts and get straight to the part where you’re clipping fresh greens off a shelf, the guide will save you a lot of trial and error.

👉 Indoor Mini Farm System – click here to get the step-by-step guide


Where to Go Next

If all you want right now is to grow food indoors and stop depending on the lettuce aisle, start with one shelf and a couple of mini farms.

Once you see how much you can grow in a few plastic shoebox totes, you’ll have options:

  • Add more mini farms to cut your grocery bill further
  • Turn one shelf into a small hydroponic side hustle
  • Or keep it simple and just enjoy delicious greens all winter

However you use it, this kind of indoor hydroponic garden gives you something the store never will:

Control.

You know where your food came from.
You know what went into it.
And you can harvest it minutes before dinner.

That’s the power of a tiny, pump-free mini farm system living quietly on a shelf in your home.


About the Author

Tyler Brown runs ProfitableHomesteader.com, a site dedicated to sharing side hustle ideas at home – including how he builds tiny indoor mini farms, growing heirloom greens in plastic totes and selling them to local families.

After years of testing containers, crops, and pricing, he built the Indoor Mini Farm System so regular people could skip the trial-and-error and start growing real food (and side income) on a single shelf.

If you’re ready to set up your own pump-free mini farm and start growing food indoors without wasting money on gadgets, you can get the step-by-step guide here: