Choose Your First Indoor Crops
Not sure what to grow first? Get the free guide to the best hydroponic superfoods for an indoor garden.
Grocery store basil is a lie. You bring it home, it wilts in three days, and you’ve spent $3–$4 on something that barely made it to Thursday. Meanwhile, a thriving hydroponic basil plant on your counter produces fresh leaves every single day for months — and smells incredible doing it.
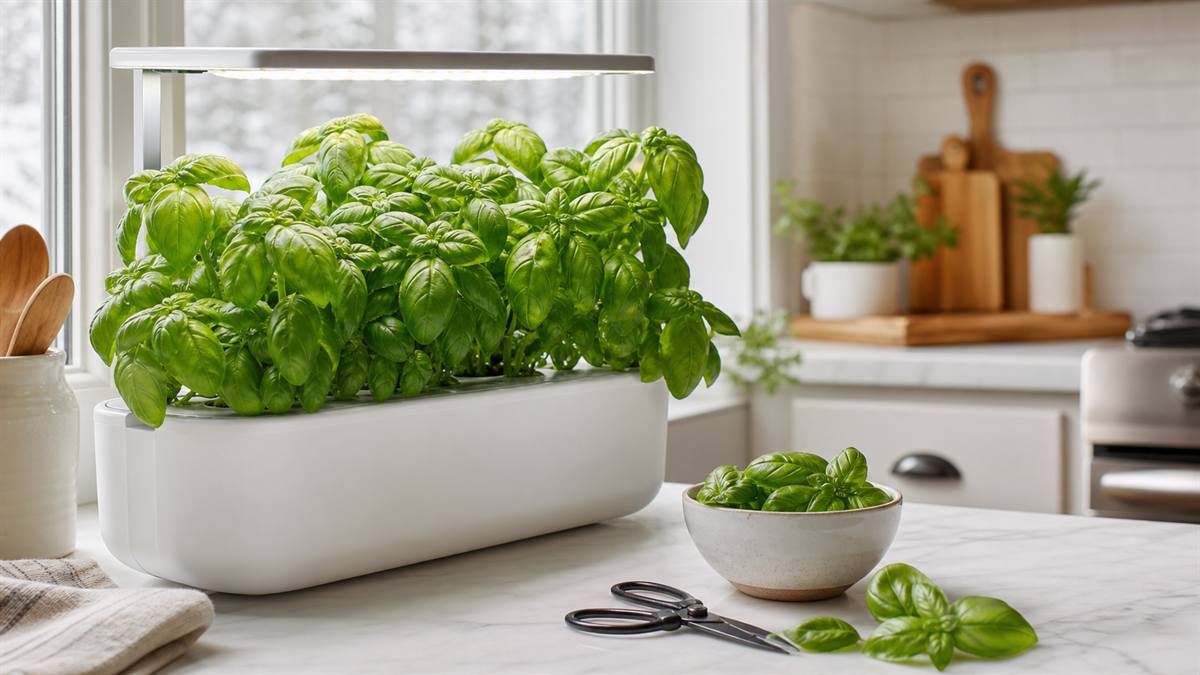
Growing basil indoors hydroponically year-round is genuinely one of the most satisfying things you can do with a grow light and a storage tote. It’s not difficult, but it does have a few specific requirements that differ from lettuce and other leafy greens. Get those right and you’ll have more basil than you know what to do with — which, as it turns out, is also an excellent problem to have if you’re selling plants to neighbors.
Why Hydroponic Basil Is Better Than Soil-Grown Basil
Basil grown hydroponically is lusher, more fragrant, and more productive than the same variety grown in a pot on a windowsill. Here’s why:
- Consistent moisture: Basil in soil is notoriously sensitive to both overwatering and underwatering. In a hydroponic system, moisture delivery is passive and consistent — roots take what they need, when they need it.
- No soil pathogens: Basil is prone to fungal root rot in poorly-draining soil. In a clean hydroponic reservoir with proper pH, root rot is rare.
- Faster growth: Like all hydroponic crops, basil puts more energy into leaf production when it doesn’t have to search for nutrients. You’ll see bigger, denser plants in less time.
- Year-round production: Outdoor basil dies at the first frost. Indoor hydroponic basil doesn’t know what season it is — it just grows.
What Basil Needs (That’s Different From Lettuce)
If you’ve already grown lettuce in a Kratky tote, you know the basics. Basil uses the same fundamental setup — net cups, nutrient solution, pH management — but has a few different requirements worth knowing before you start:
More light
Lettuce does fine with 12–14 hours of light per day. Basil wants 14–16 hours and benefits from being closer to the light source. If your basil is leggy (long stems, small leaves), it needs more light. Keep your grow light 4–6 inches above the canopy and run it for the full 16 hours.
Warmer temperatures
Basil is a warm-season crop and hates cold. Keep your growing space above 65°F at all times — below that and growth slows dramatically, leaves turn yellow, and the plant becomes susceptible to disease. 70–80°F is ideal. Don’t put a basil tote in a cool basement or near a drafty window in winter.
Slightly different pH
Basil prefers a pH of 5.5–6.5, same as most leafy greens, but it tends to be a bit more sensitive to swings at the high end. Keep your solution below 6.5 and check it every 5–7 days. If pH drifts above 7.0, you’ll see yellowing and stunted growth even with plenty of nutrients in the water.
Higher nutrient concentration
Basil is a heavier feeder than lettuce. Mix your nutrient solution at the medium-to-high end of the manufacturer’s recommended range — roughly 800–1200 ppm for established plants. Start lighter for seedlings (400–600 ppm) and increase as they mature.
Step-by-Step: Setting Up Your Basil Tote
Step 1: Choose your variety
For most growers, Genovese basil is the best starting point — it’s the classic large-leaf Italian variety, grows vigorously, and is what most customers expect when they think “basil.” Once you’re comfortable, branch out:
- Thai basil — Anise-scented, purple-stemmed, popular with customers who cook Southeast Asian food
- Lemon basil — Bright citrus flavor, great for fish dishes and cocktails
- Cinnamon basil — Spicy-sweet, distinctive, interesting for customers who want something unusual
- Tulsi (Holy basil) — Clove-like flavor, hugely popular for tea, commands premium prices
Step 2: Start your seeds
Basil seeds germinate best in warmth — 70–80°F. Place 2–3 seeds in a rockwool cube or directly in a net cup filled with moist growing medium. Cover loosely and keep in a warm spot. Germination takes 5–10 days. Once seedlings are 1–2 inches tall with their first true leaves, they’re ready to go into the tote.
Alternatively, start from grocery store cuttings: snip a 4-inch stem just below a leaf node, strip the lower leaves, and place the bare stem in your net cup with the bottom inch in nutrient solution. Cuttings root in 7–10 days and give you a head start of 2–3 weeks over seeds.
Step 3: Set up the tote
Fill your tote with nutrient solution mixed to 600–800 ppm. Check and adjust pH to 5.5–6.5. Set water level so the bottom of each net cup just barely touches the solution — roots will find their way down within days.
For a standard 18-gallon tote, plant 4–6 basil plants rather than the 6–8 you’d fit for lettuce. Mature basil gets bushy and benefits from a little more airflow between plants.
Step 4: Light and temperature
Set your grow light timer for 16 hours on, 8 hours off. Position the light 4–6 inches above seedling height and raise it as plants grow. Monitor your grow space temperature — if it drops below 65°F at night when the light is off, consider a small seedling heat mat under the tote or a space heater on a timer.
Step 5: First harvest
Your first harvest opportunity comes at 3–4 weeks, when plants are 6–8 inches tall with multiple sets of leaves. At this point, pinch or snip the top two sets of leaves. This does two things: gives you your first harvest and — critically — triggers the plant to branch rather than grow tall. Two stems replace the one you cut, then four, then eight. This branching is what makes a hydroponic basil plant genuinely productive over months rather than weeks.
The Most Important Rule: Never Let It Flower
This is where most basil growers — hydroponic and soil alike — lose their plants prematurely. When basil flowers, it shifts all its energy from leaf production to seed production. The leaves get small and bitter, production drops, and the plant effectively begins to die.
Watch for flower buds — small, pointed clusters that emerge at the growing tips — and pinch them off the moment you see them. Check your plants every 3–4 days once they’re mature. If you stay on top of this, a single hydroponic basil plant can produce abundantly for 4–6 months before it finally exhausts itself.
Harvesting for Maximum Production
Always harvest from the top of each branch, just above a leaf node. Cutting here signals the plant to send out two new branches from that node, which means every harvest makes the plant more productive than it was before. Within 6–8 weeks of regular harvesting, a single Genovese basil plant in a Kratky tote can be impressively bushy — 12–18 inches wide, with dozens of active growing tips.
Never harvest more than one-third of the plant at once. The remaining leaves are what power the next round of growth.
Troubleshooting Common Basil Problems
Yellowing lower leaves
Usually a pH problem (too high) or a sign that lower leaves are being shaded out by the canopy. Prune lower leaves that don’t get light and check your pH. If pH is fine, check your nutrient concentration — add a half-strength nutrient top-up if the reservoir is running low.
Black or brown stems at the base
This is fusarium wilt or root rot — typically caused by contaminated water or growing medium, or temperatures that are too cool. Prevention is easier than treatment: use clean equipment, maintain temperatures above 65°F, and keep pH in range. If you see this, remove and discard affected plants and sanitize the tote before replanting.
Leggy plants with small leaves
Not enough light. Move the grow light closer (4 inches above the canopy) and increase to 16 hours per day. Leggy basil can recover quickly once light levels are corrected.
Slow growth despite good conditions
Check your water temperature. If your nutrient solution is too cold (below 65°F), root activity slows significantly even if air temperature seems okay. Warm growing medium leads to faster nutrient uptake — a seedling heat mat under the tote can help in cool spaces.
Selling Hydroponic Basil to Neighbors
A mature, thriving hydroponic basil plant is one of the easiest neighbor sales you can make. Most people have had the experience of buying grocery store basil, watching it wilt in three days, and wishing they had something better.
You can sell basil in a few different ways:
- Individual plants in small containers: $10–$18 each. Start from cutting, grow for 3–4 weeks, sell when bushy and fragrant.
- A full tote of 4–6 basil plants at harvest stage: $40–$60. The customer gets weeks of daily fresh basil from one purchase.
- Monthly subscription: $35–$45/month for a fresh basil replacement when their current plant is done. Customers who cook regularly will subscribe indefinitely.
Basil is also a natural add-on to a lettuce tote subscription — “would you like to add a basil plant to your monthly order?” is an easy upsell that customers appreciate.
The Indoor Mini Farm System ($47) covers the complete growing and selling setup — including basil, lettuce, and the other top-performing tote crops — with a clear path from first grow to first sale to ongoing neighbor subscription income.